Sending and Receiving Images
As soon as one or more slicebox connections have been set up (cf. Managing Slicebox Connections), it is possible to send select image data and for collaborators to send data to you. When sending data, the relevant patients, studies or series are selected from the Home view and marked for sending using the Send list menu option. Past and present transactions (both sent and received images) can be monitored and browsed in the Transactions view. This section will describe in detail the steps necessary to send data and how to monitor transactions.
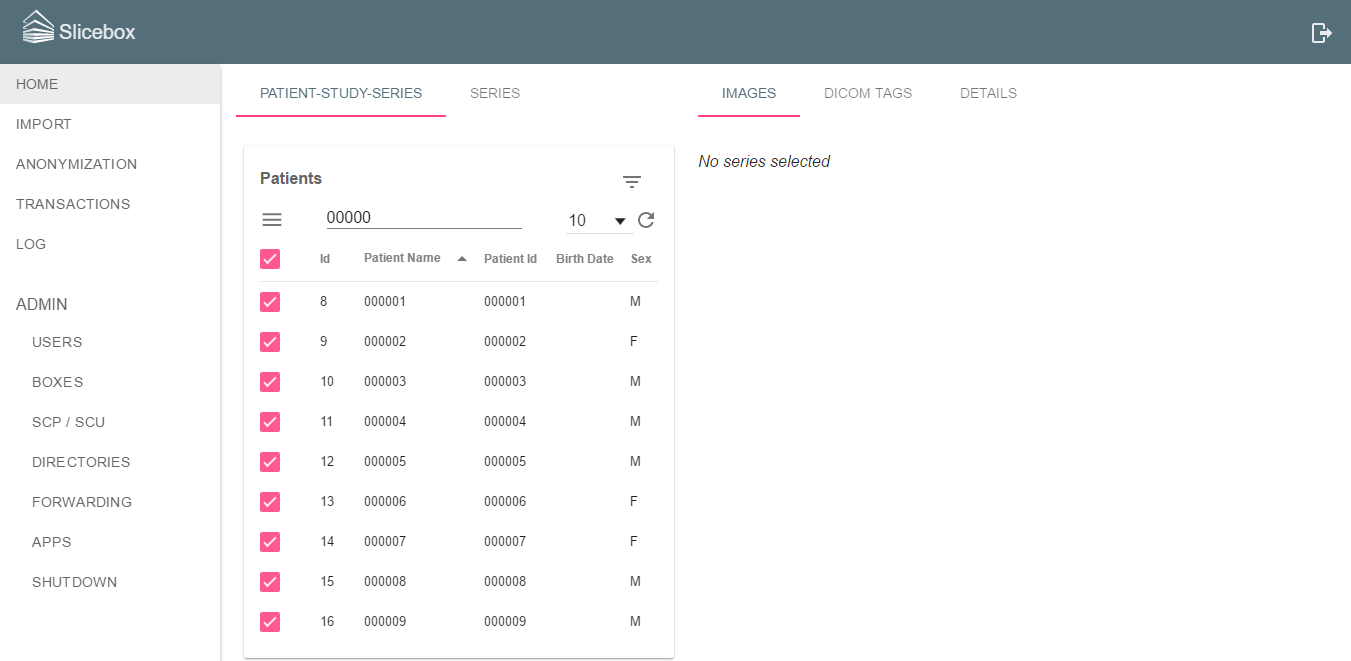
Sending image data is carried out from the Home view. First, find and select the appropriate patients, studies, series or flat series to send using any combination of filtering, sorting and working with the page size (cf. Browsing and Filtering Data). In the image below, the user has sorted the list of patients on patient name and is using the filter 00000 to single out patients with single digit (anonymous) patient IDs. All such patients have then been selected.
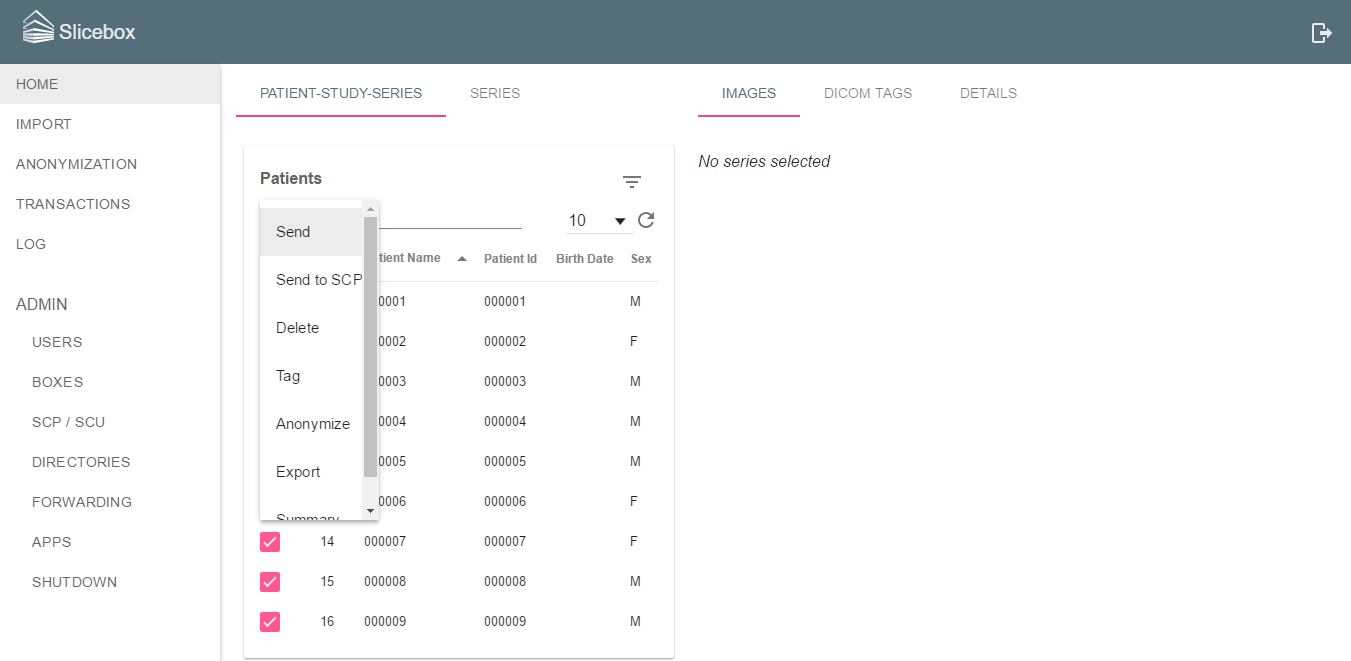
Using the list menu option Send, the user tells slicebox that the selected data should be sent to a collaborator.
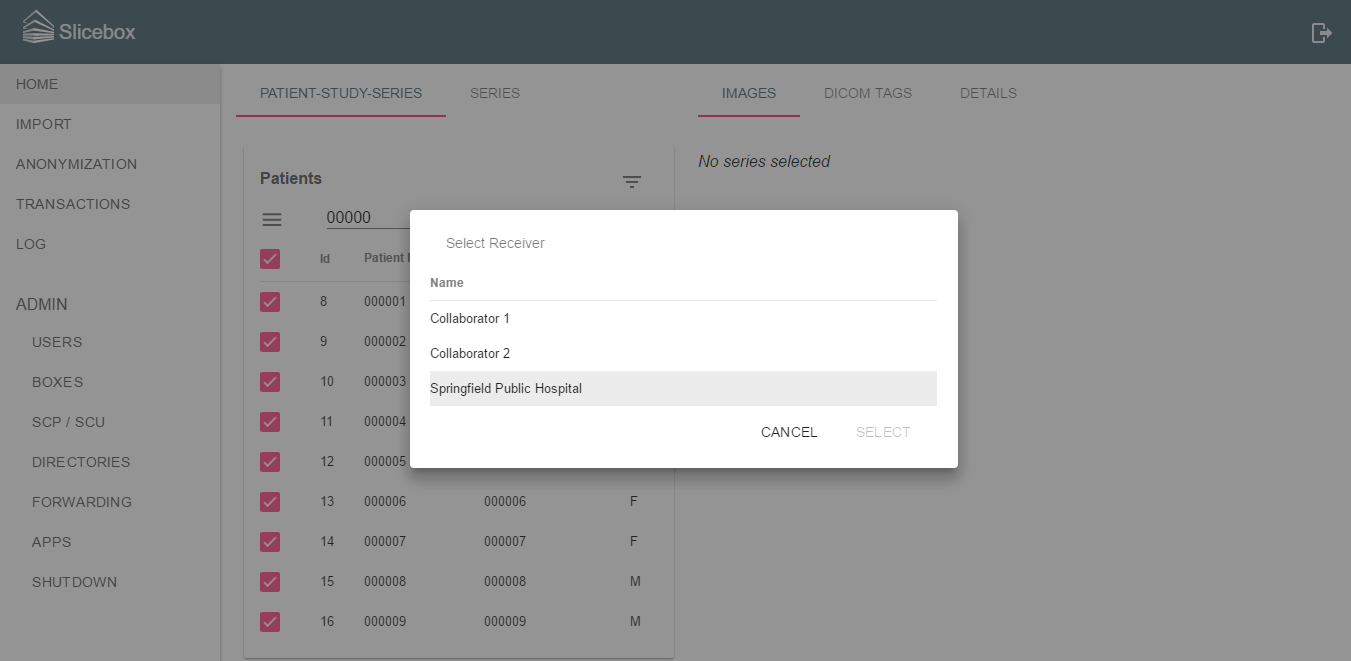
A dialog appears with a list of all possible recipients. These are the slicebox connections defined in the Boxes view (see Managing Slicebox Connections).
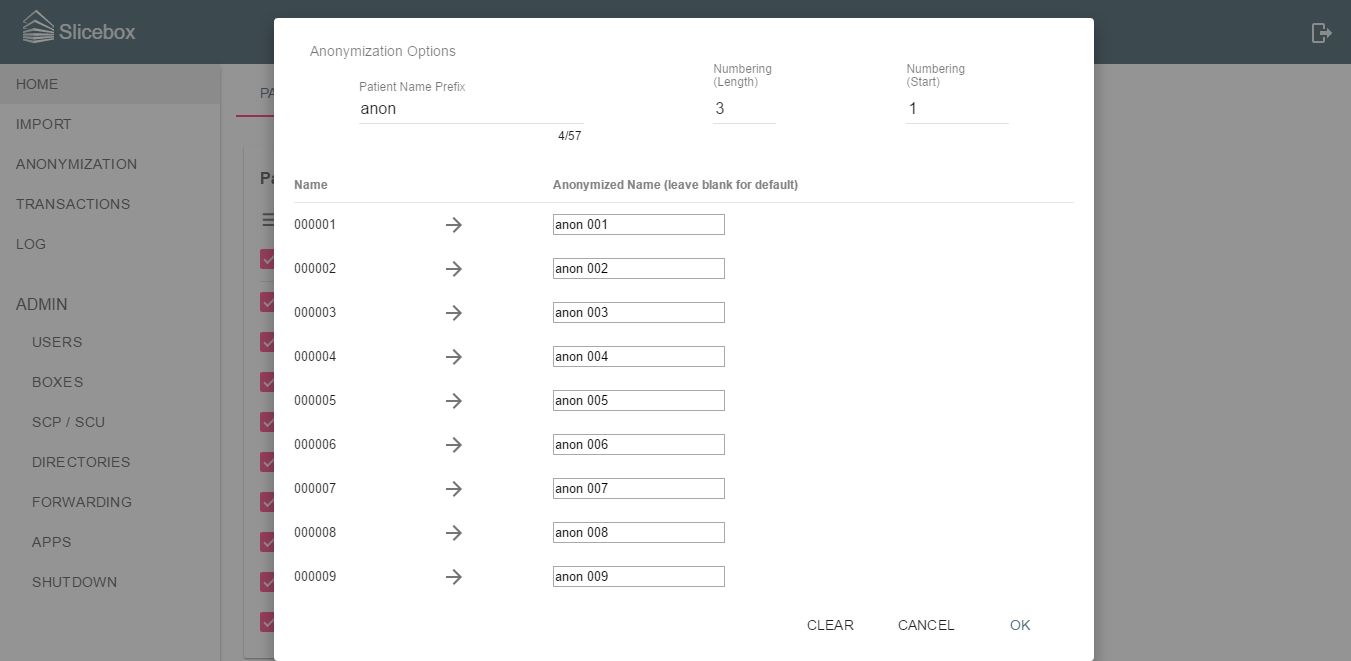
After having selected a receiver, a second dialog appears. Images sent to any collaborator is always anonymized, unless already anonymous (as defined by the patient identity removed (yes/no) DICOM attribute). In this stage, slicebox allows the user to customize how the DICOM attribute patient name shall be anonymized (note that using the programmatic slicebox API, any attribute can be modified when sending data). The following image shows the slicebox standard mapping of patient names, which is the text anon followed by a three digit sequence number starting at 001.
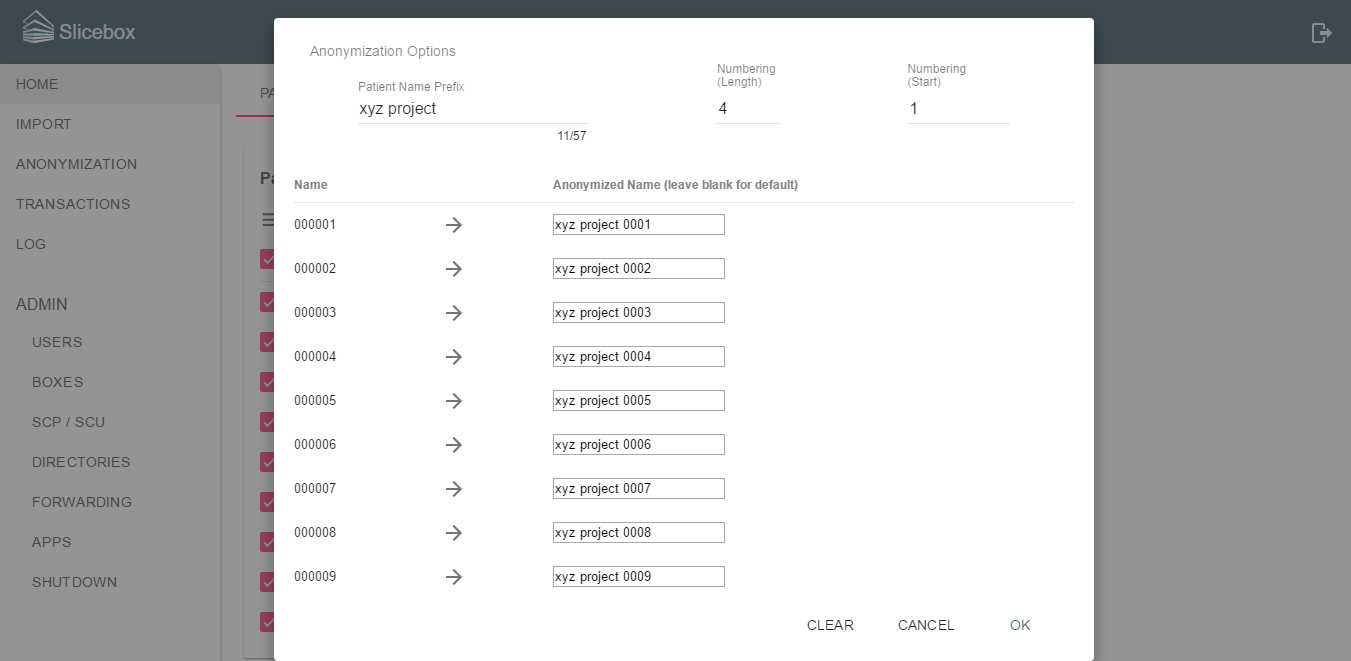
This pattern is easily modified using the input fields at the top of the dialog. In the following image, the prefix is changed to xyz project (assuming that Springfield Public Hospital and Springfield Technical University is collaborating on a project named xyz). The numbering is changed to four digits.
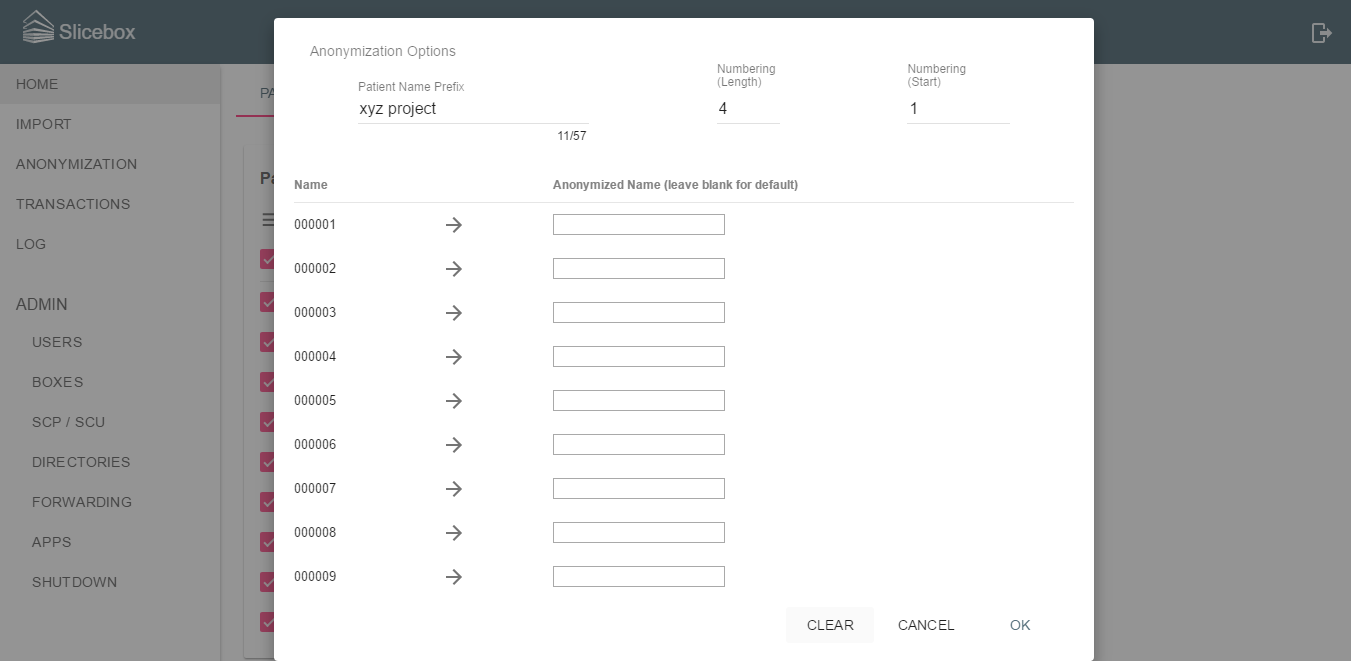
Another option is the default mapping which can applied to all patients using the Clear button at the bottom of the dialog - a blank anonymous patient name yields the default mapping.
The default mapping is different for anonymous data and for data containing patient health information. For already anonymized data, the patient name attribute is left intact and is propagated to the receiver. For data with patient health information the default mapping is Anonymous <Sex> <Age> where <Sex> and <Age> is the patient's gender and age respectively taken from the DICOM attributes Patient Sex and Patient Age. For a 45 year old male patient, the anonymous patient name using the default mapping is Anonymous M 045Y.
Once anonymized patient names have been chosen, click Ok to mark the selected data for sending. The Home view will be visible again.
When image data have been marked for sending, they are queued and sending commences as soon as the recipient is online. If the recipient becomes unavailable during transmission the transaction is paused until the receiver is back online. Sending large quantities of data is time consuming. In the Transactions view, the progress can be monitored. In the following image, the result of sending the 9 patients (corresponding to 18 images) selected above is depicted.
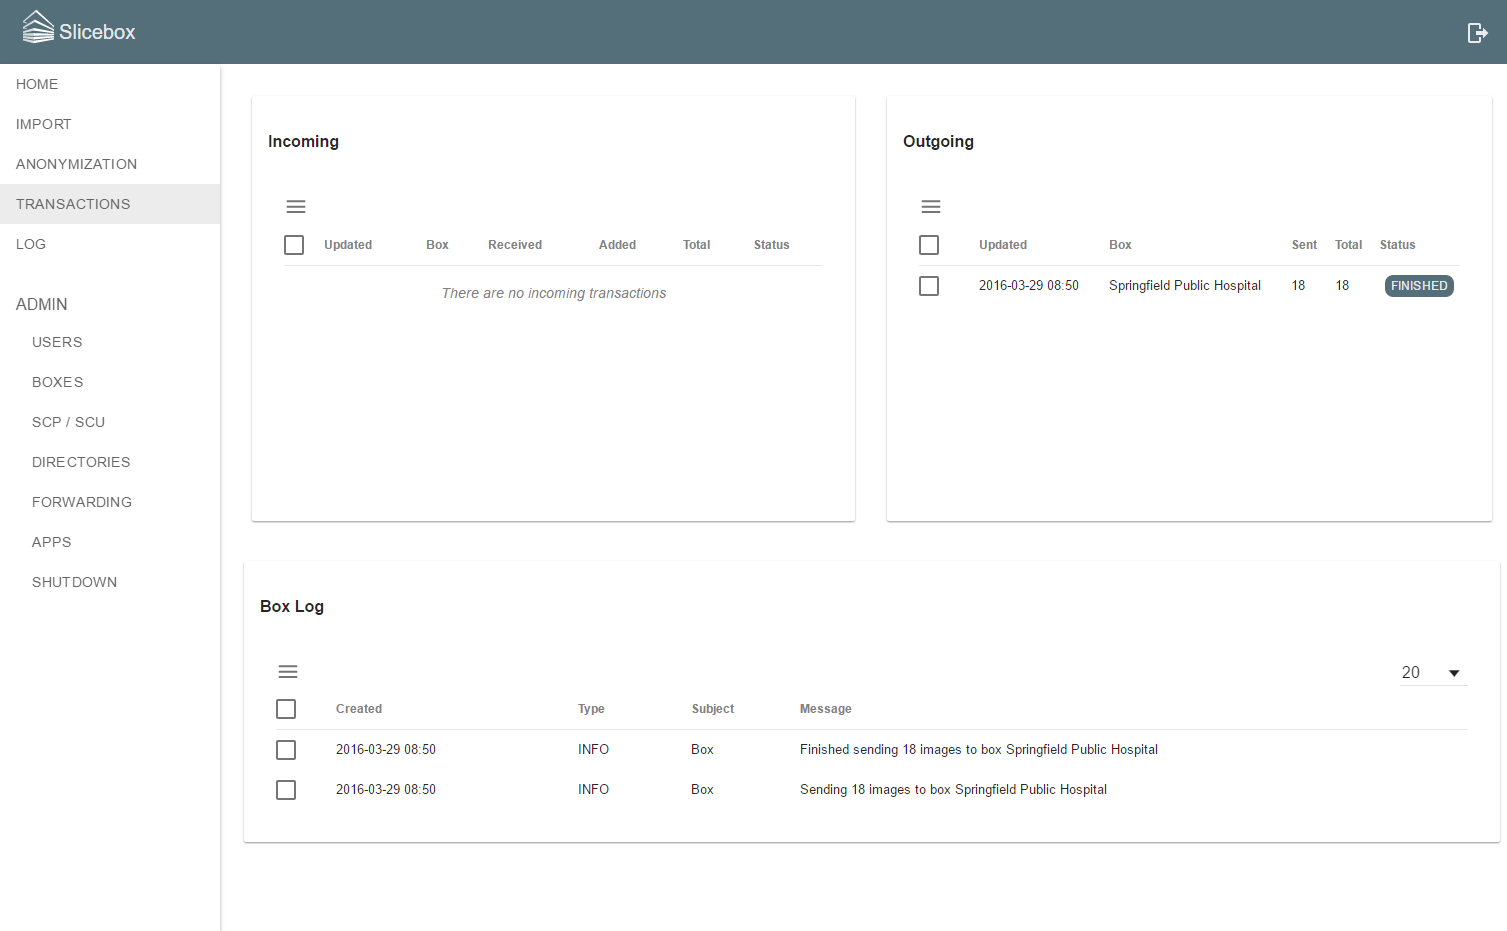
The single entry in the outgoing table shows that the transaction has finished and that 18 images were transferred. There are four possible states for a transaction, waiting, processing, finished and failed. The current state of a transaction is visible in the Status column of the outgoing and incoming lists of transactions. A waiting transaction is waiting for the recipient to go online. A processing transaction is currently sending data. A finished transaction has successfully transferred all queued images. A failed transaction was unsuccessful and should be retried.
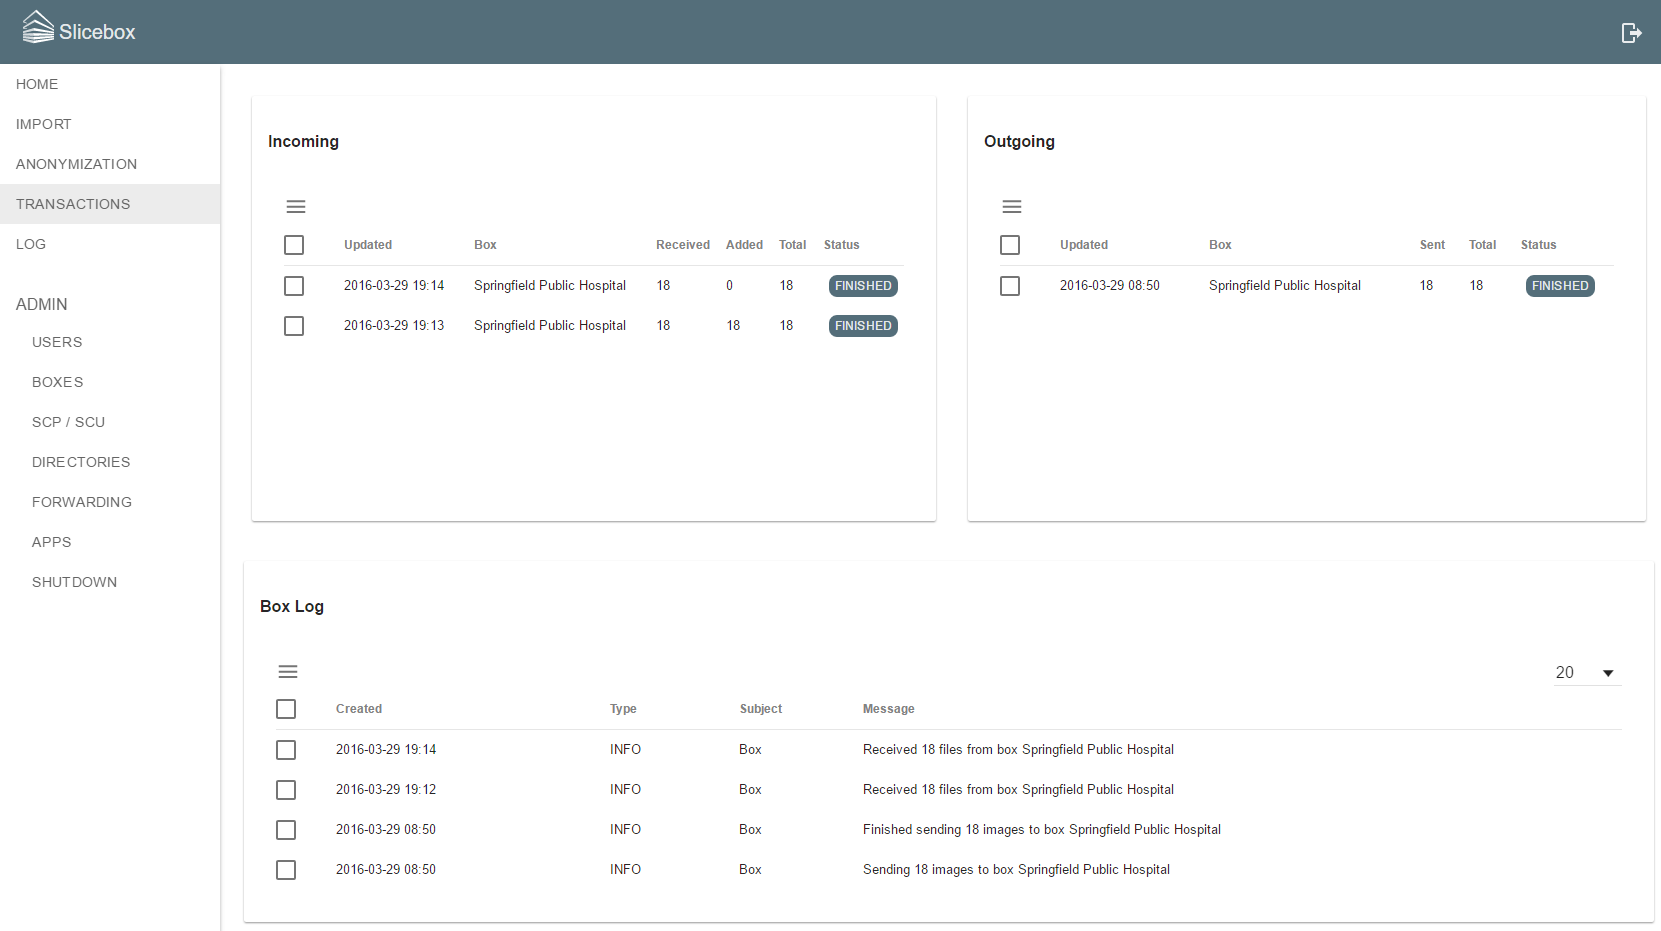
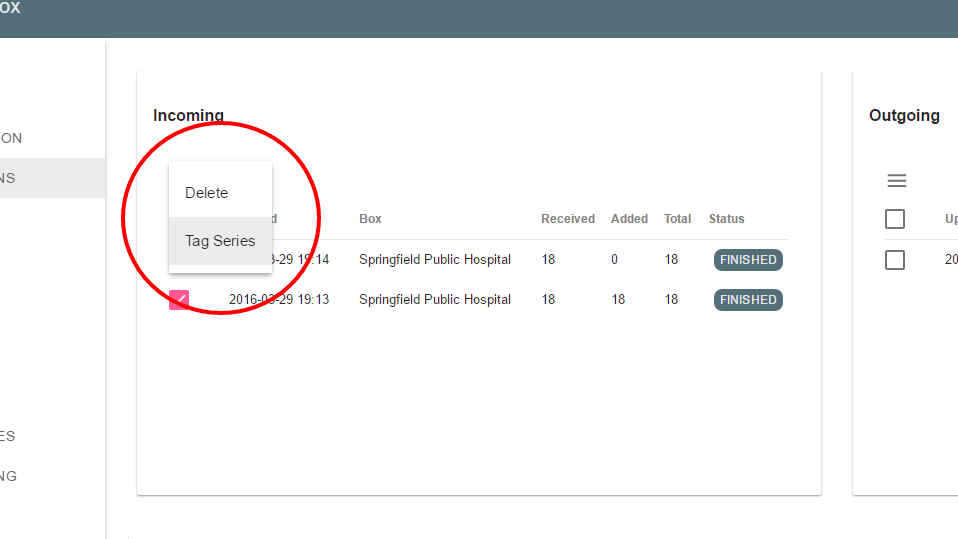
The Incoming list of transactions shows transactions in which images have been received. In the image below, the same 18 images have been received twice from the collaborator Springfield Public Hospital. The Added column shows how the number of images that were actually added to slicebox. Since the two transactions contantained the exact same images (with the same anonymous patient names), zero images where added in the second transaction. This information is helpful when collaborators by mistake or otherwise sends the same batch of images more than once.
The list of Incoming and Outgoing transactions have the same two list menu commands that can be applied to one or more transactions. Delete is used to remove transaction information. The corresponding images are not deleted. Tag Series can be used to add to and remove tags from the series corresponding to the images received or sent. This is a powerful way of connecting image data in transactions to the Home view. For instance, to delete all images of a specific transaction, add a unique tag to the series of the transactions using the Tag Series menu option. Then switch to the Home view. Filter the list for the created tag and remove all resulting images.
A more detailed description of series tags is given in Getting Organized.