Managing Slicebox Connections
One of the central use cases for slicebox is the ability to send and receive images from collaborators. The system handles anonymization automatically by anonymizing all outgoing images containing patient health information (see Managing Anonymization Records for more information on how to search and manage anonymization information). All parties who wish to collaborate must run a slicebox instance. These instances can be connected by one or more box connections. This is managed from the Boxes (admin) view shown in the image below.
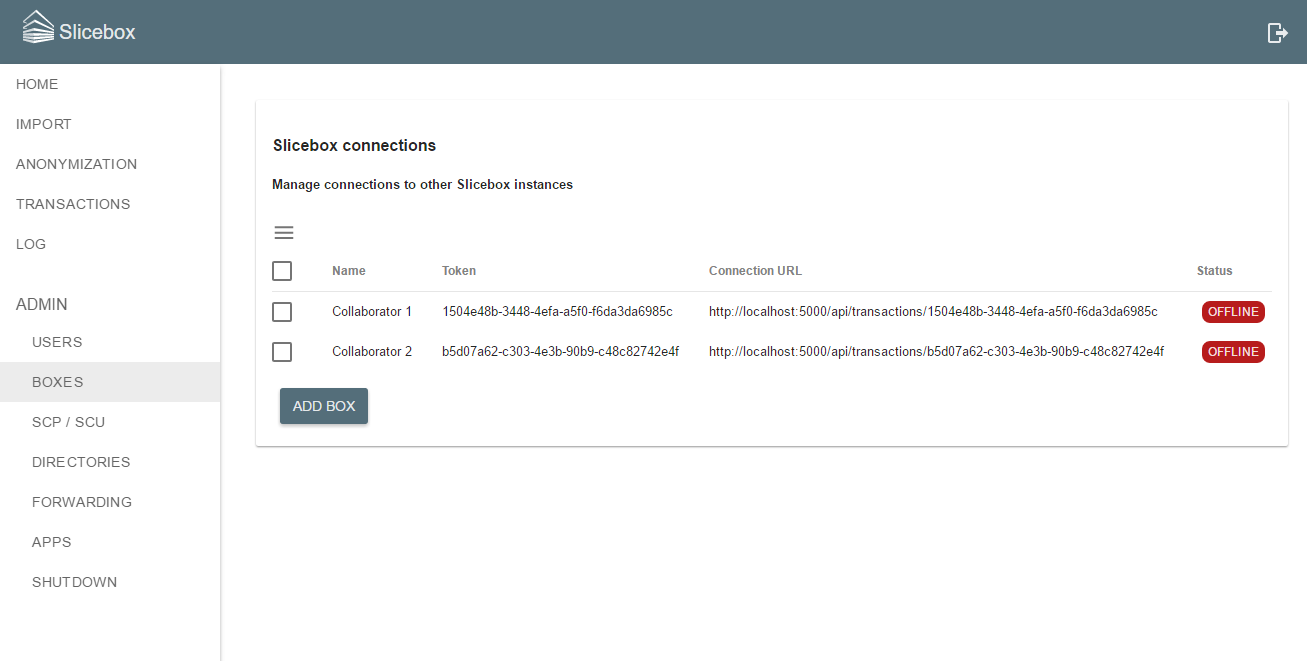
Connections in the list can be deleted and new connections can be added by clicking the Add Box button. In every slicebox connection between two collaborators, at least one instance must be reachable from the other. A reachable instance has an IP address and port number that is available to the collaborator. The two instances must therefore reside within the same network (an intranet or the Internet). In a typical hospital-university collaboration the hospital slicebox instance in unreachable from the internet due to strict firewall policies. Communication is still feasible if the university instance can be setup to be reachable from the hospital. It can either be installed on a publicly available server within the university network or on a dedicated cloud server. See Installing a Public Slicebox on how to setup a public instance. In the following, we distinguish between the private (hospital) and public (university) instance. Clicking the Add Box button will bring up the following dialog.
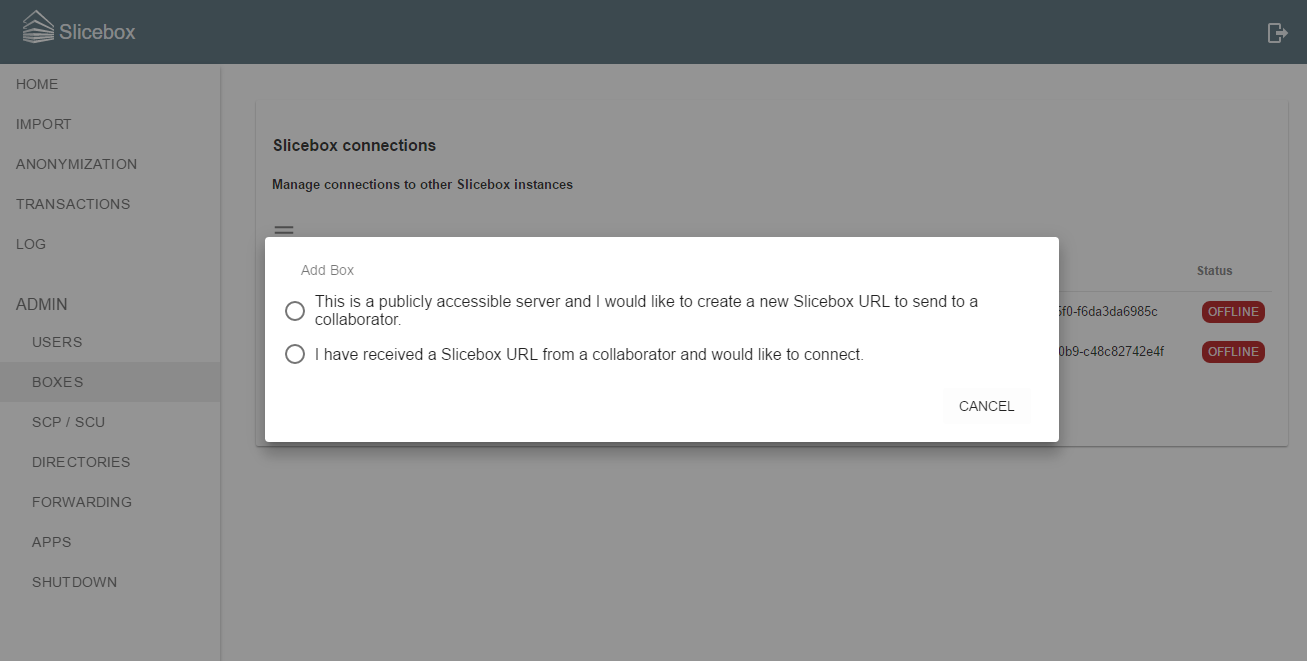
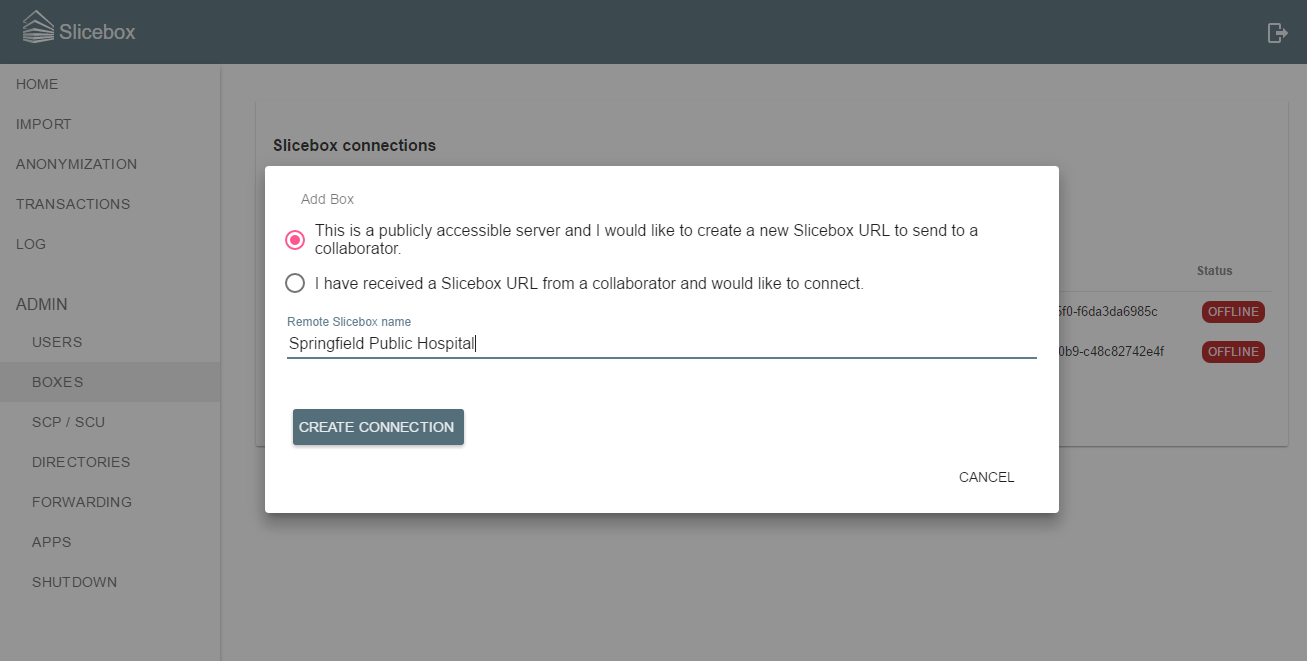
A connection must be initiated by the public instance by selecting the top option (This is a publicly accessible server...) and typing a suitable name for the connection.
Creating the connection presents a new dialog with information on the created connection. This includes the box URL which is the slicebox address and connection id to be used by the private instance.
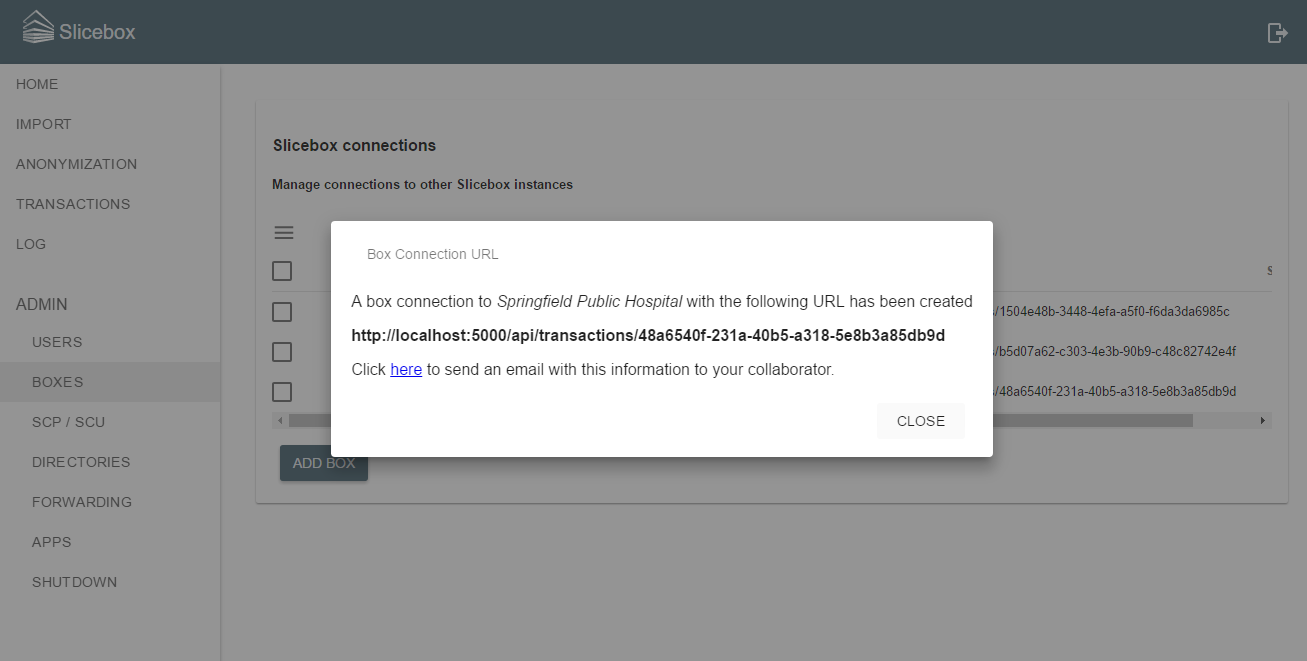
This URL must be given to the collaborator and should be treated with care since anyone with the URL can send and receive images over this connection. Note however that it is not possible to log in nor in other ways access information on the public instance using this URL. One simple way of sharing the URL with the collaborator is by email. For convenience, the dialog contains a mailto link which will bring up a pre-configured email containing the URL. Just specify the email address of the recipient and you are good to go. Dismissing this modal will bring back the list of connections with the new connection added.
Once the collaborator with the private slicebox instance has received the email with the connection URL, the connection can be completed. The process is similar to that on the public side. Click Add Box to setup the connection and select the I have received a slicebox URL... option. Fill in a suitable name and the received URL.
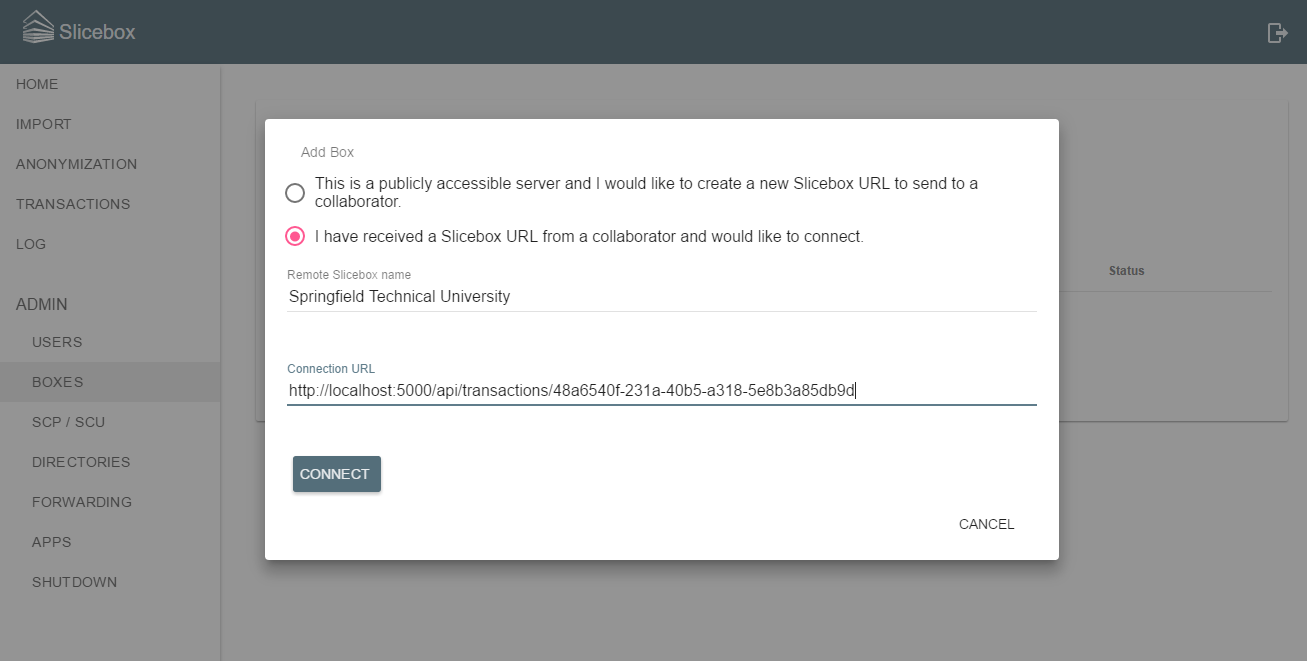
Completing the connection brings up the list of connections where, if the public instance is up and running, the connection should go online within a few seconds.

As soon as a connection has been established, images can be queued for sending regardless of whether the connection is currently online or not. See Sending and Receiving Images on how to send images and monitor transactions.
Connections can be deleted by selecting them from the list and using the Delete option in the list menu.