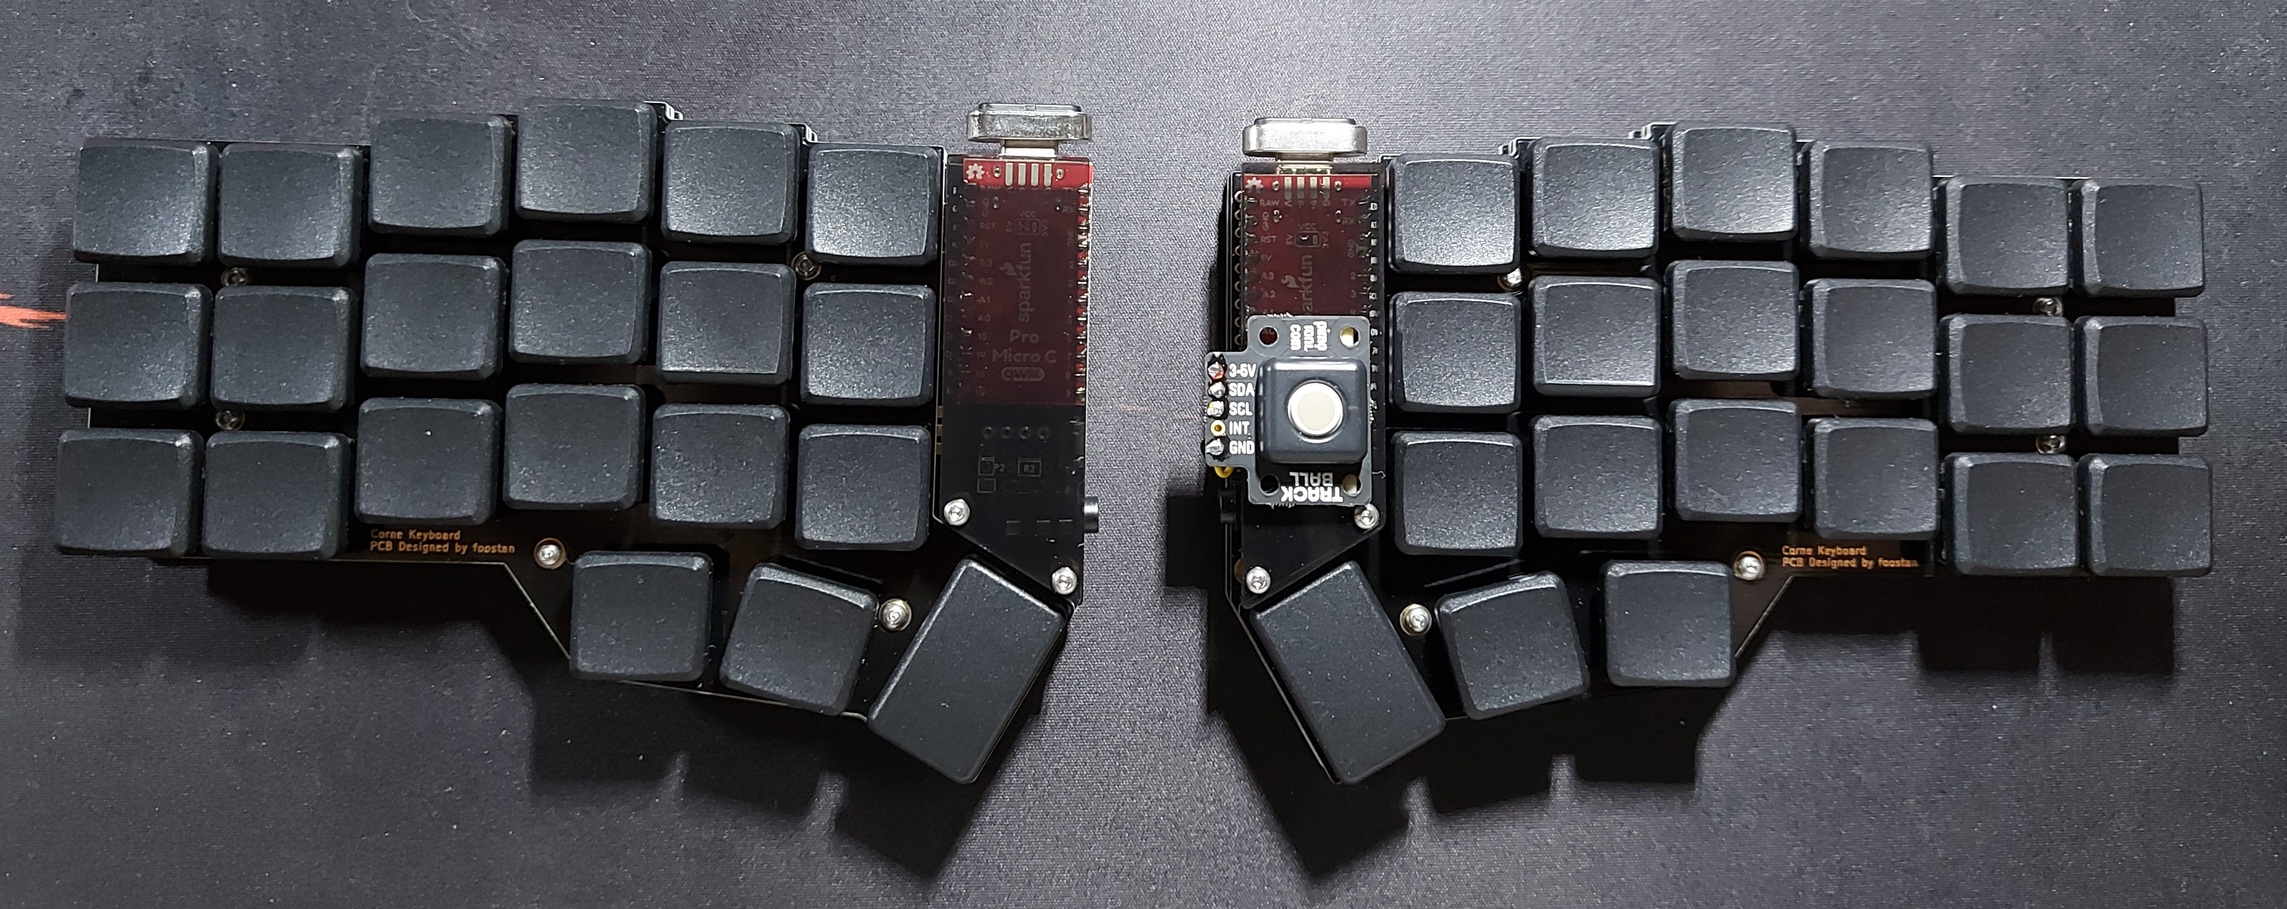
Portable keyboard and mouse companion.
This was inspired by foureight84's sofle and vlukash
- crkbd classic
- corne analyst case
- mbk choc low profile keycaps
- kailh choc low profile switches (brown)
- mill max ultra lowprofile sockets
- sparkfun pro micro usb-c
- If you are a beginner, please use the standard pro micro controllers. Pro Micro
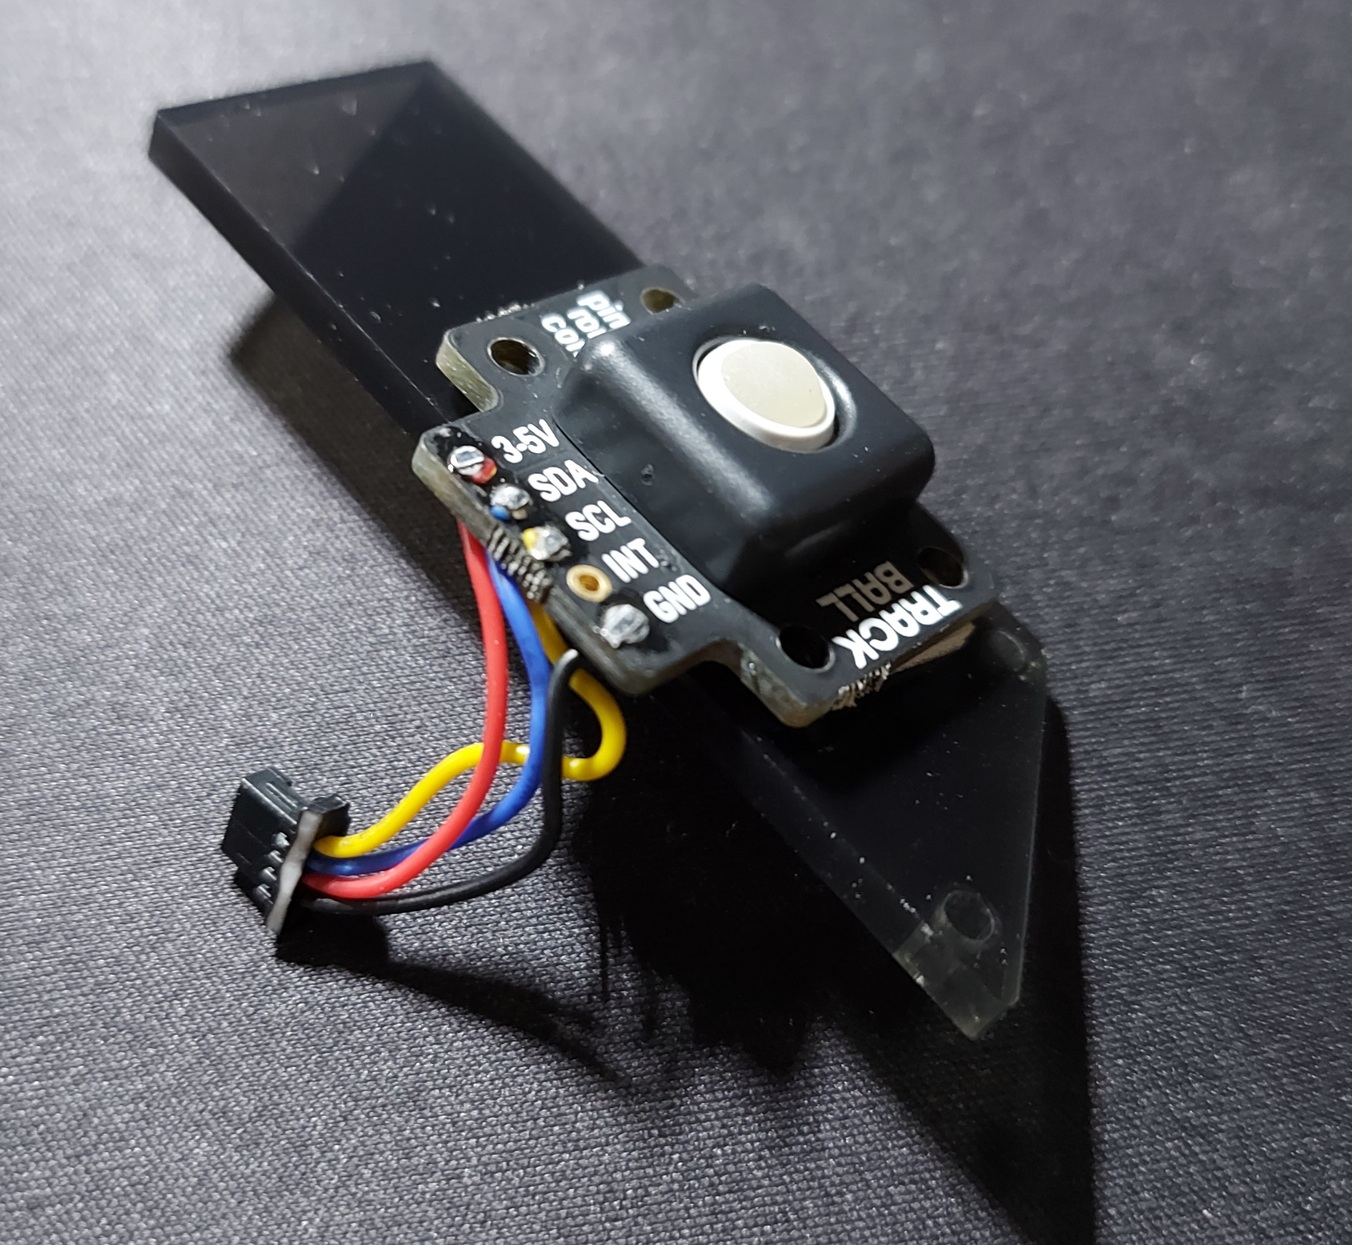
- pimoroni trackball
I won't go over the details of the crkbd base build there is a lot of youtube clips and the orginal foostan build is already detailed.
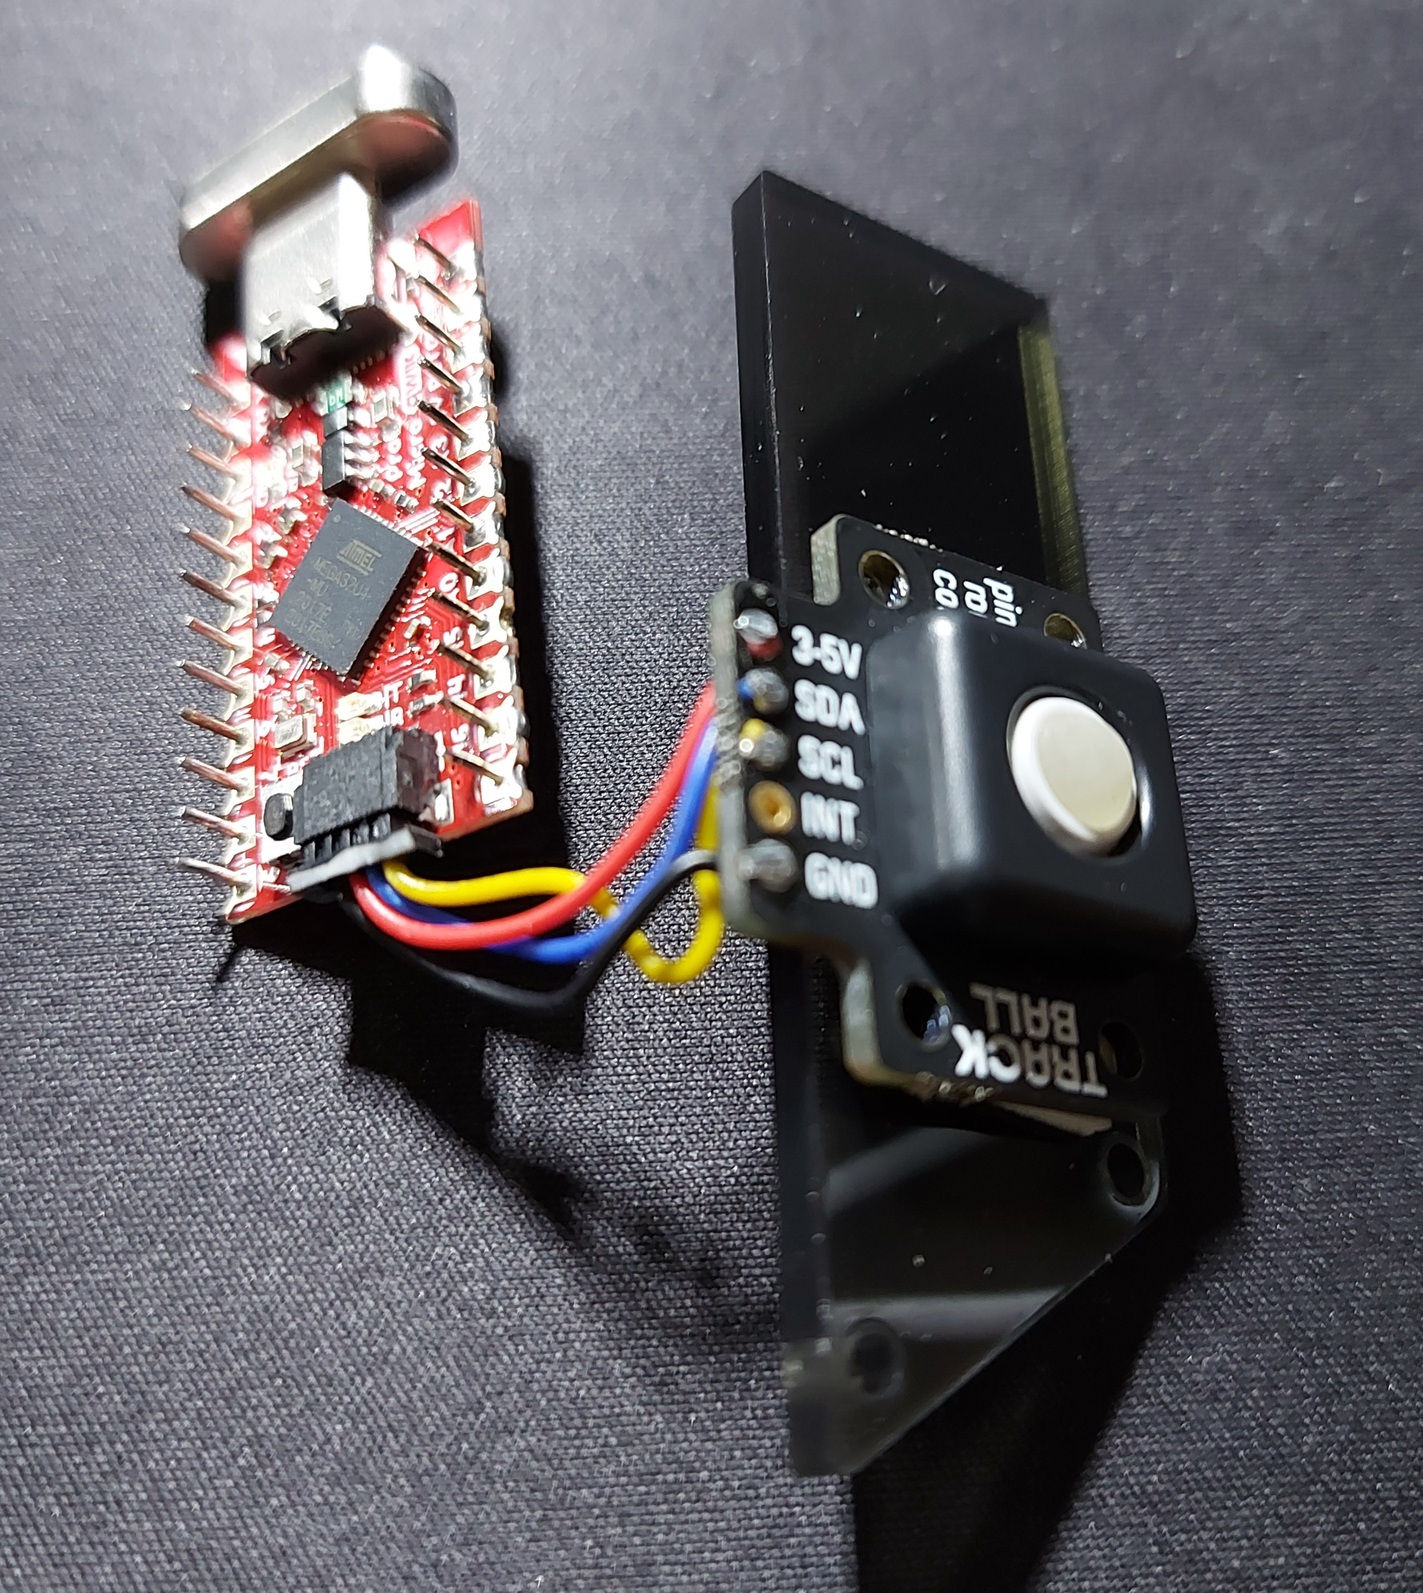
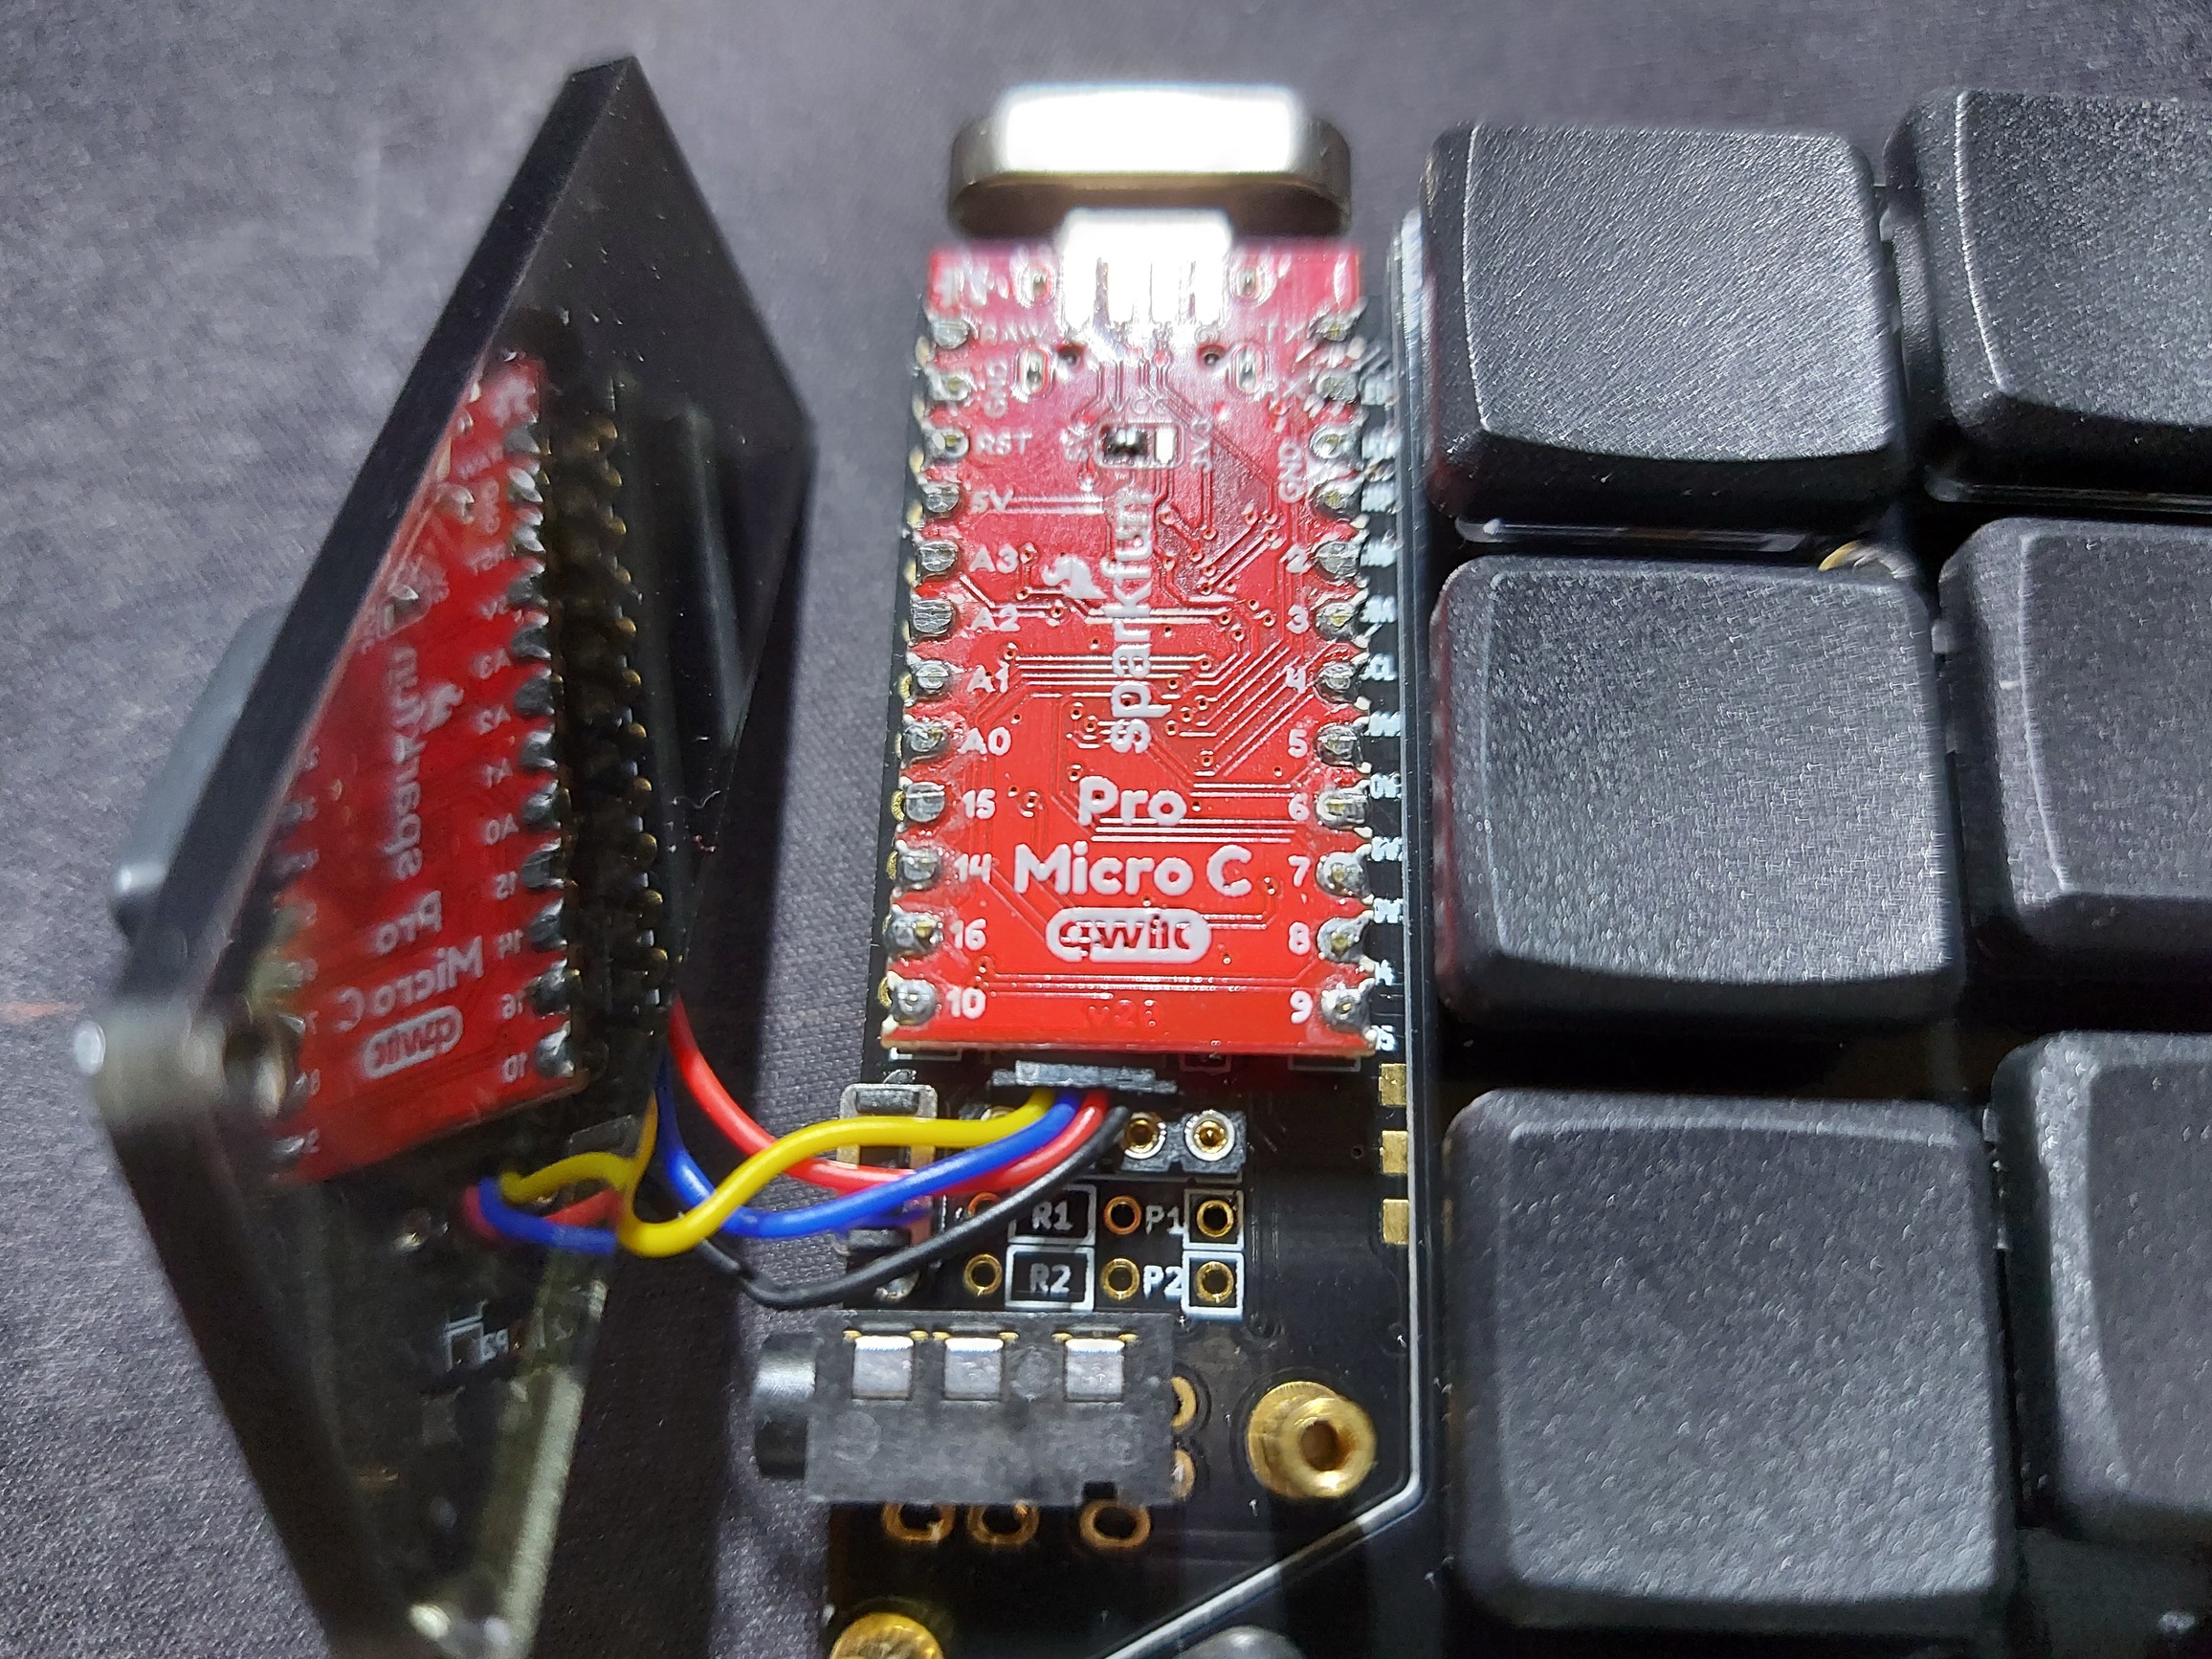
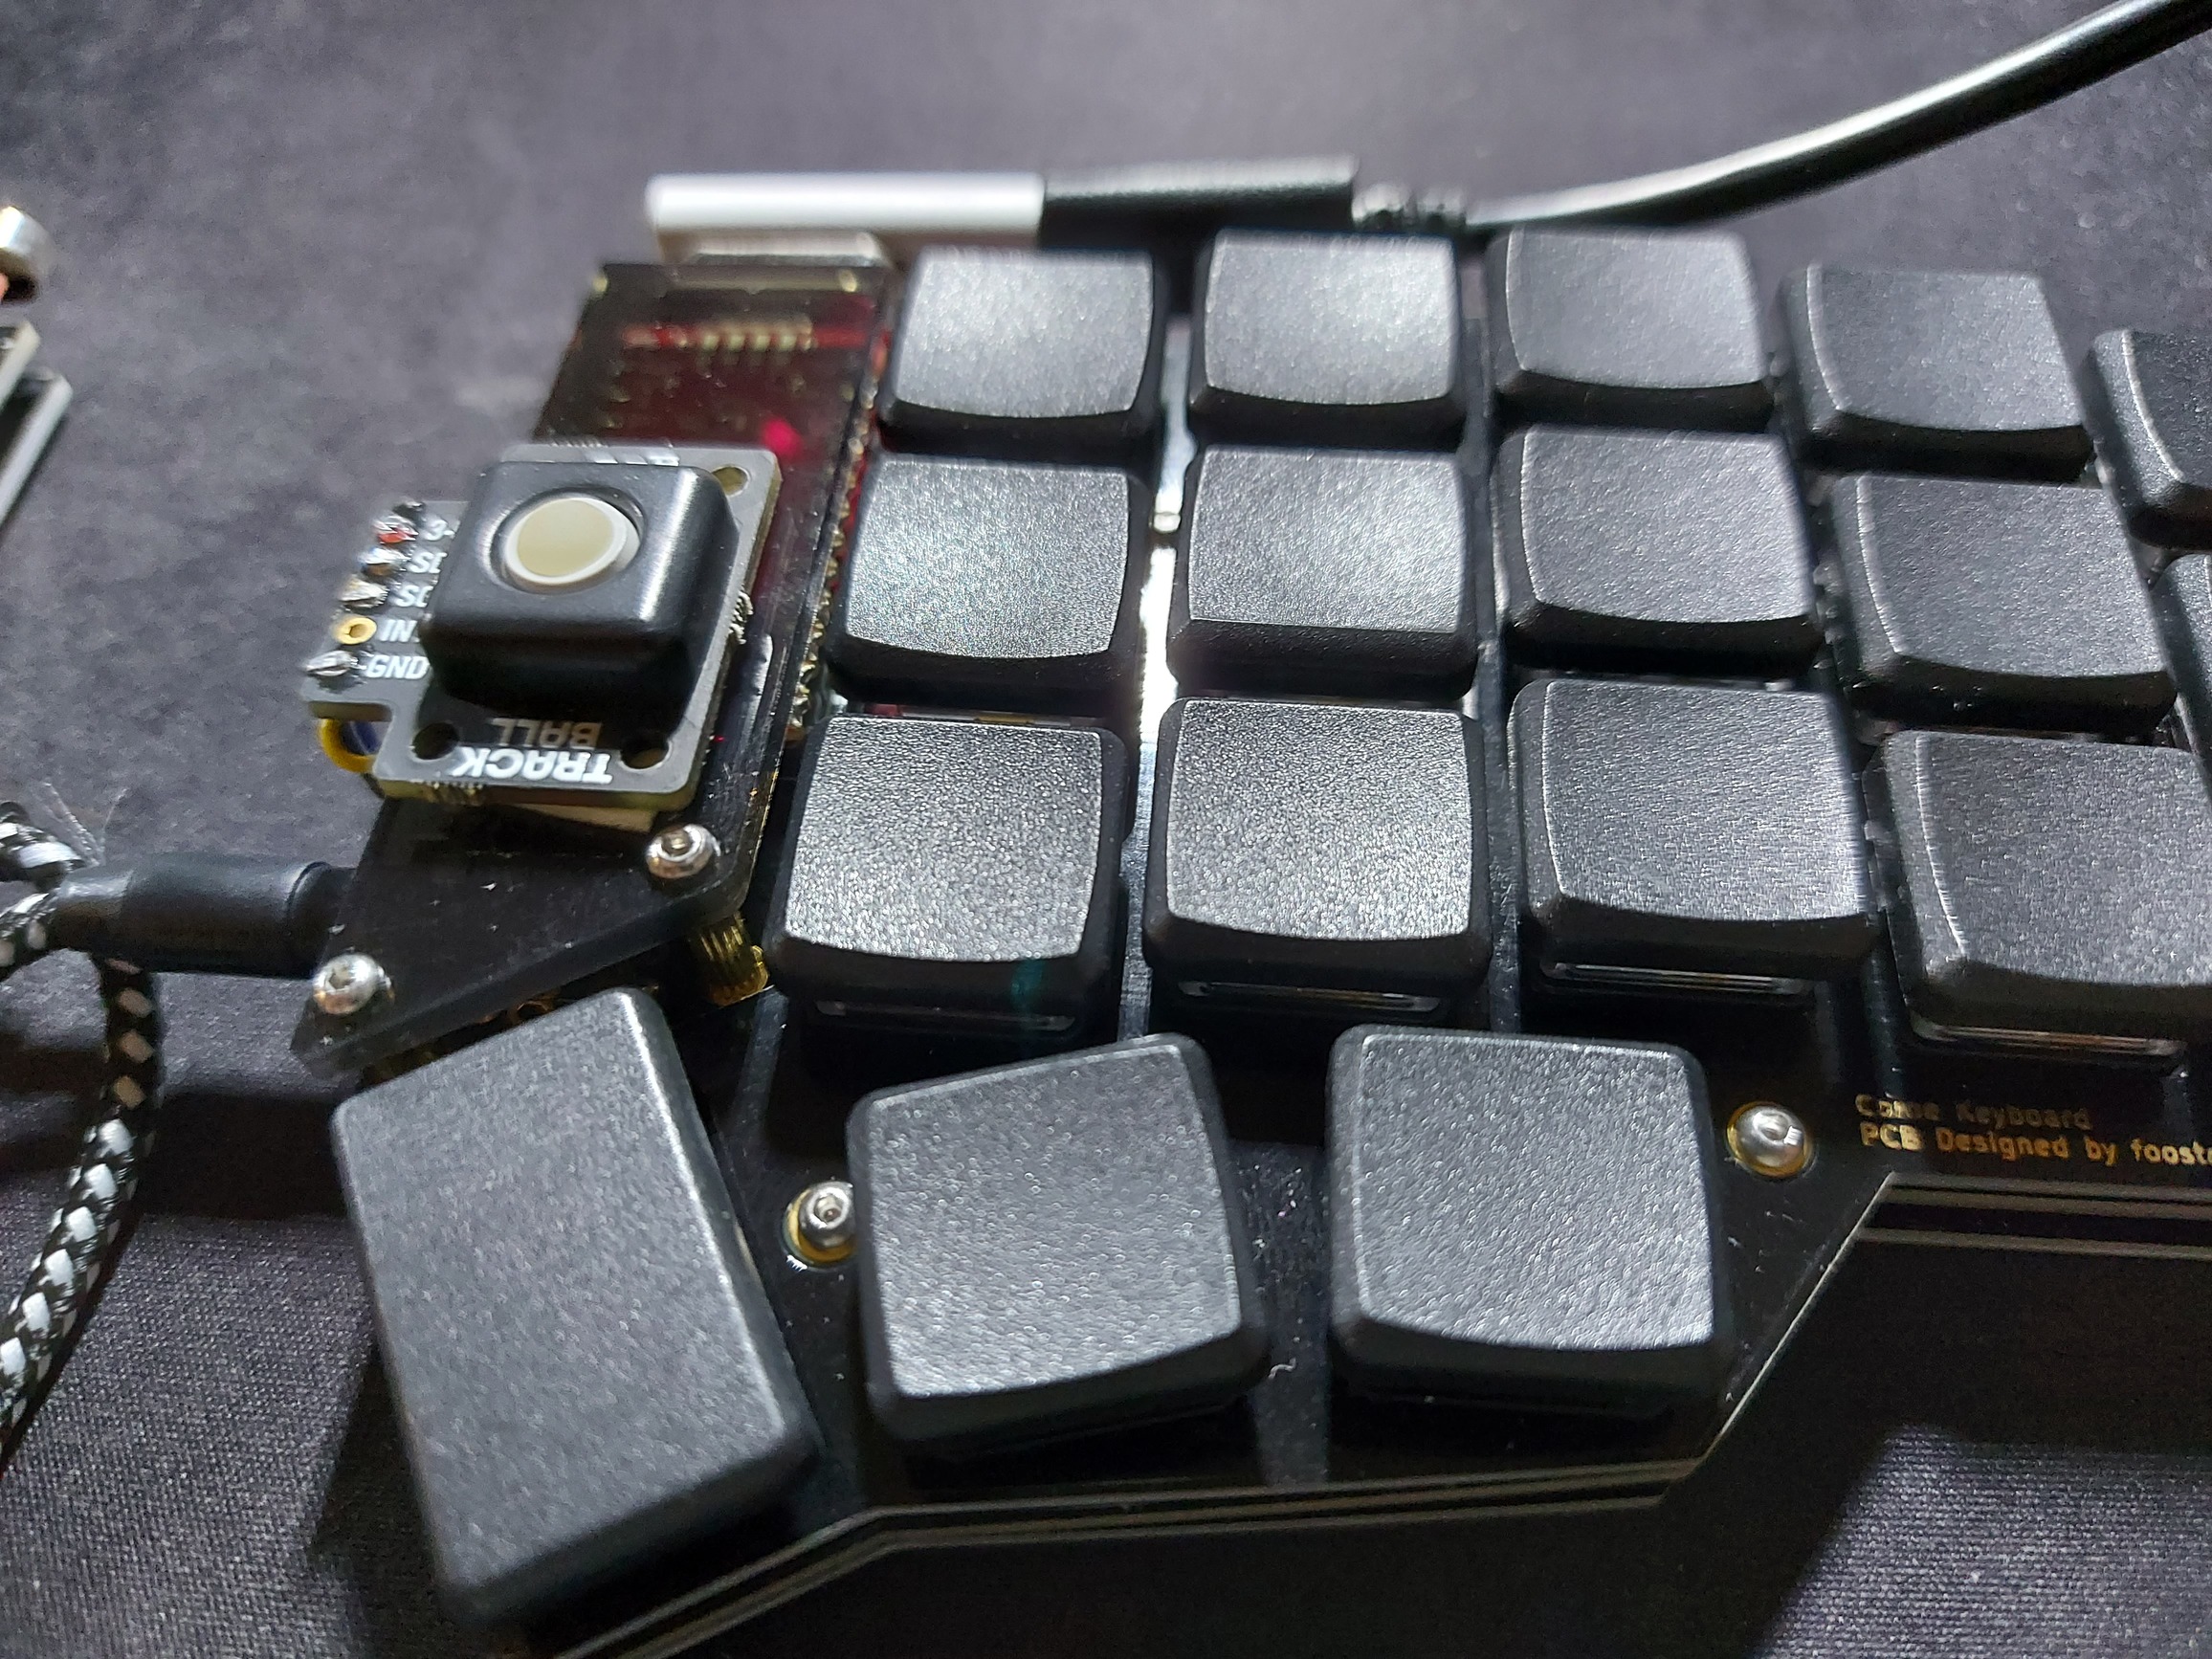
Instead of using the standard pro micro, I used the sparkfun pro micro usb-c controller and qwiic port to connect the pimoroni trackball as shown below.
Pimoroni Trackball with qwiic connection:
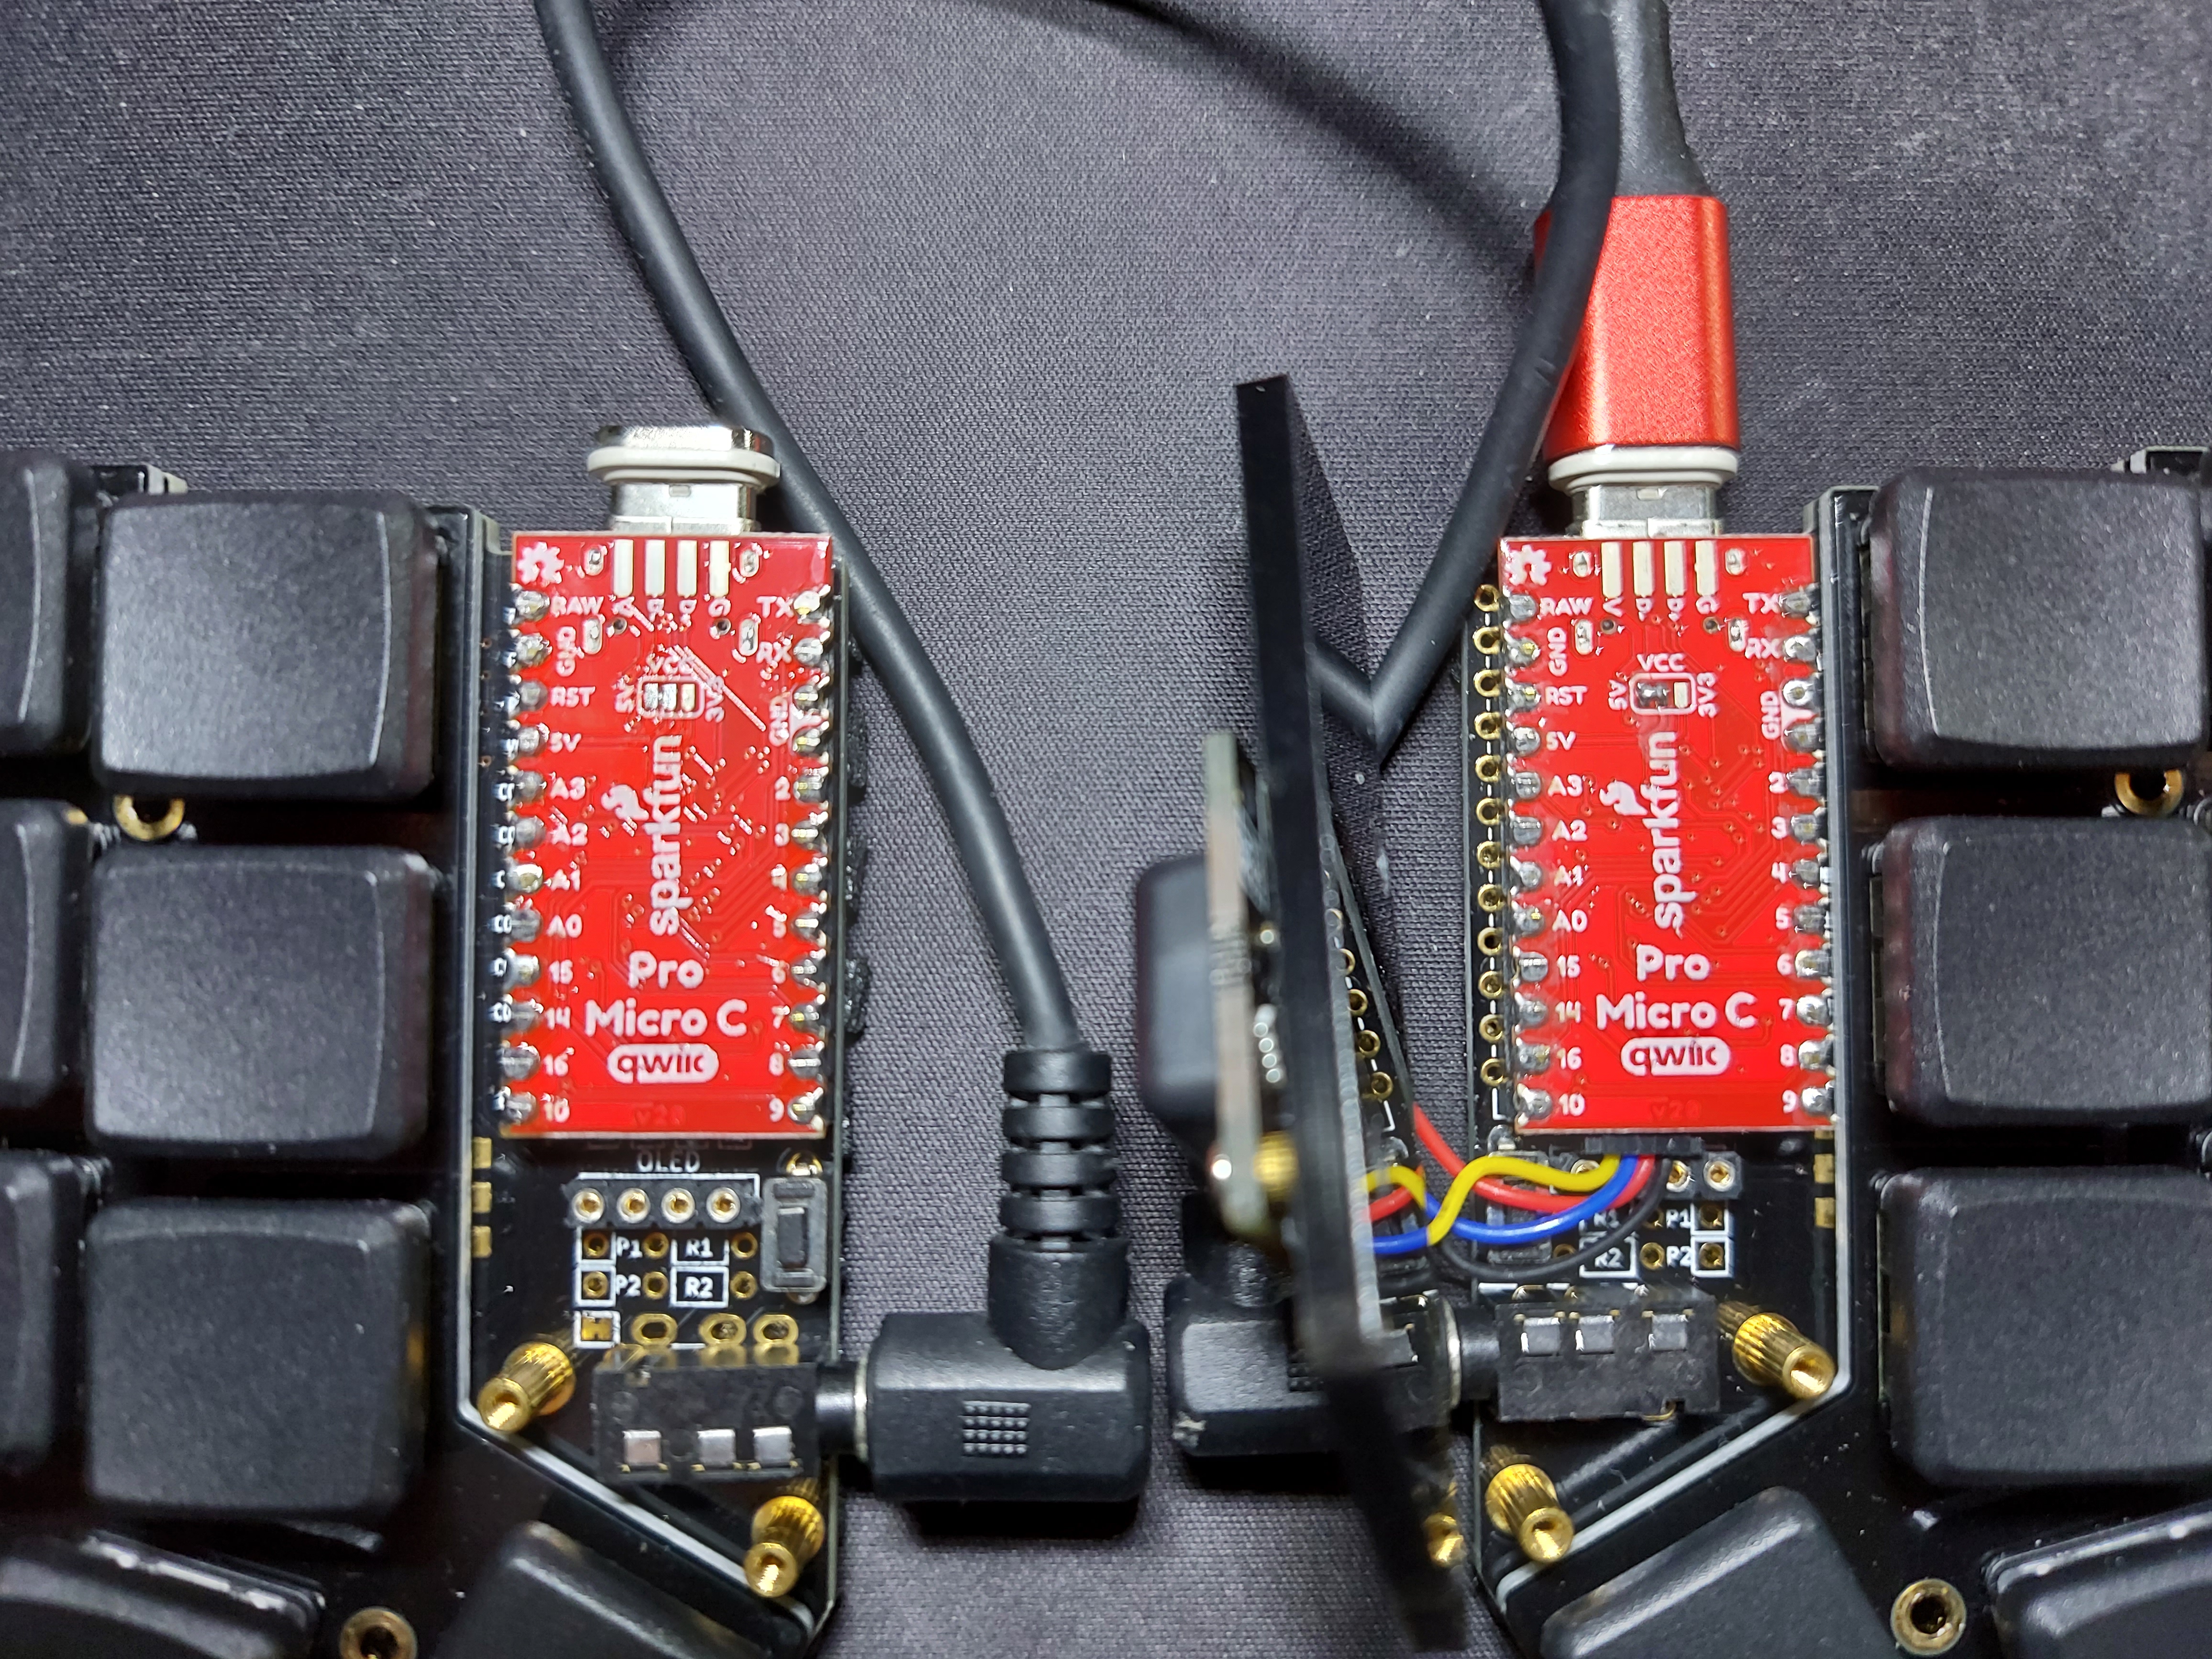
Trackball connected to the controller:
Controller connected to the board:
Right Hand Master:
I'm in no means a pro C/C++ developer and I'm sure once you see the code you could probably find improvements, but most of the development was originally from foureight84, drashna and sevanteri.
Currently the common crkbd doesn't support i2c for the split keyboard communication, so I had to build the firmware similar to vlukash trackpad approach by having a firmware for the right and left controllers. Basically the master hand, the one that has the usb connected, will have the working code for the pimoroni trackball. So you have to explicitly say which is the master and enable the pimoroni trackball for that side only.
The firmware does not include the OLED driver mainly because I haven't tested it yet. The LED in the trackball will change indicating which layer you are currently at.
Clone my firmware here: https://github.com/greyhatmiddleman/qmk_firmware.git
git clone --branch greyhatmiddleman https://github.com/greyhatmiddleman/qmk_firmware.git
The firmware is located in keyboards/crkbd/rev1/common/keymaps/greyhatmiddleman_trackball_[left|right].
The firmware is located in keyboards/crkbd/keymaps/greyhatmiddleman_trackball_[left|right].
For this example the trackball will be connected to the right hand which will be the master side.
Here you want to make sure the following:
- Important: Make sure that both the
config.handkeymap.care identical under the right and left folders - In the
config.hfile make sure to define the master:
...
#define MASTER_RIGHT
...
- Change your keymaps accordingly and update any layer state switch cases accordingly.
- Set the
rules.mkbased on the which hand is master and that has the trackball connected. - For the right hand
rules.mkset the following:
...
PIMORONI_TRACKBALL_ENABLE = yes
...
- For the left hand
rules.mkset the following:
...
PIMORONI_TRACKBALL_ENABLE = no
...
- Verify all your changes and confirm that the
config.handkeymap.care the same in the right and left holders. - Now you ready to flash the firmware.
Connect the usb to right hand controller and run the following:
qmk flash -kb crkbd -km greyhatmiddleman_trackball_right
Next connect the usb to the left hand controller and run the following:
qmk flash -kb crkbd -km greyhatmiddleman_trackball_left
Connect the usb to the right hand controller then to your computer and you should be all set!
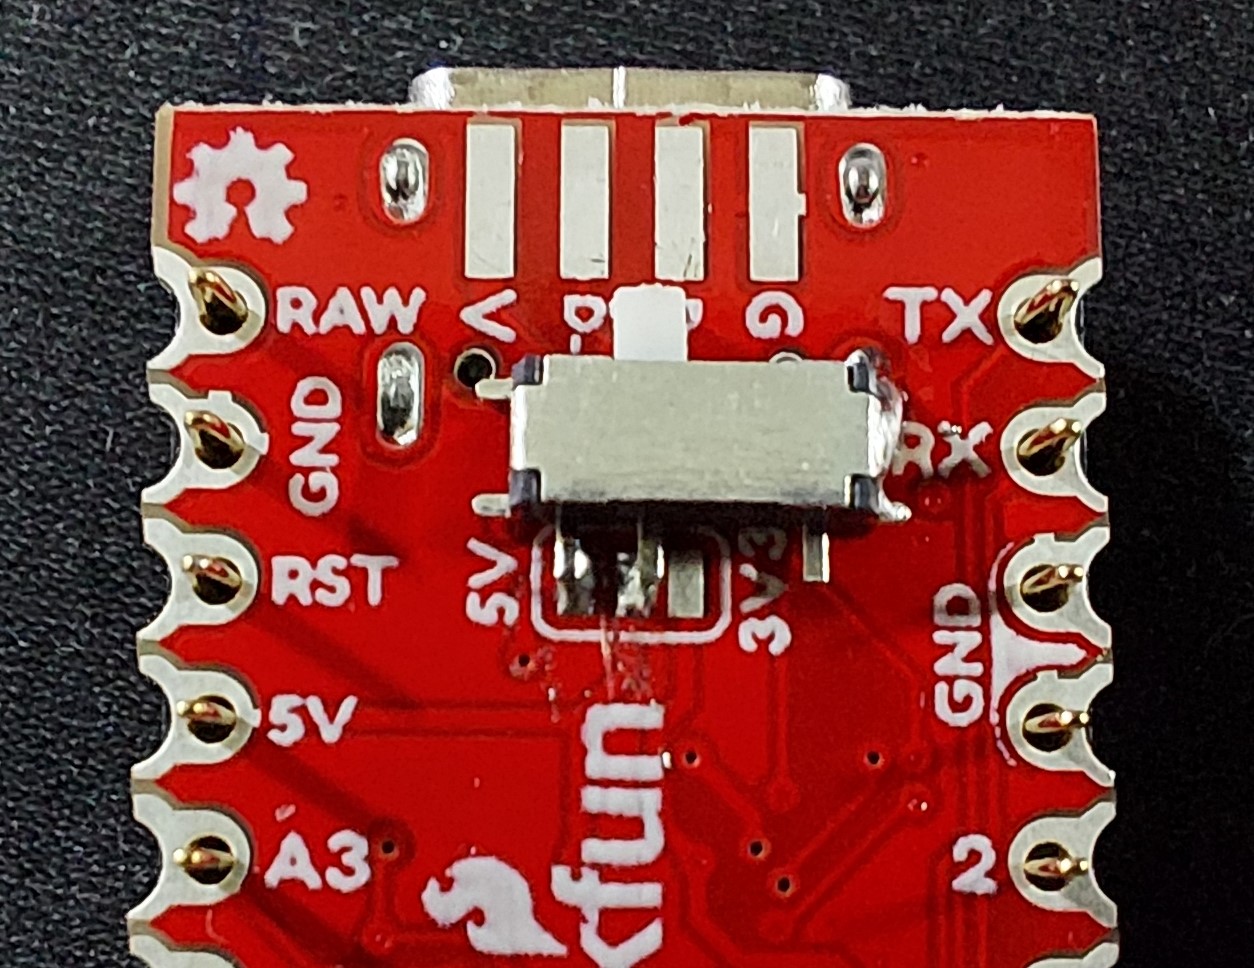
When using the sparkfun pro micro usb-c controllers you will need to break the VCC bridge on the back of slave/left hand controller. As shown in the image below.
When you need to update the firmware on the slave/left hand controller, you will need to jump the 5v and RAW pins prior to connecting the usb cable.
Remember to load the firmware on these sparkfun controllers, you need to press the reset button twice. Refer to sparkfuns documentation for more details.
I found this article when troubleshooting the sparkfun controllers: Only one half of my keyboard works at a time, but not when they are both connected
If you are able to find this switch, you can solder a switch on the VCC bridge connector. After breaking the default 5v bridge to VCC, solder the switch pins to 5v and VCC, so that when the switch is on 5v is connected to VCC and off 5v is disconnected from VCC. No connection is needed for the 3v pad.
- Pimoroni Trackball reference core source code located in the drivers/sensor path
- OLED enabled by default, must have OLEDs on both sides.
- Added keycode BALL_LC: Mouse left click
- Added keycode BALL_SCR: While held down mouse will act as a vertical scroll wheel
- You might want to use the standard pro micro controllers rather than the sparkfun pro micro usb-c ones. There are some differences with the controllers and it will not follow some of the standard documentations.
- Confirm that the
config.handkeymap.care the same under the right and left folders. - Ensure that you connected the trackball to the master hand, which would be defined under the
config.h - The
rules.mkshould be different between the right and left folders. It should dictate which has the Pimoroni enabled which the other side should have it disabled.
- Convert the controllers using the Nice!Nano ones for wireless connectivity
- Add an OLED on the opposite side of the trackball
- Try to get EE_HAND working so that we can have a single firmware
