This dandy Redmine plugin imports time entries from Toggl to Redmine using REST API service calls for both Toggl and Redmine.
Additionally, the plugin groups similar Toggl time entries into a single Redmine entry. So, even if you start and stop your timer for a particular task multiple times on Toggl, at the end of day, when you import the time entries to Redmine, they are grouped by the issue ID and the description, which keeps Redmine clean.
This plugin has been made and tested with love and care. However, the makers of this plugin are in no way responsible for any damages - direct or indirect - caused by the use of this plugin. In short, use it at your own risk.
- Copy the plugin directory into the
pluginsdirectory of Redmine. - Run database migrations.
- You can read more about plugin installation on redmine.org
RAILS_ENV=production bundle exec rake redmine:plugins:migrate- This creates a Toggl API Token field on the user profile.
- Your database must support transactions.
- Without transaction support, users might end up importing duplicate time entries.
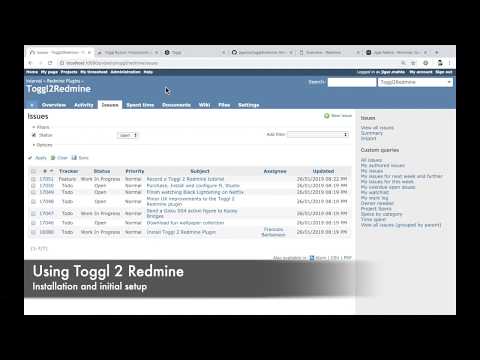
Here's a quick video to get you started.
If a certain topic is not mentioned in the video, you can find more information on it by reading this document.
- Go to the My Account page on Redmine (
/my/account). - Paste in your Toggl API Token and save your profile.
- You can find this in your Toggl profile settings page.
- Update your time zone on Toggl and Redmine - this makes your time reports
show correctly according to your timezone.
- Important: Confirm with your Redmine administrator whether you need to update your timezone. Some organizations use Redmine without configuring timezones to avoid certain timezone-related bugs in Redmine.
- Login to Toggl and log your time when you're working.
- Make sure your task description is in one of the following formats:
#1919 Feed the bunny wabbit.
Tracker #1919 Feed the bunny wabbit.
- You can use the Toggl browser extension to make this easier.
#1919is the Redmine issue ID.Feed the bunny wabbitis the comment.- When you're done working for the day, visit the My Timesheet page on Redmine
and click on the Toggl tab on Redmine (
/toggl2redmine).- Most of the options on this page have useful tooltips. If you are confused about what something does, simply hover over the item to see if it has an informational tooltip.
- You should see the time you've already logged on Redmine (if any) under the heading Time logged on Redmine.
- You should see the time you've logged on Toggl for the day under the heading Time logged on Toggl.
- If you want to import entries from some other date, you can change the Date filter and any other options as per your requirements.
- If you change any options, make sure you press Apply for them to take effect.
- Now, in the Toggl report, check the entries you want to import into Redmine.
- For each entry, you can modify the comments, activity and time as per your requirements.
- You can enter time as in decimal or as
hh:mm. For example,1h 30mcan be written as1.5or1:30in the input boxes.
- Once you've reviewed everything, click on the Import to Redmine button
towards the bottom of the page.
- After you import the data, you cannot undo it, so BE CAREFUL.
- You will see a success (or failure) message next to each item.
- Entries which imported successfully will be marked in green.
- Entries which failed to import will be marked in red.
You can specify a Default activity in the options form. This activity will be pre-populated in your Toggl report, making it easier to import data.
If you use multiple workspaces on Toggl, you can choose the workspace from which you want to import data using the Toggl Workspace field in the options form.
As mentioned before, the Date option allows you to import time entries from past dates.
You can use this option to round your time entries as per your requirements. Let's say, the option to round to the nearest 10 minutes. There are 3 ways in which you can round your time entries.
- Round Up: 1h 26m becomes 1h 30m.
- Round Down: 1h 26m becomes 1h 20m.
- Round Off: 1h 26m becomes 1h 30m whereas 1h 24m becomes 1h 20m.
To disable rounding, you can choose the Don't round option.
Want to fiddle with the code? Or just get a demo of the plugin? If you use Docker, you can do so with ease.
- Clone the code repository.
# Replace x.y with a real branch name, e.g. 5.x git clone --branch x.y git@github.com:jigarius/toggl2redmine.git cd toggl2redmine - Prepare docker containers.
docker compose up # When Redmine is ready, you'll see a message like: # INFO WEBrick::HTTPServer#start: pid=X port=3000 # At this point, press Ctrl+C and run the next command. docker compose start - Provision the environment, e.g. create seed data, etc.
rake provision
Run rake info to learn how to access your demo installation!
Thanks to the Docker setup, the plugin code can easily be linted and tested.
rake reset RAILS_ENV=test: Prepare/reset the test environment.rake lint: Run Rubocop.rake test: Run tests.
Mailhog has been included in the Docker setup so that you can easily reset your password or test Toggl 2 Redmine with more than one user accounts.
- Thanks Evolving Web for funding the initial development of this plugin.
- Thanks Jigarius (that's me) for spending many evenings and weekends to make this plugin possible.
- Thanks JetBrains for their Open Source License, without which development would have been very difficult.