This blog explains how to set up a private blockchain network with multiple nodes running on different computers.
This tutorial is meant for those with some knowledge of Ethereum and smart contracts, who have some knowledge of nodes, geth and POA, etc. The purpose of building this blog is to write down the detailed operation history and my memo for learning the dApps. If you are also interested and want to get hands dirty, just follow these steps below and have fun!~
NOTE: In the following Command Line Interface (CLI) We mark the two CLIs running on different computers as
pc1$andpc2$. Do not copy the prefixpc1$andpc2$.
We use this CLI command to know the ip address of macOS device pc1:
pc1$ ifconfig|grep netmask|awk '{print $2}'
Output:
127.0.0.1 1X.1XX.2XX.35
Use the second one.
geth account new
Output:
E.g. :
Your new key was generated
Public address of the key: 0xXa79b38262Xf270d5A3141X4F326X76A9F37e9E4
Path of the secret key file:
......
Copy the following code and name it as genesis.json.
{
    "config": {
      "chainId": 15,
      "homesteadBlock": 0,
      "eip150Block": 0,
      "eip155Block": 0,
      "eip158Block": 0,
      "byzantiumBlock": 0,
      "constantinopleBlock": 0,
      "petersburgBlock": 0,
      "ethash": {}
    },
    "difficulty": "1",
    "gasLimit": "8000000",
    "alloc": {}
  }
This is the code for creating genesis block.
In the same directory we add file mineWhenNeeded.js and paste the following code:
var mining_threads = 1

function checkWork() {
    if (eth.getBlock("pending").transactions.length > 0) {
        if (eth.mining) return;
        console.log("== Pending transactions! Mining...");
        miner.start(mining_threads);
    } else {
        miner.stop();
        console.log("== No transactions! Mining stopped.");
    }
}

eth.filter("latest", function(err, block) { checkWork(); });
eth.filter("pending", function(err, block) { checkWork(); });

checkWork();
For mining automatically when necessary.
To create a blockchain node using this, we navigate to the directory that created this file, and run the following command:
This imports and sets the canonical genesis block for your chain.
pc1$ geth init --datadir . genesis.json

Once node is initialized to the desired genesis state, it is time to set up the peer-to-peer network.
Any node can be used as an entry point. I recommend dedicating a single node as the rendezvous point which all other nodes use to join. This node is called the ‘bootstrap node’.
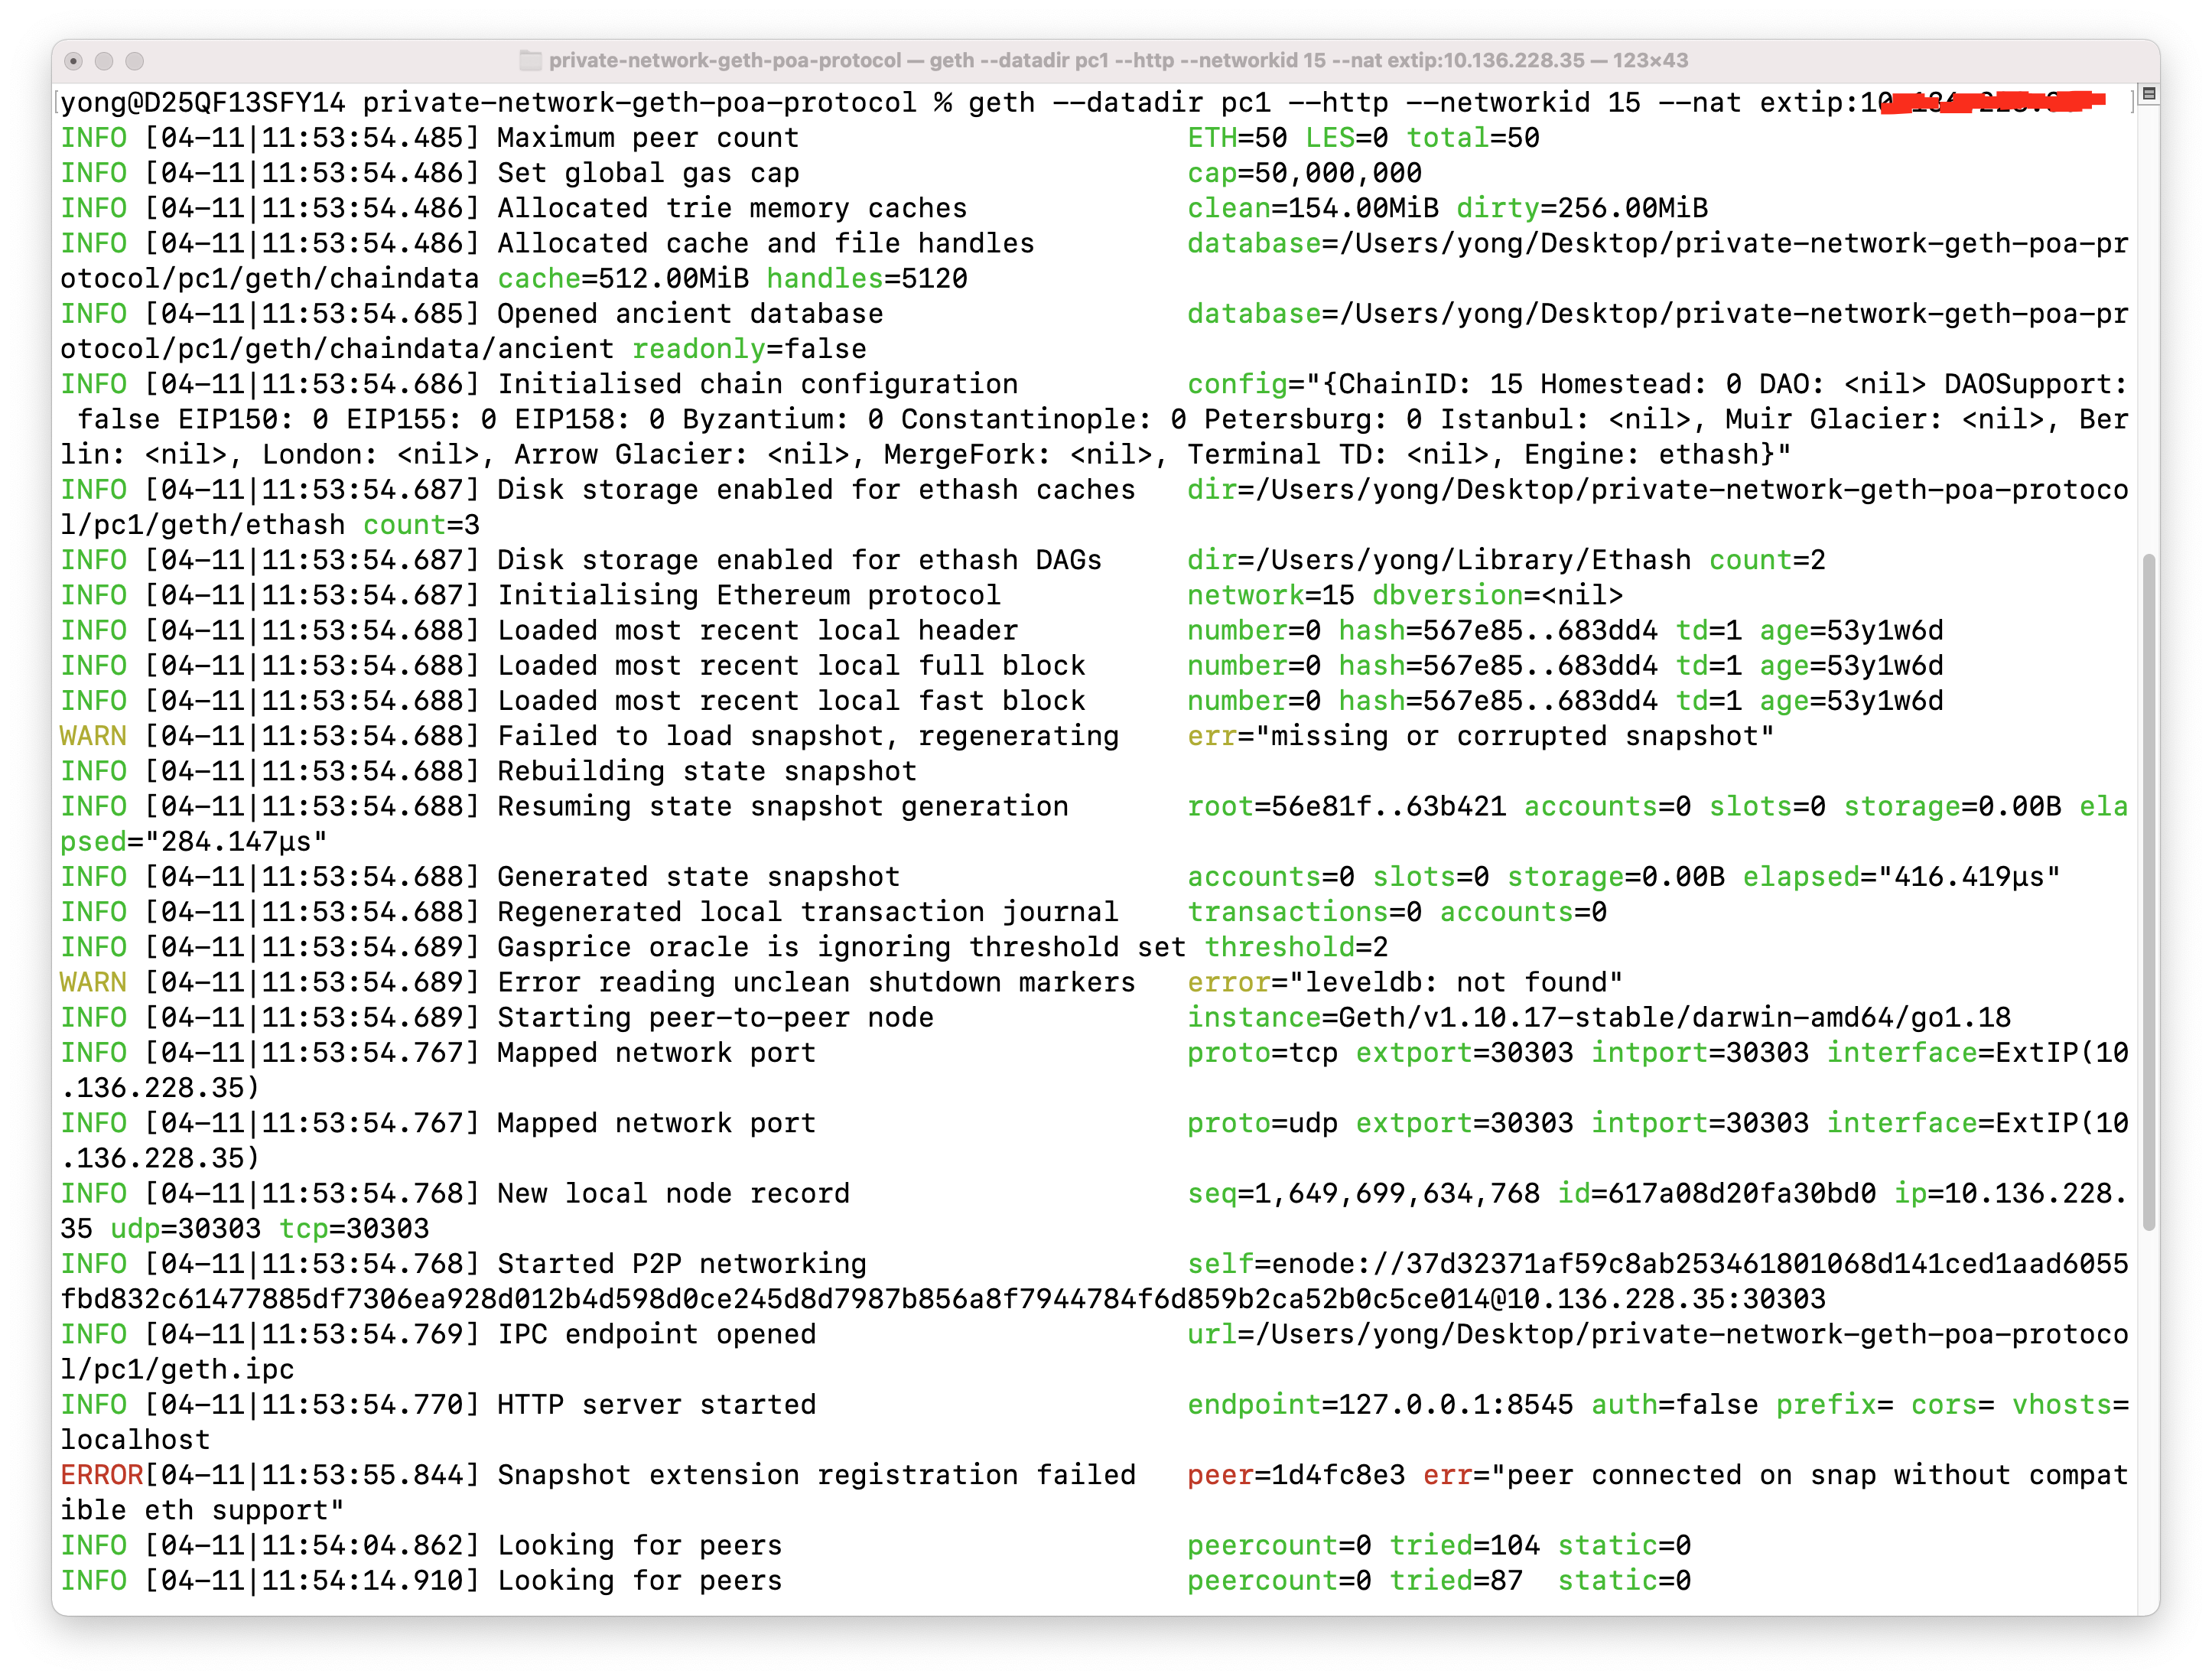
pc1$ geth --datadir . --keystore ~/Library/ethereum/keystore --allow-insecure-unlock --http --http.api 'personal,eth,net,web3,txpool,miner' --http.corsdomain "*" --networkid 15 --nat extip:IP_ADDRESS --mine --miner.etherbase="GETH_ACCOUNT_ADDRESS"
Replace the keystore route, GETH_ACCOUNT_ADDRESS and the IP_ADDRESS with yours.
Now use another CLI to extract the ‘node record’ of the bootnode using the JS console.
pc1$ geth attach geth.ipc --exec admin.nodeInfo.enr
Or use this one to prompt a new Geth CLI and get the ‘node record’:
pc1$ geth --preload "checkAllBalances.js" attach geth.ipc
pc1> admin.nodeInfo.enr
This command should print a base64 string such as the following example. Other nodes will use the information contained in the bootstrap node record to connect to your peer-to-peer network.

Before running a member node on LinuxOS Ubuntu, we have to first initialize it with the same genesis file as used for the bootstrap node.
Navigate to the directory /genesis.json first.
pc2$ geth init --datadir . genesis.json

Then we connect the second node to the bootstrap node: Option 1:
pc2$ geth --datadir . --networkid 15 --port 30304 --bootnodes "enr:-YOUR_ENR_STRING"
In this option: Node 2 will not be a miner. Use your own enr string.
Option 2: Alternatively use this one to connect the second node to the bootstrap node:
pc2$ geth account new
pc2$ geth --datadir . --keystore /home/yongchang/.ethereum/keystore --allow-insecure-unlock --http --http.api 'personal,eth,net,web3,txpool,miner' --http.corsdomain "*" --networkid 15 --port 30304 --mine --miner.etherbase="YOUR_ACCOUNT_ADDRESS" --bootnodes "BOOTNODE ENR"
Node 2 will be a miner using this command Use your own keystore route, account address and enr string.
Open a new CLI and input the following:
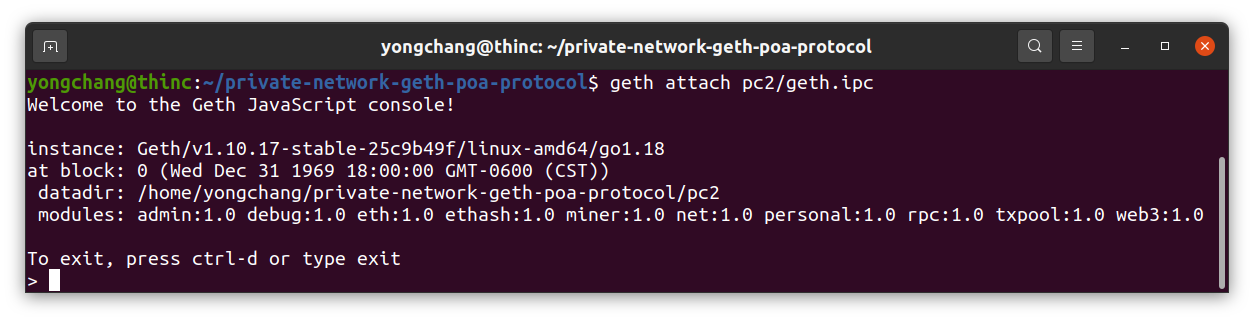
pc2$ geth --preload "checkAllBalances.js" attach geth.ipc
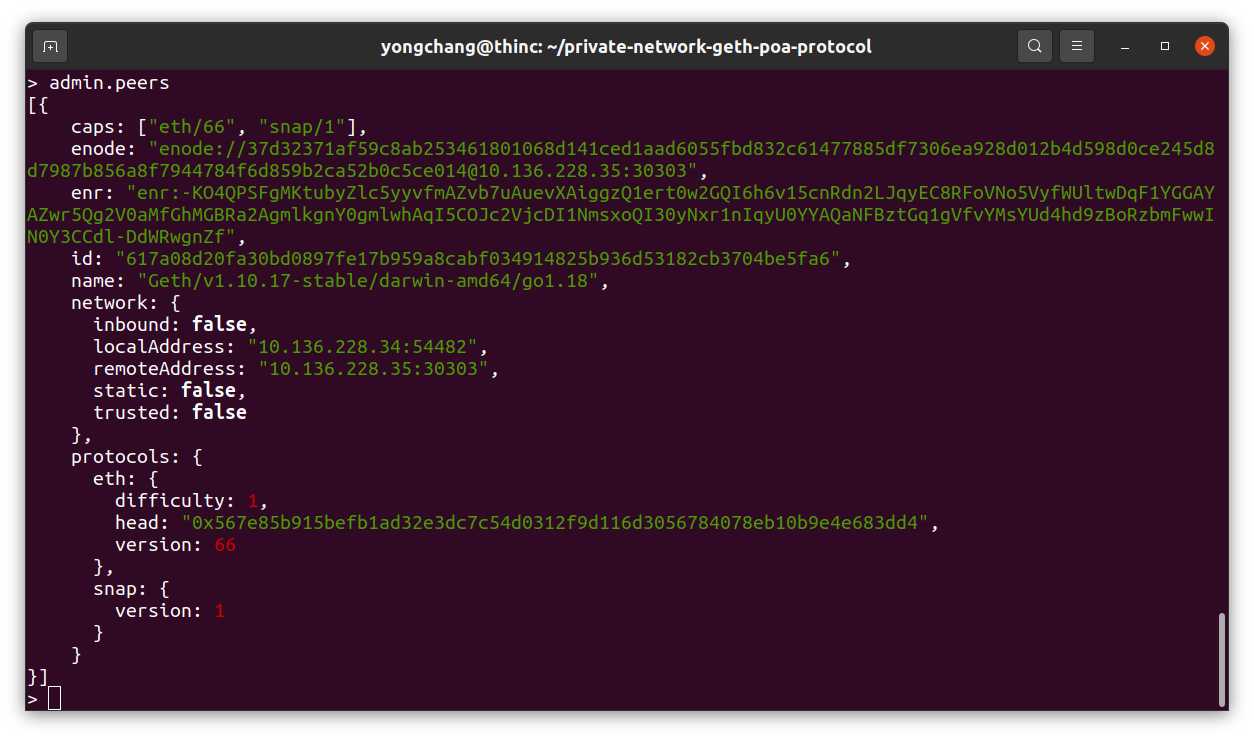
Find peers:
> admin.peers
> net.peerCount

To begin mining our blockchain, we can run:
> miner.start()Let's allow it to run for a while, and then stop the mining by typing:
> miner.stop()Now We have rewarded some tokens for mining new blocks. We can verify this by running the following command:
> eth.getBalance(eth.accounts[0])
Option 1:
> eth.sendTransaction({from: ACCOUNT_pc1_STRING, to: ACCOUNT_pc2_STRING, value: 5000})Value here is in Wei (Where 1 ETH equals 1 x 10 ^ 18 Wei)
We should get a green transaction hash if the transaction has been done correctly (should mining for a while).

Option 2: We can use MetaMask to transfer ETH from account_pc1 to account_pc2 and vice versa. Should be faster and simpler.
If deploy the bootstrap node on server or cloud, remember to config the firewall to make sure that the TCP, UDP port are open to 30303 and TCP port is open to 8545.
You can unlock it for as long as the geth instance is running using a 0 as the duration parameter:
web3.personal.unlockAccount("address", "pass", 0)
0x8edf4e7676597137013652a21a09db797fb8a971