A simple example for beginners to implement social authentication in their Django Projects. In this tutorial, we will teach you how to sign up/in with facebook, twitter and Google with your web applications.
After we finish the basic sign in mechanisms in those three platforms, the next step is to learn how to get users' profile image from social networks as their profile image in our web services.
- Chapter 1: Install the Python Social Auth and Finish the Configurations.
- Chapter 2: How to establish apps with a simple social login function?
- A Facebook App
- A Twiiter App
- A Goolgle App
- Chapter 3: Pipleline: Set up our own authentication process.
- What is the Pipleline?
- Application 1: Get the User's Profile Picture
- Application 2: Handle an Exception: Facebook user login without Email Address.
(Still Continuing....)
$ pip install python-social-auth
You can also install social-auth from github clone, check here
If you use the default django ORM, please follow:
INSTALLED_APPS = (
...
# Use default Django ORM
'social.apps.django_app.default',
...
)
Using MongoEngine? Follow the below setting:
INSTALLED_APPS = (
...
# For MongoEngine
# 'social.apps.django_app.me',
...
)
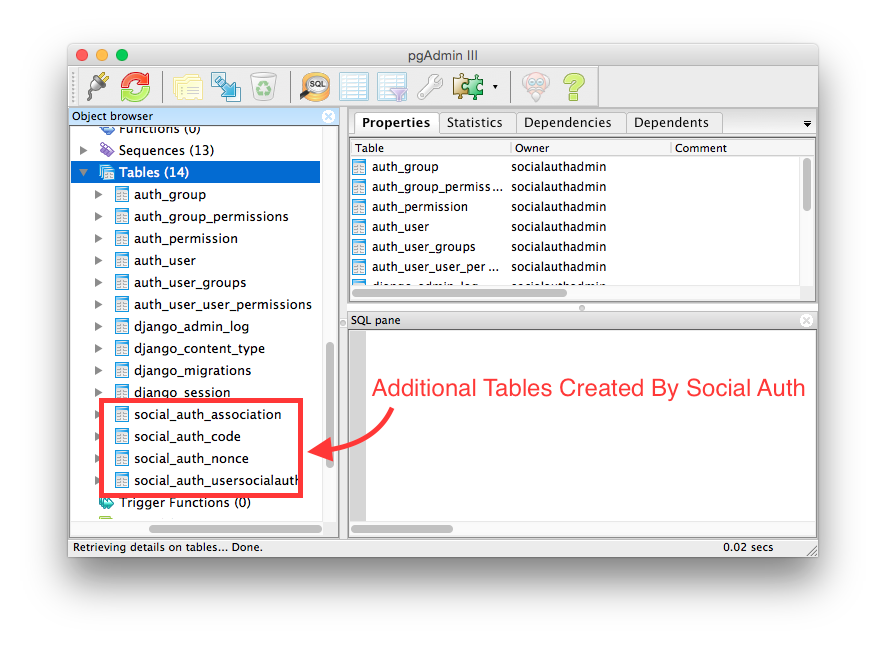
After the setting, do the migration to create tables the social auth need.
$ python manage.py migrate
Then go to check our database( I like postgreSQL :) ), we can see that there are 4 tables established with prefix "soical_auth".
Social Auth provides many social networks' authentications. Facebook, Twitter, Google, Yahoo, Spotify and Instagram are all supported. We can check whether the social authentications are supported by Social Auth in here
In this tutorial, we will focus on making a Web app with Facebook, Google and Twitter authentications.
# Authentication backends Setting
AUTHENTICATION_BACKENDS = (
# For Facebook Authentication
'social.backends.facebook.FacebookOAuth2',

# For Twitter Authentication
'social.backends.twitter.TwitterOAuth',

# For Google Authentication
'social.backends.google.GoogleOpenId',
'social.backends.google.GoogleOAuth2',
'social.backends.google.GoogleOAuth',

# Default Django Auth Backends
'django.contrib.auth.backends.ModelBackend',
)
Warning: In the tutorial, we use django's authentication system. If you have make a better authentication system on your own. Hope you can share us how to implement customized authentication system with Social Auth :)
Don't forget to set the url entreis for the social auth and the django administration
urlpatterns = patterns('',
...

# Url Entries for social auth
url('', include('social.apps.django_app.urls', namespace='social')),

# Url Entries for django administration
url('', include('django.contrib.auth.urls', namespace='auth')),

...
)
Two template context processors should be added.
TEMPLATE_CONTEXT_PROCESSORS = (
    # Default Template context processors
    'django.contrib.auth.context_processors.auth',
    'django.core.context_processors.debug',
    'django.core.context_processors.i18n',
    'django.core.context_processors.media',
    'django.core.context_processors.static',
    'django.core.context_processors.tz',
    'django.contrib.messages.context_processors.messages',

    # Setting of Template Context Processors for Social Auth
    'social.apps.django_app.context_processors.backends',
    'social.apps.django_app.context_processors.login_redirect',
)
Congratulations, we finish the basic social auth configuration. Let's start to build our first facebook login app.
Everyone who has the facebook account is a facebook developer. If you don't have a facebook account, spend three minutes to apply one.
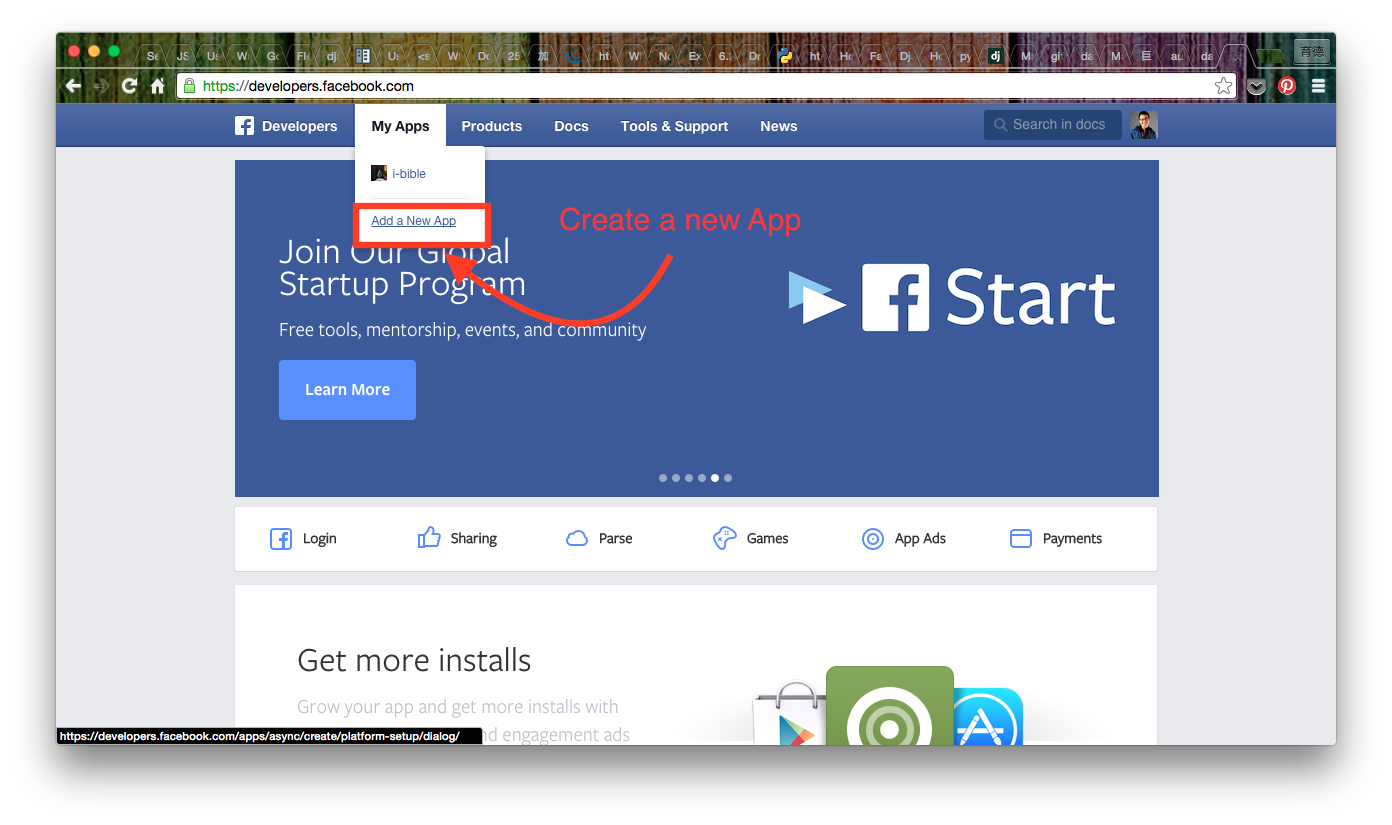
Let's go to facebook developer center.
Click "Add a New App" in "My Apps"
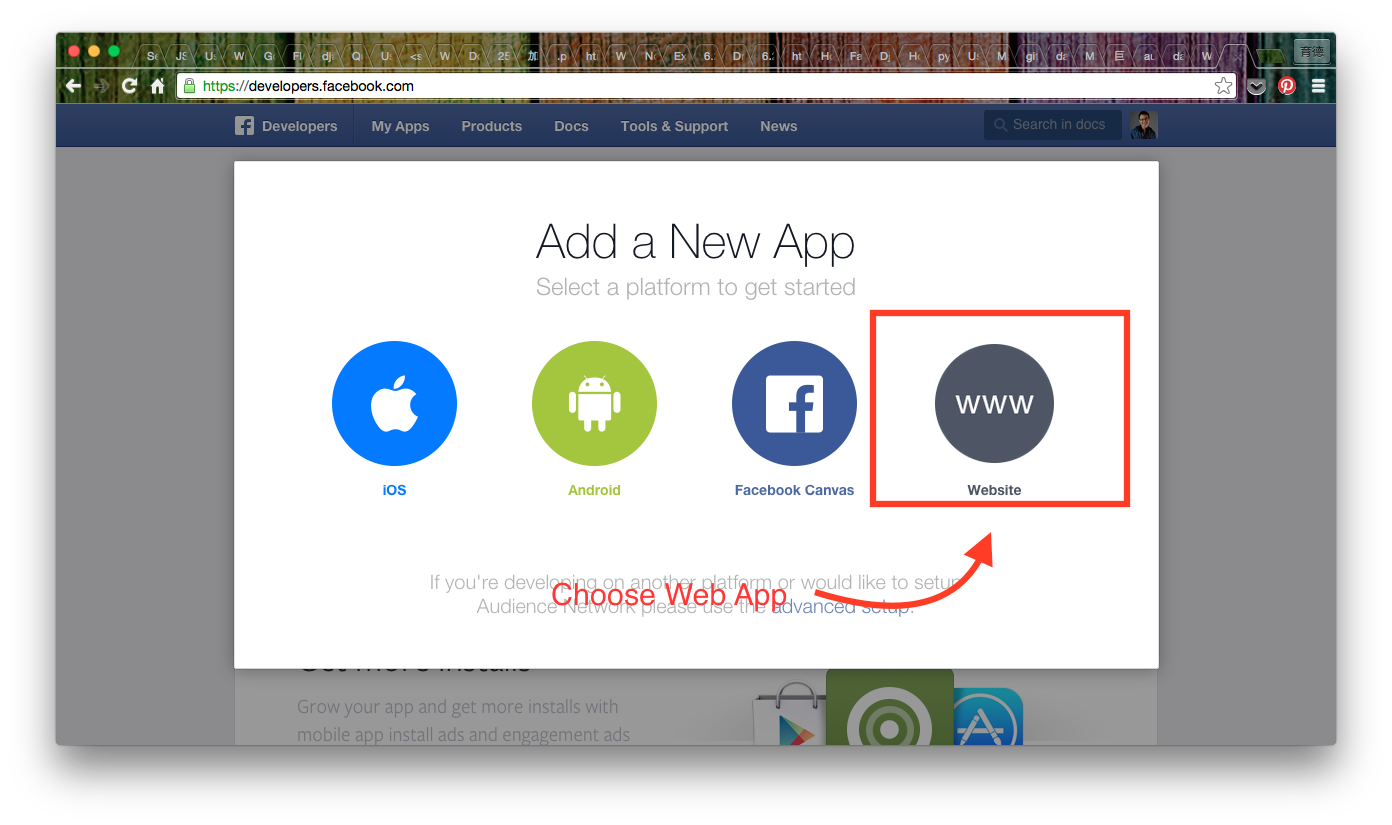
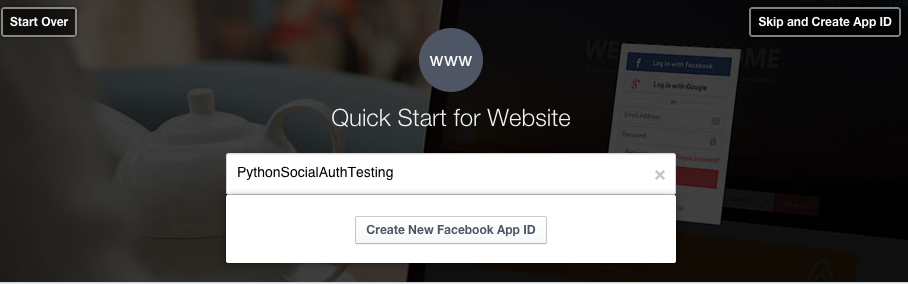
We are developing a Web app so chick the "www" icon.
Then name our app and click the button "Create New Facebook App ID"
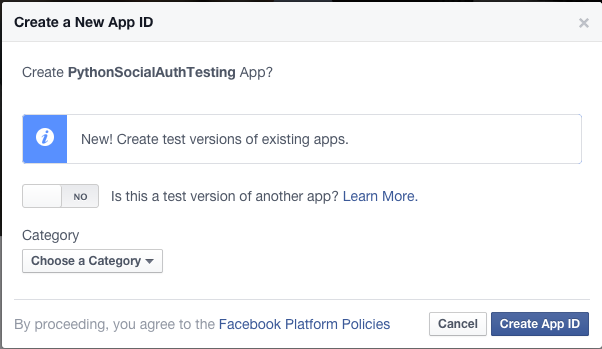
A form pops out, finish the required blanks and click "Create App ID".
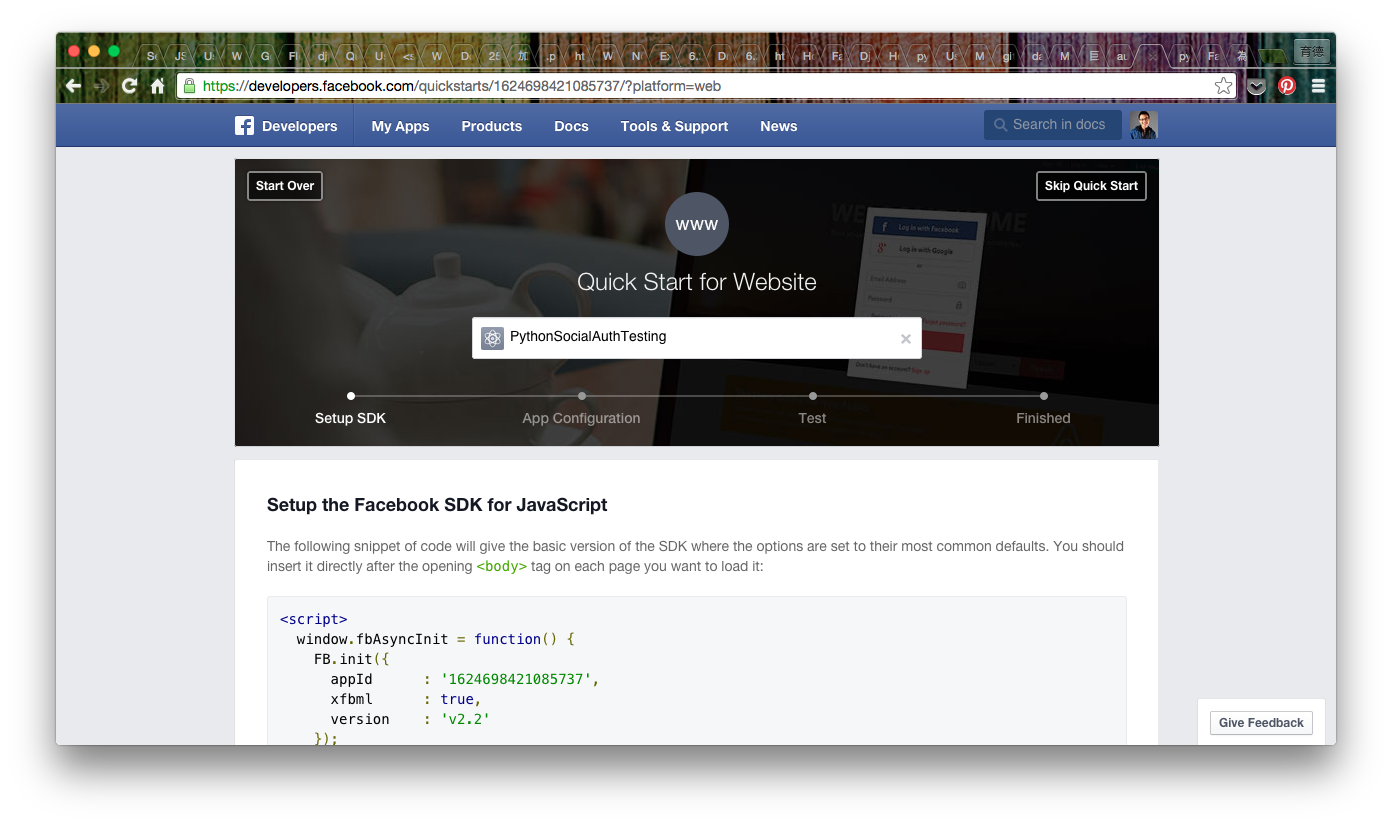
After the App is created successfully, the page will redirect to a "Quick Start" tutorial.
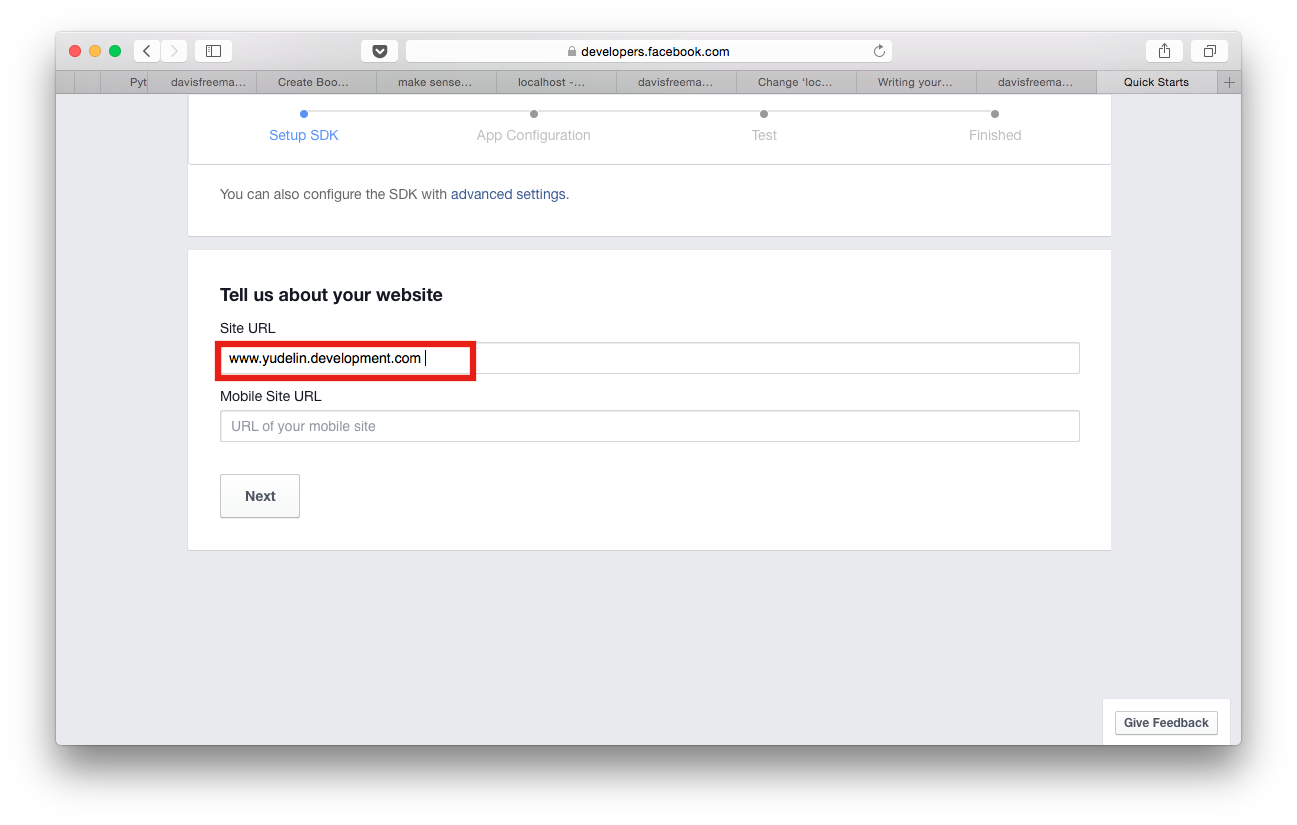
Scroll down the page, there are two blanks about the settings of the url. The first one is the url of our websites and the second one is for the mobile websites.
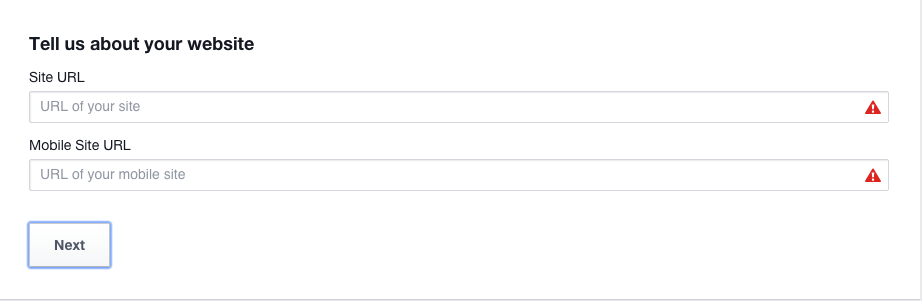
In the tutorial, we use the normal web app as the example. Hence, we input our web app's url in the above blank.
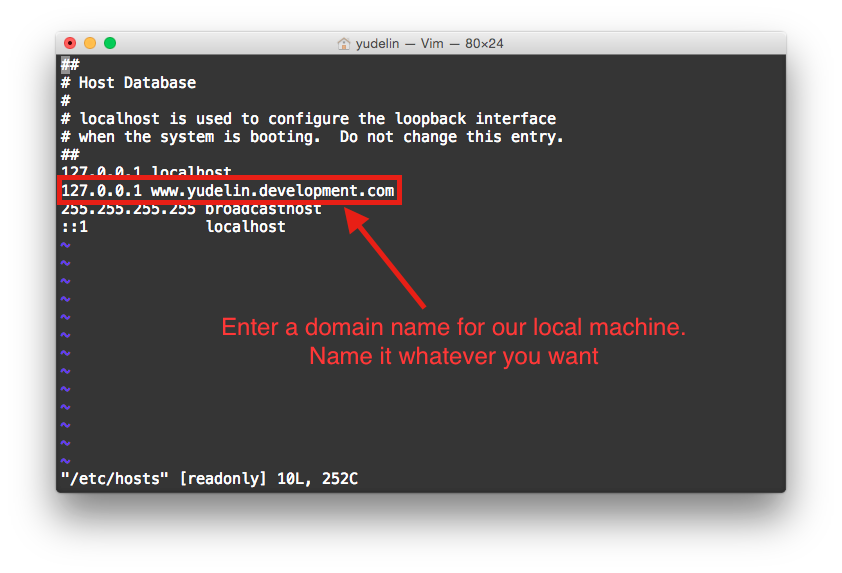
If we want to test the functions of the social auth on the local machine. There are something we have to do.
Because the http://localhost and http://127.0.0.1 are not allowed. we have to define the domain name for our local machine local machine.
My development environment is built on Mac OS X, so the following steps are specific for the developers using Mac. For developers on Windows, I have no idea. Hope there are some professional developers contributing the configuration of windows. (In my point of view, the steps for linux may quite alike, if you guys want to contribute the related information, please do :") )
-
Open the terminal.
-
Open the /etc/hosts with vim
$ sudo vim /etc/hosts
-
Change the localhost to the domain name we want and save the changes.
-
Recache the modifed Domain Settings.
$ decacheutil -flushcache
-
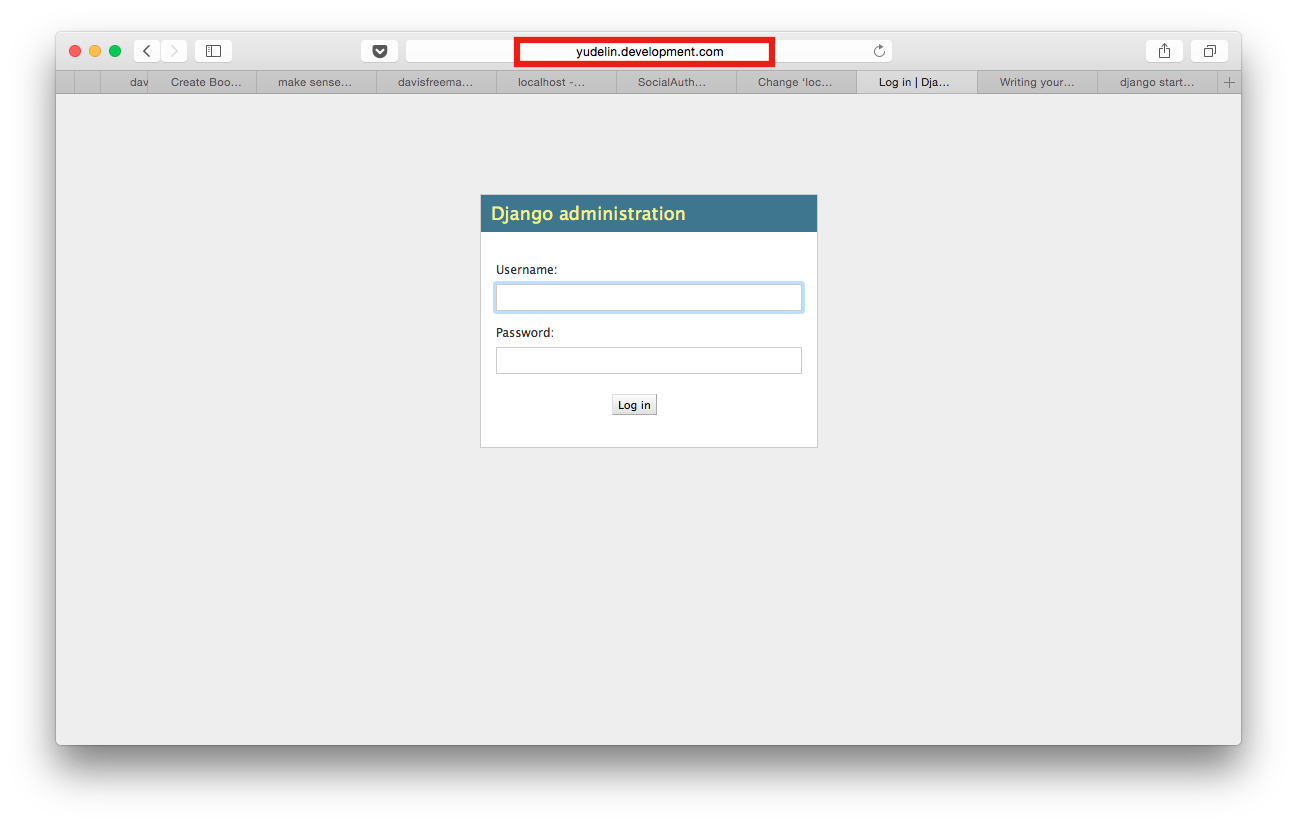
To check the domain name is successful or not, run the django project we set. If we can open the page with the new domain name. We success.
Enter the name in the site url blank.
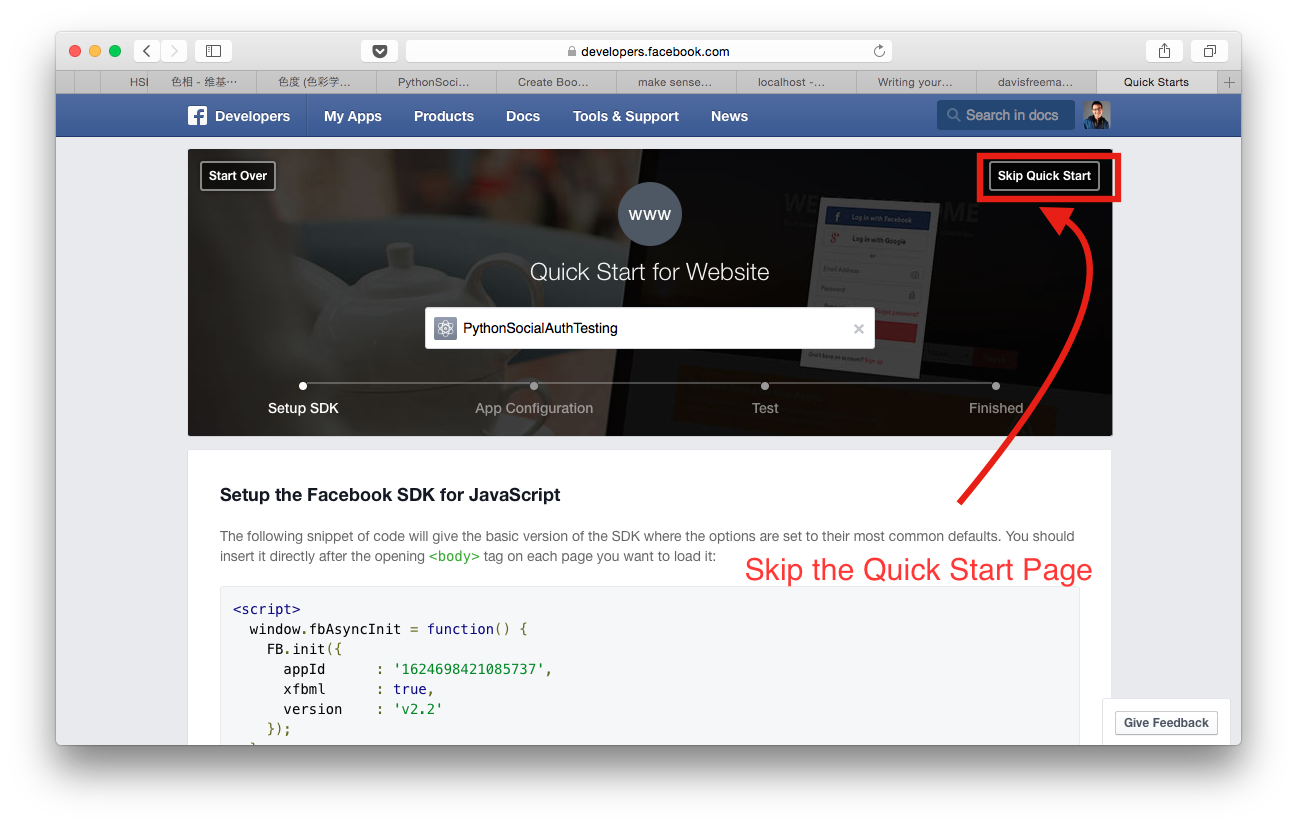
Congratulations, we create our own facebook app successfully.
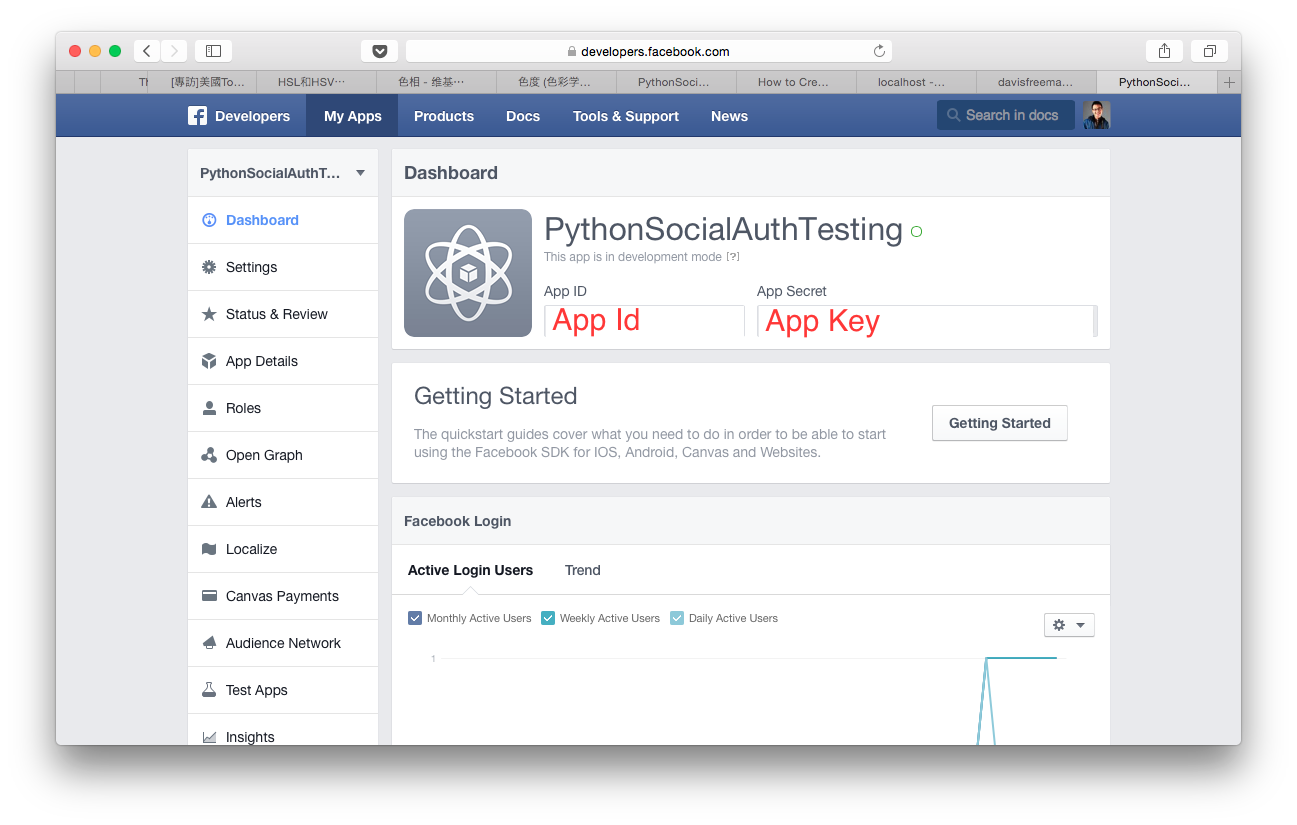
It's worth to read the "Quick Start" page which can give us a quick understanding of the basic facebook APIs. However, life is short. Click the "Skip Quick Start" button and go ahead.
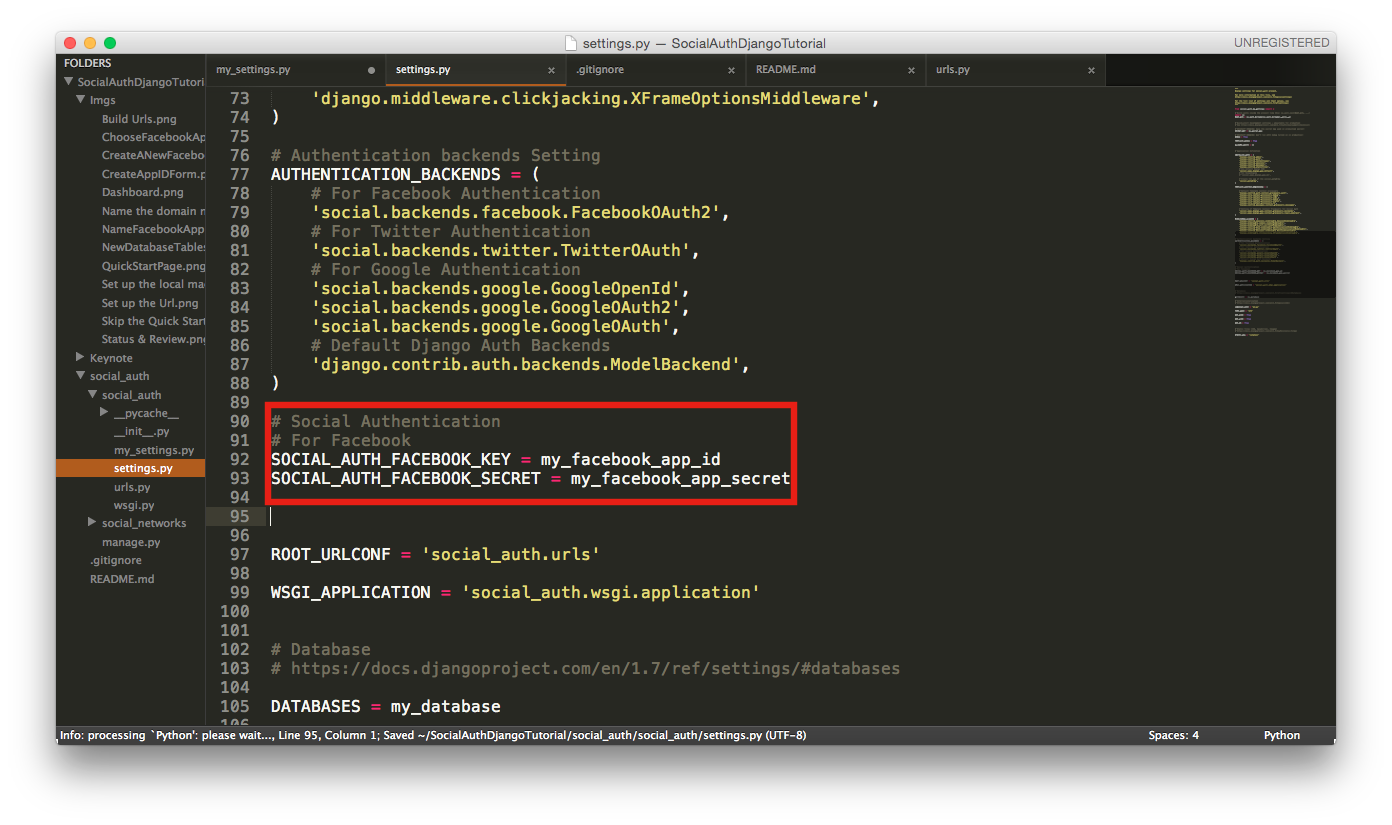
Then the page will direct to the dashboard of the web app. On the dashboard, we can see two vital properties which have deep connection with the social auth. One is the App Id, the identity number of the app. The other is the App Secret(or App Key), the app's password. Careful, NEVER let other knows the App Secret. Hide it as well as you can.
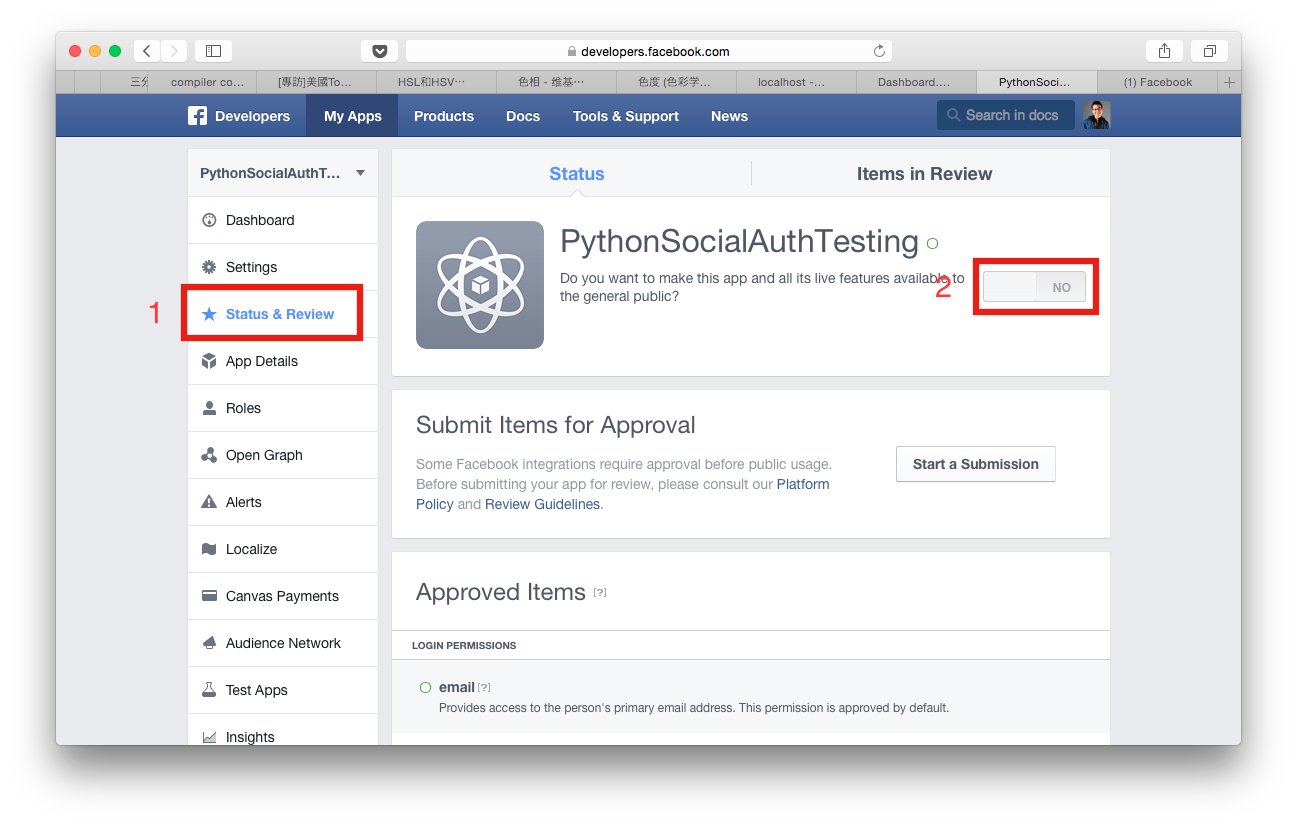
We are too excited to wait. So let's trigger our web app for development! Go to "Status & Review" page (Mark 1) and there is a toggle on the right side of the page (Mark 2). Click it for start.
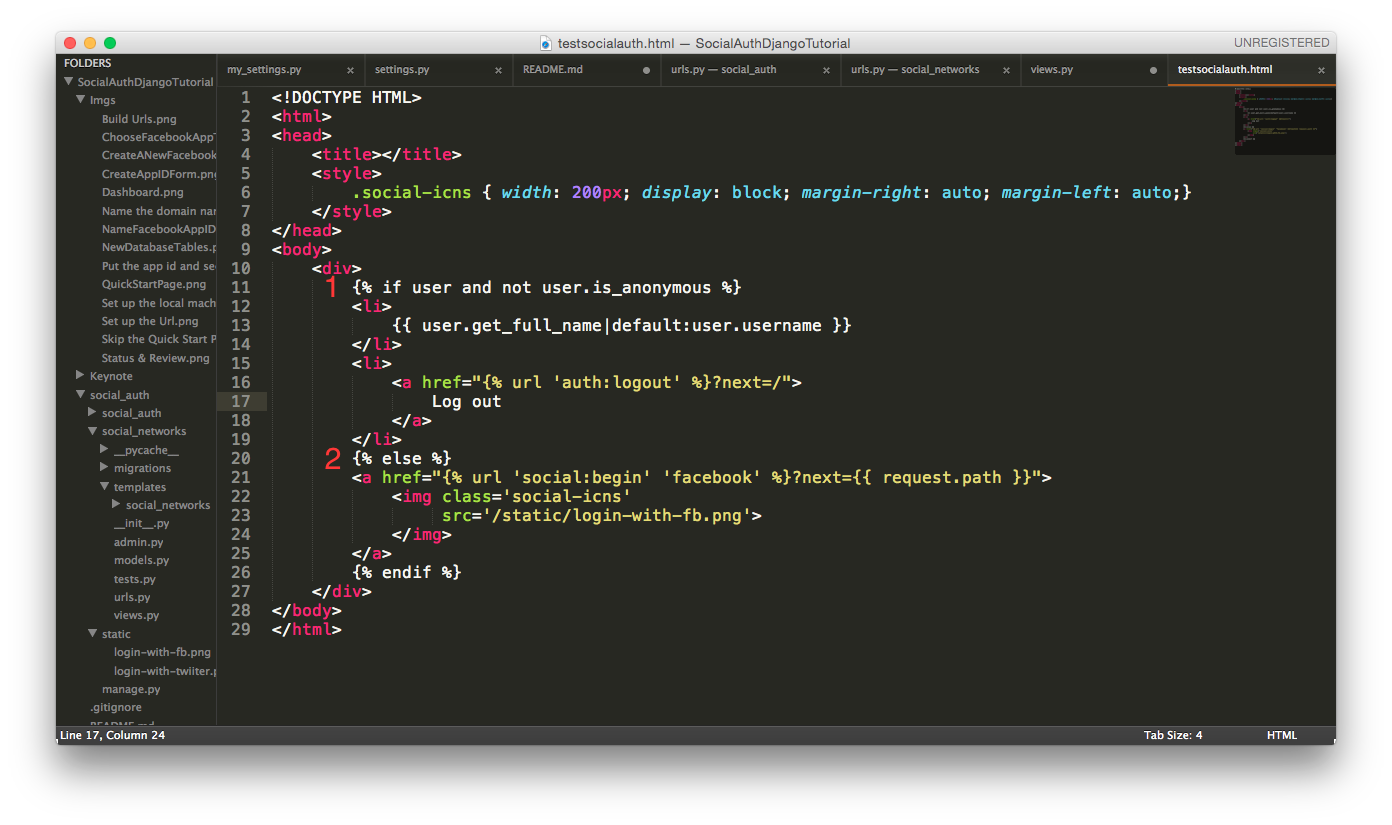
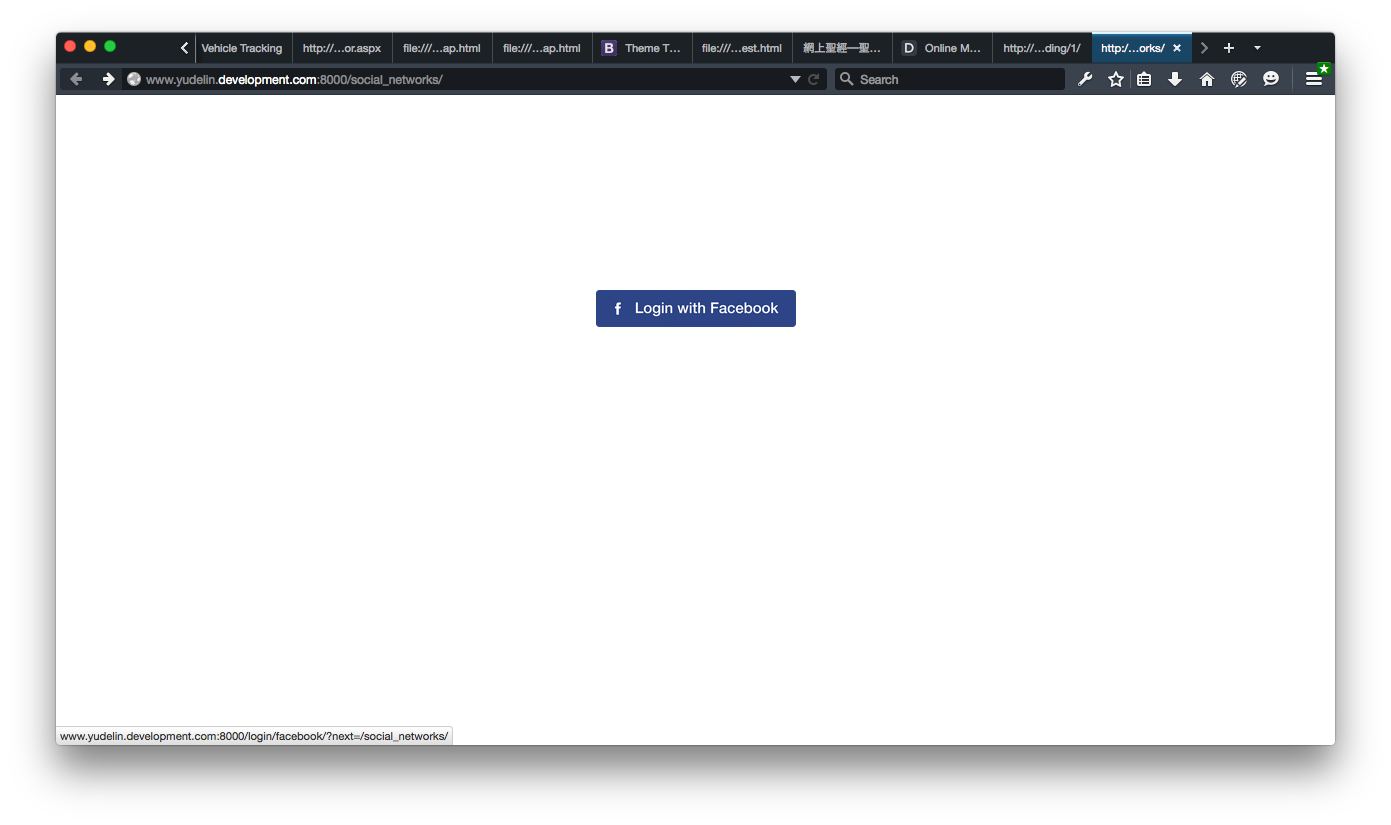
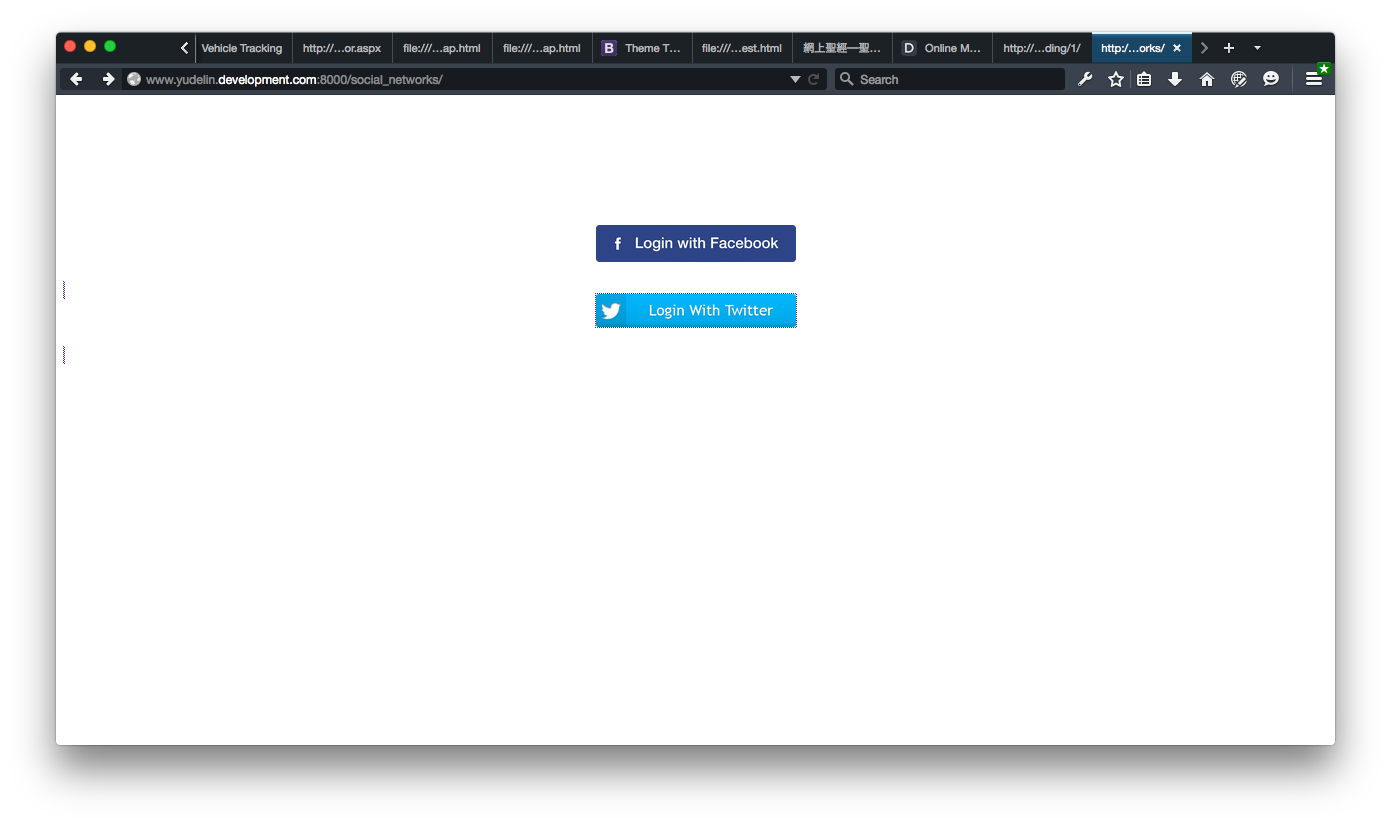
When a client gets the web page, the server will check the client's session id. If the id is correct, then the server will read the session data to check the user's properties. Getting anonymous represents the client hasn't logged in. Therefore, the "Login with facebook" icon will display.
If our facebook cookies are not expired, we will redirect to the app authentication message page in facebook.
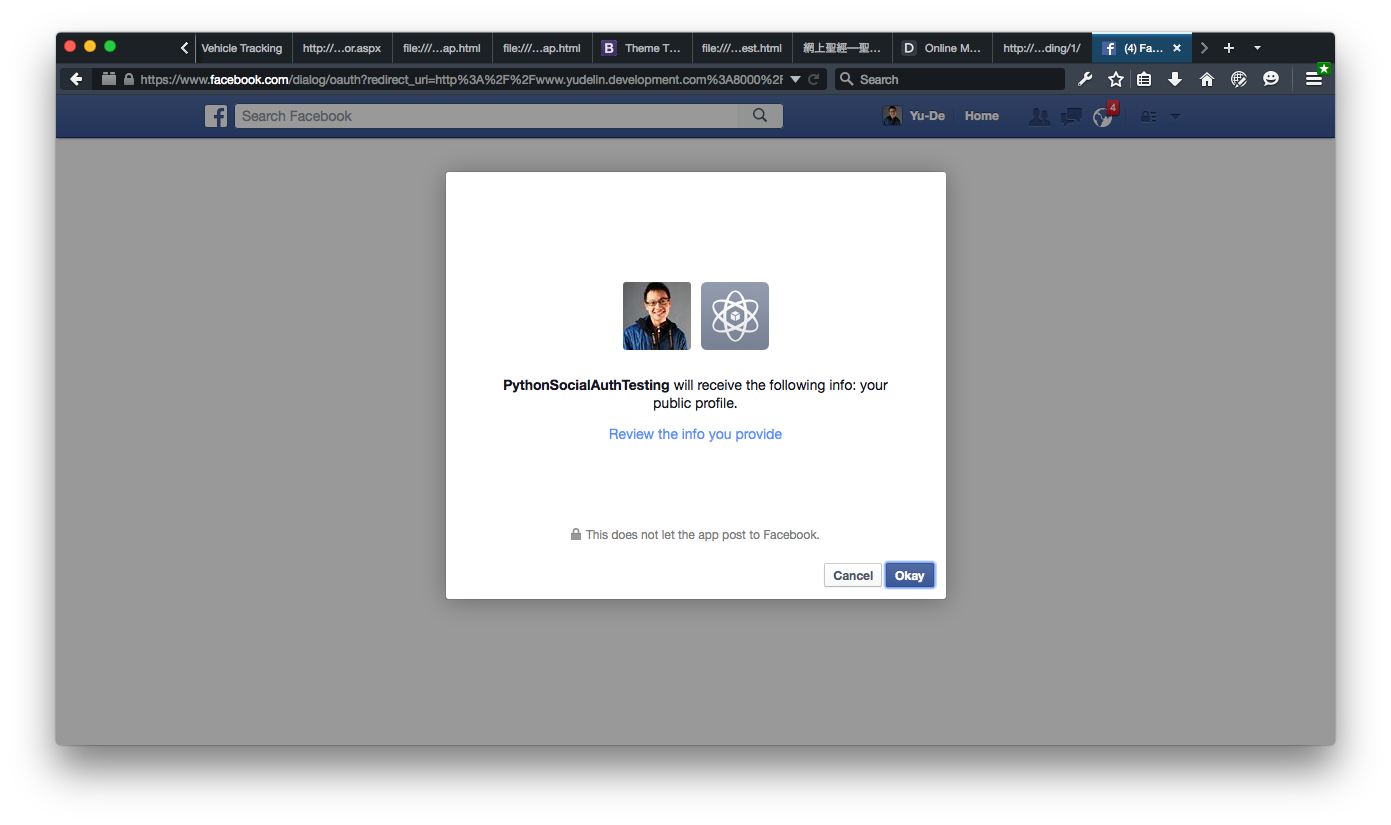
Suppose that the facebook cookies is expired, the facebook will redirect the clients to the facebook login page. Just finish the login process and the rest of the steps are really similar.
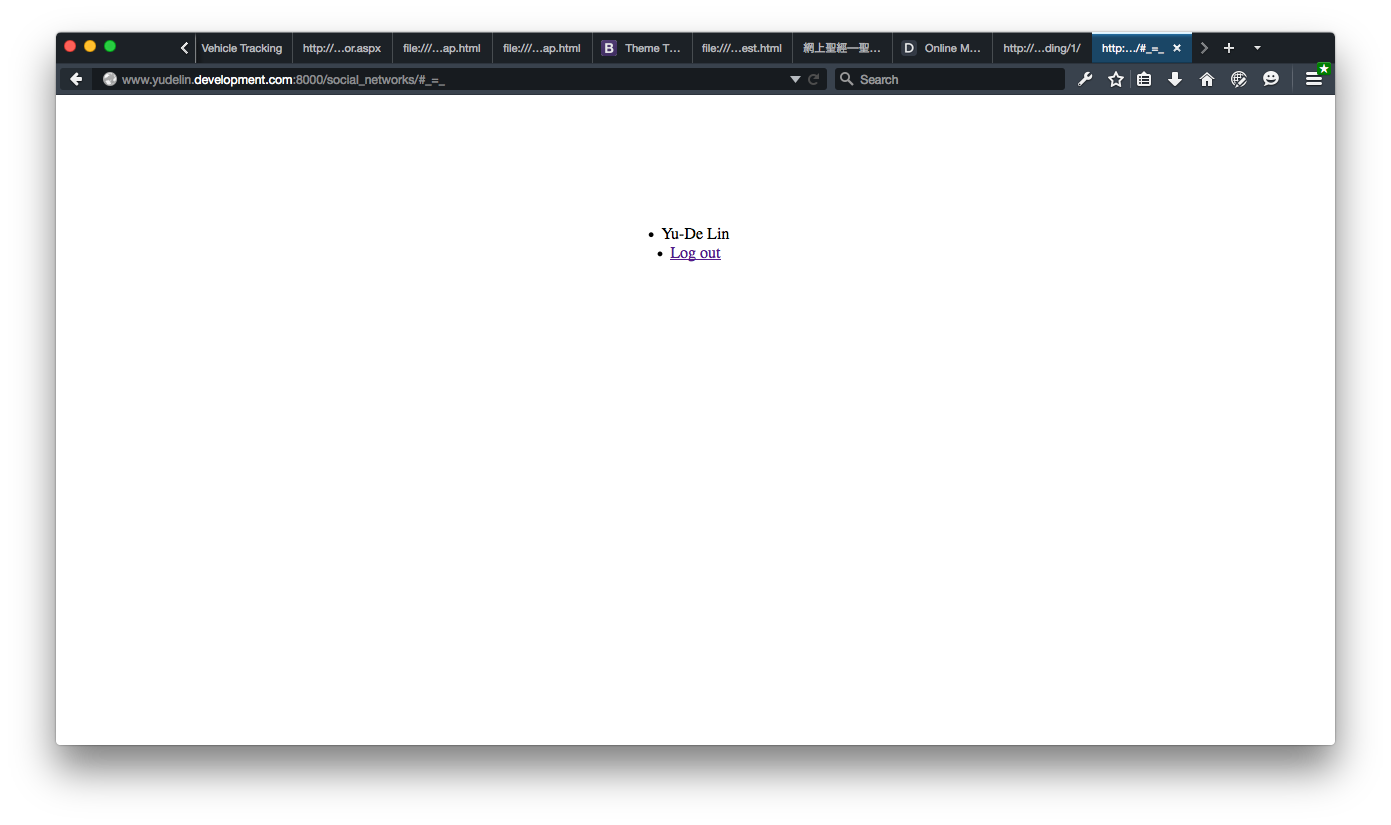
Click the okay. The page will redirect to the original page and we can see the client's user name is displayed on the page. We can see the name "Yu De Lin" displaying.
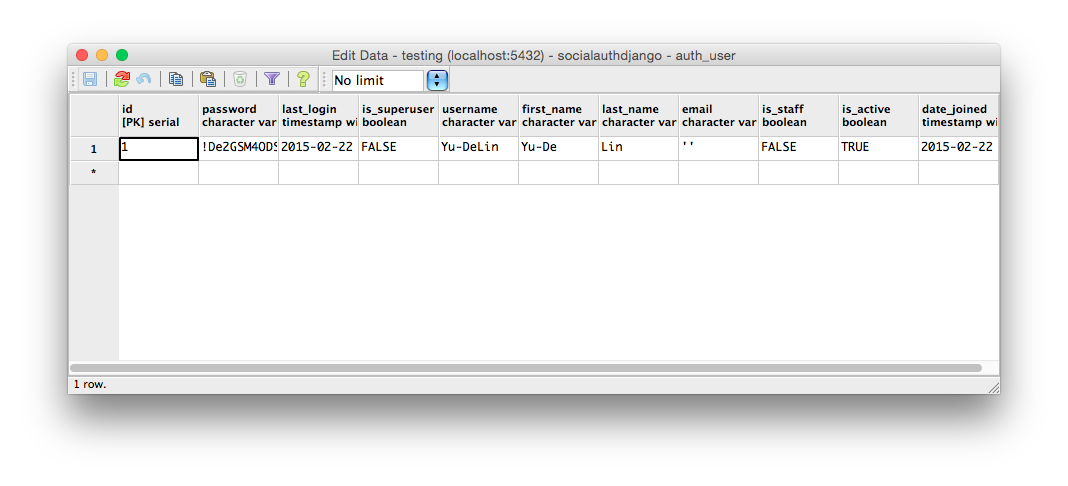
Let's go to check the "auth_user" table inside the database. We can see the client's related information here.
Also, there is another data storing in "usersocialauth" table.
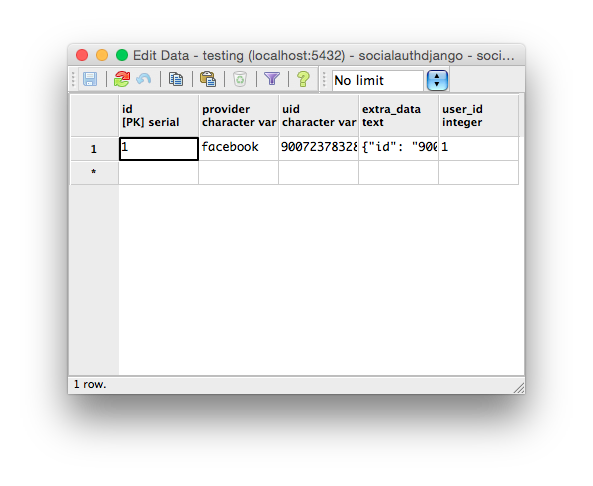
The "provider" column saves the client's social data provider such as facebook. "uid" is the abbreviation of "user id" meaning the user's identity number in the social provider. The most important part is the "extra_data" where stores the "access token". The higher priority the "access token" with, the more data and social mechanism we can access and use.
Go to twitter application management page.
Then sign in with our twitter account, the page will direct to a simple dashboard page. Click the "Create New App" on the right side.

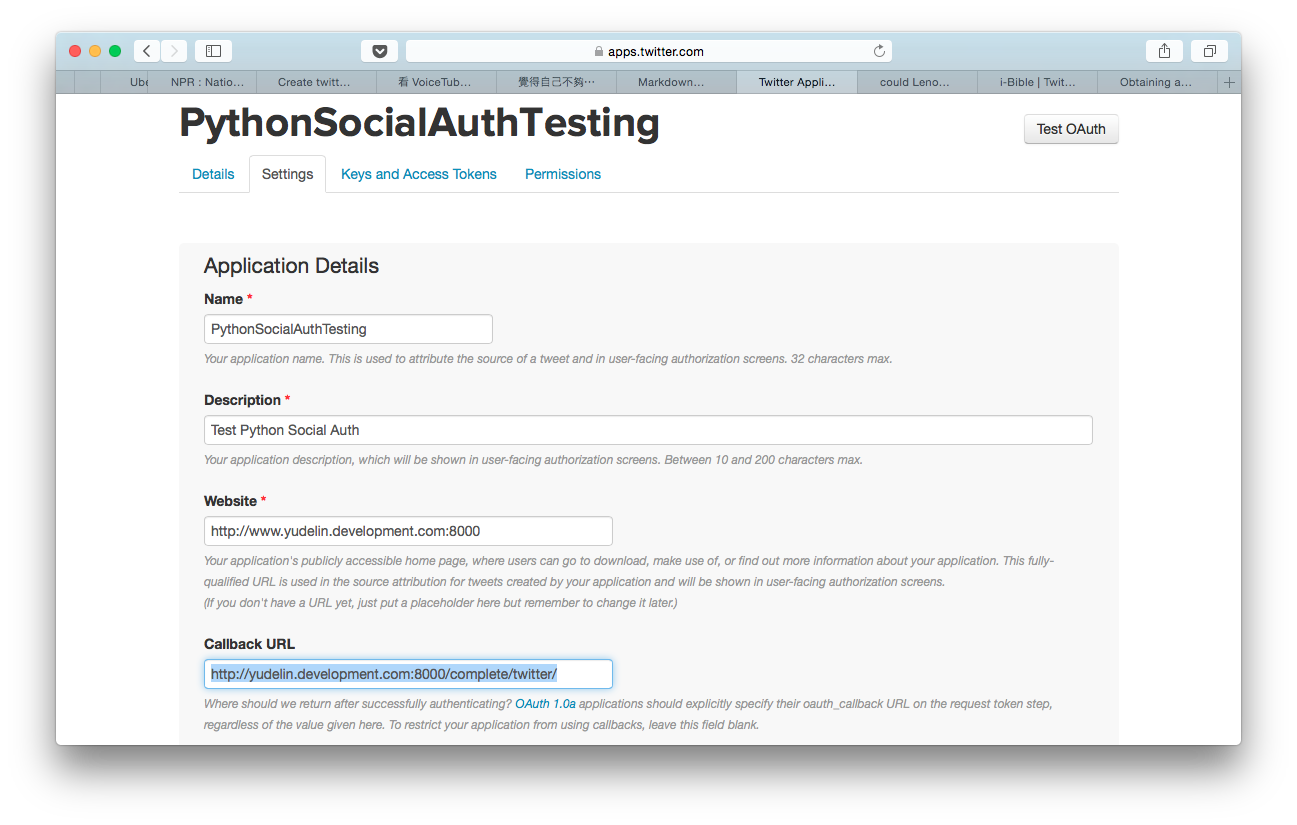
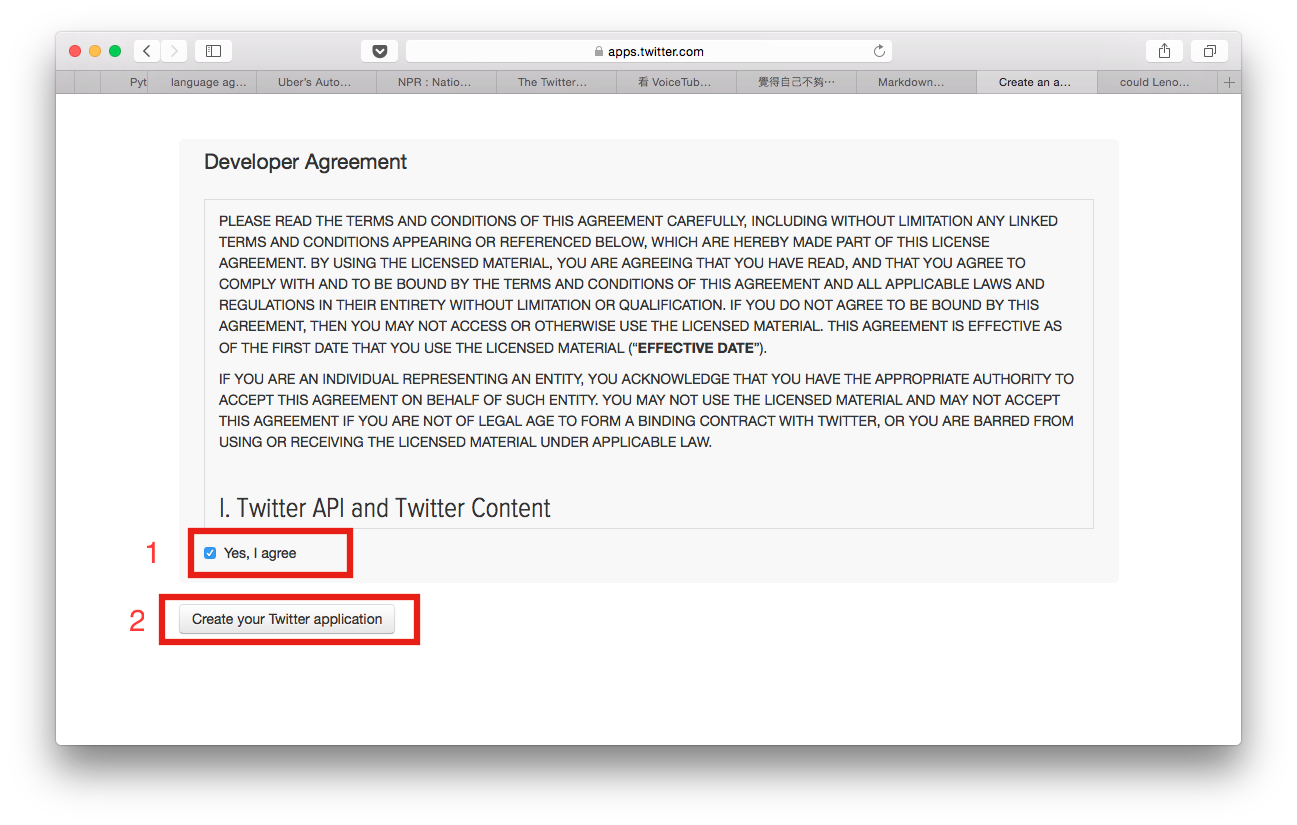
We will get an application form page for applying app. Fill the following blanks which are marked required and agree the "Developer Agreement". Important, an app with twitter authentication follows Oauth 1.0a rule, so we have to add a call back url like "http://domain.name/complete/twitter".
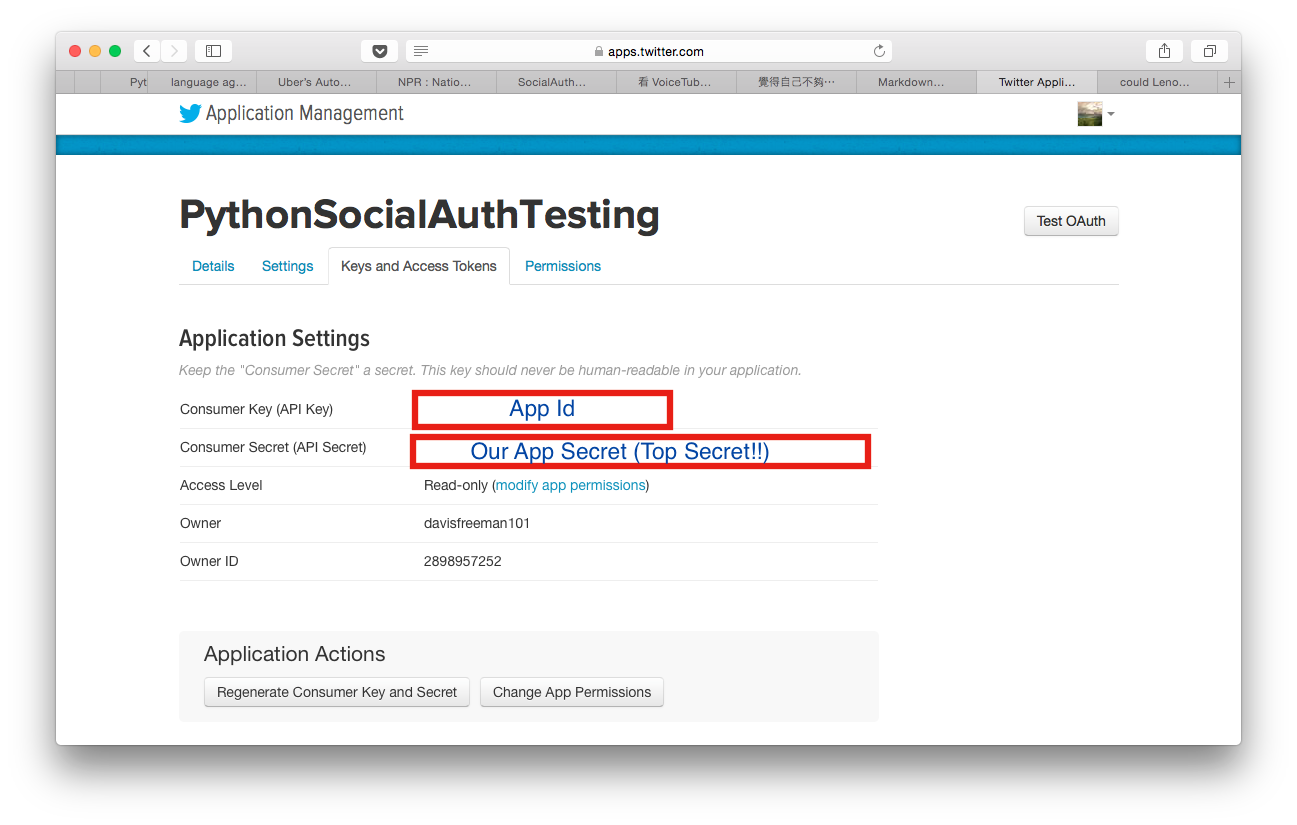
Like applying a facebook app, twitter will lead us to our dashboard page of the app. To start an app with twitter authentication as we did a facebook auth app, the key and secret are the must. Go to page about "Keys and Access Token".
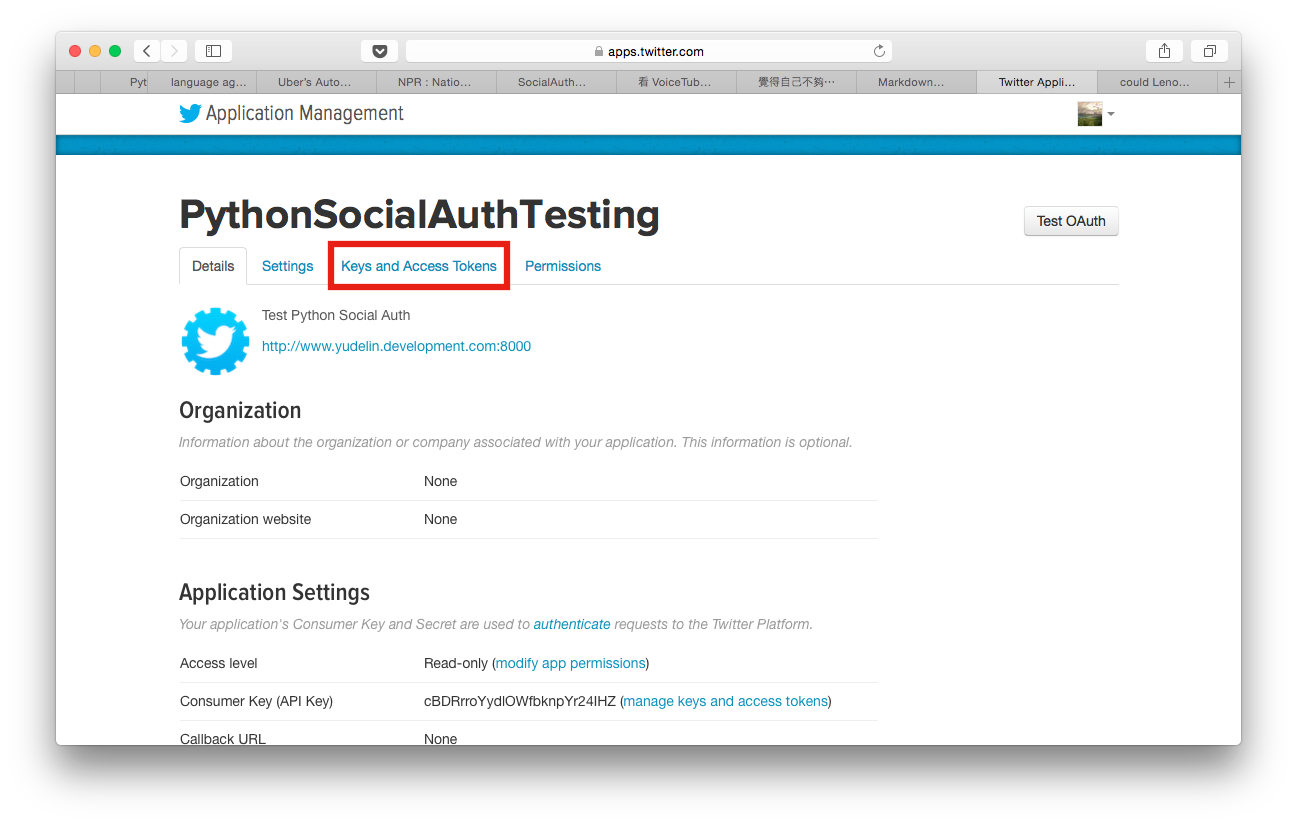
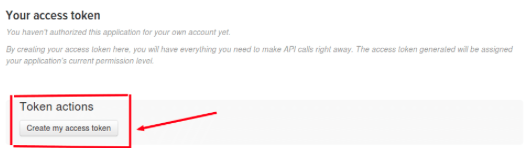
On the "Keys and Access Token" page, we can find out our App id and App secret here. Please copy these two into our setting files. (Do not leak the "secret" one.) Don't forget to click the "Create my acess token" at the bottom of the page.
It's really simple. Just add the lines of code as below:
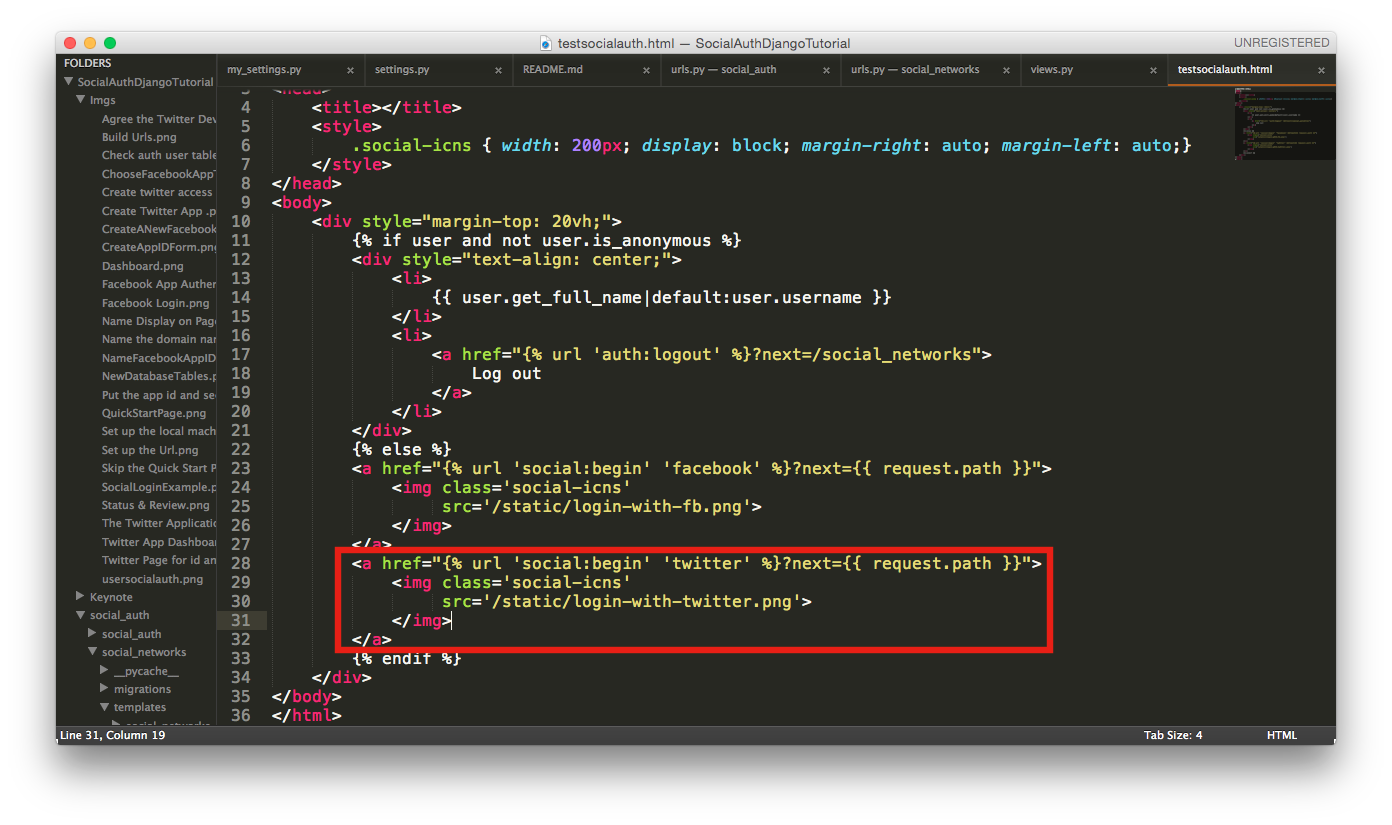
If a twitter validation page shows up, it means the twitter soical auth app is established successfully.

Just like we apply a facebook or a twiiter app. We have to create an app on the Google Developer Console.
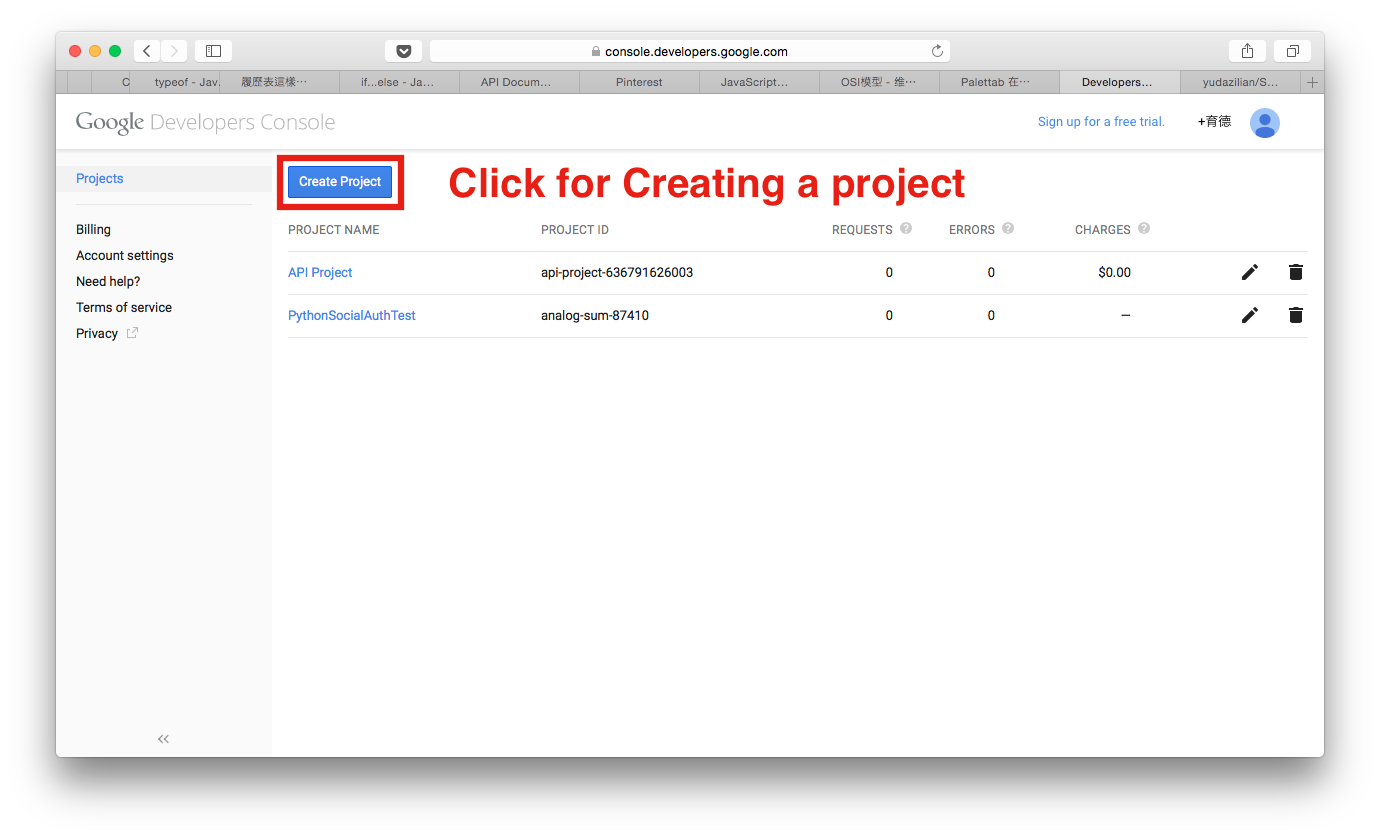
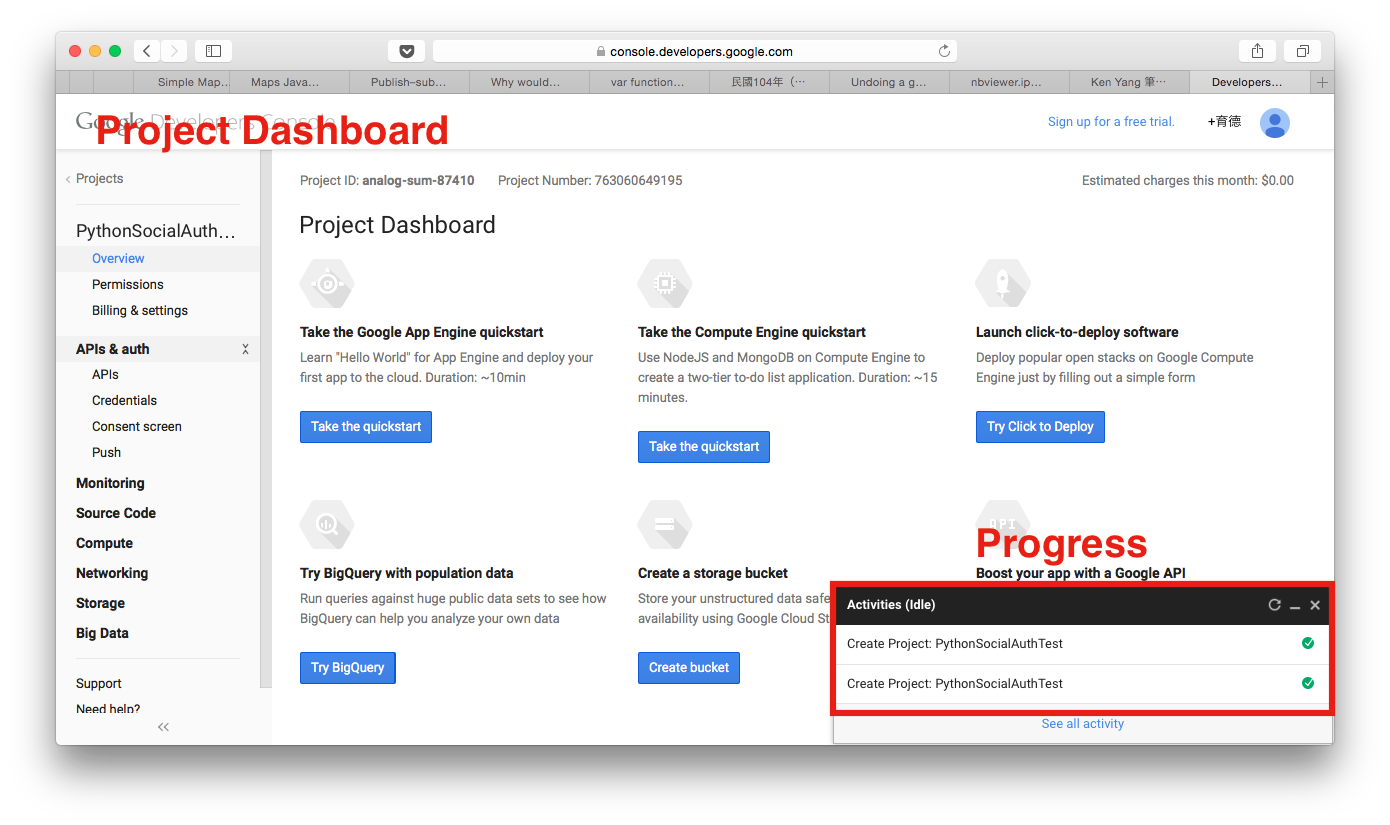
Then fill the form with a beautiful project name and the project id is a self-created object which I have no idea how to use it on the applications now.
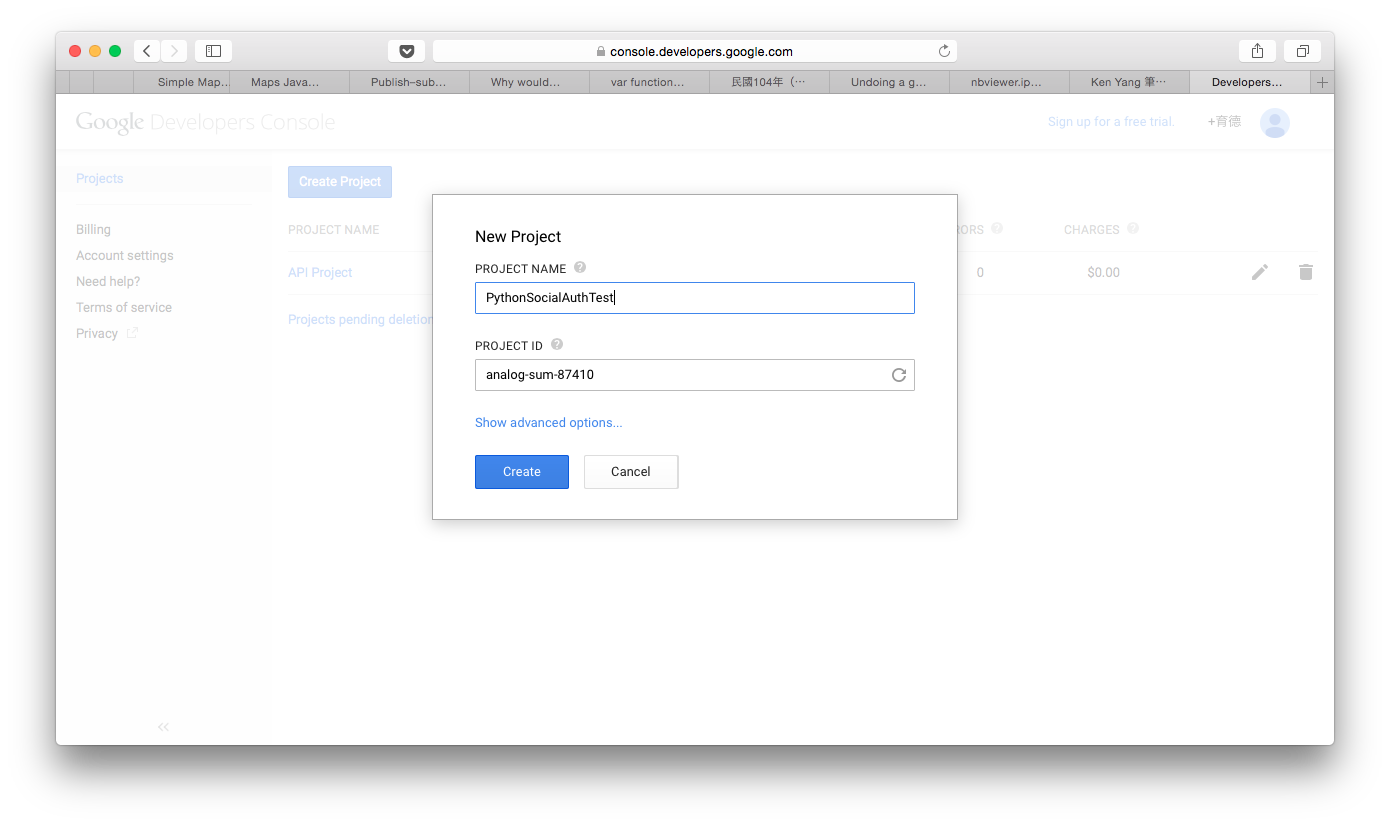
After completing the form, we can see a block showing the building progress of our project on the right side. The browser also directs us to the project's dashboard page when the progress is completed.